Previous Next

Driven Disc and Pressure Plate

REMOVAL & INSTALLATION

  1. Remove the transmission or transaxle, as detailed earlier in this section.
  2. Attach a braking device to the flywheel (to keep it from turning during clutch cover removal and installation).
  3. Temporarily install a clutch arbor to prevent the clutch cover from falling.

    NOTE: An old input shaft makes an excellent arbor.

  4. Unfasten the bolts which secure the clutch cover/pressure plate, one turn at a time in sequence, until the clutch spring tension is released. Do not remove the bolts on at a time.
  5. Remove the clutch disc and arbor.

    NOTE: Be careful not to get grease or oil on the surface of the clutch disc.

  6. Unhook the return spring from the throwout (release) bearing and remove the bearing.
  7. Pull out the release fork until its retaining spring frees itself from the ball stud. Withdraw the fork from the housing.

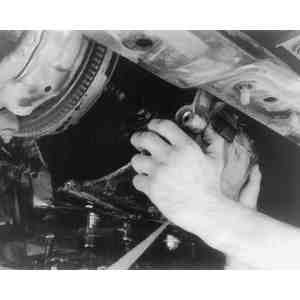
    Fig. 1: Unfasten and remove the transaxle's clutch housing from the engine

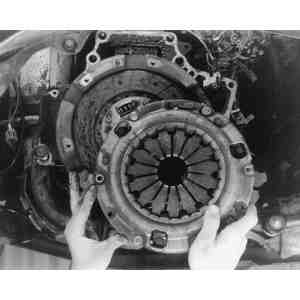
    Fig. 2: A clutch arbor will keep the clutch and pressure plate assembly aligned during removal or installation

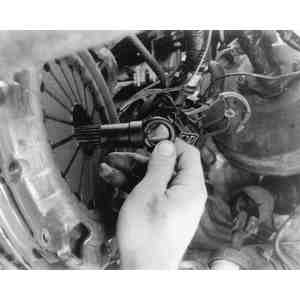
    Fig. 3: Unfasten and remove its retaining bolts. . .

    Fig. 4: . . . then remove the clutch cover

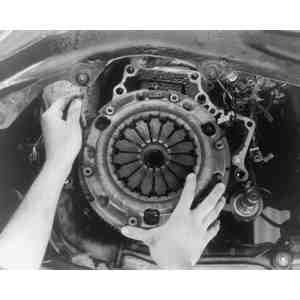
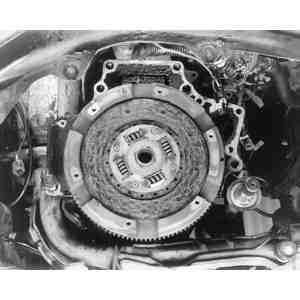
    Fig. 5: The clutch disc is positioned against the flywheel

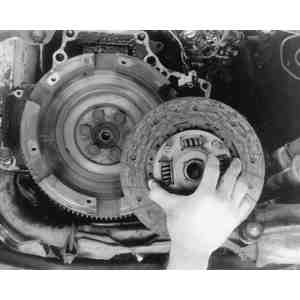
    Fig. 6: Remove the clutch disc from the flywheel

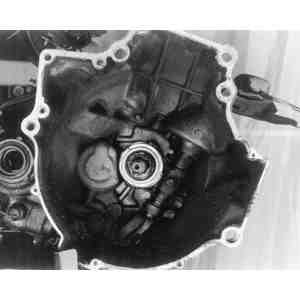
    Fig. 7: The throwout bearing and release fork surround the input shaft in the clutch housing

    Fig. 8: Remove the throwout bearing from the release fork

    Fig. 9: RX-7 clutch components; other hydraulic systems are similar

    To install:

  8. Clean the flywheel and pressure plate surfaces with fine emery paper. Be sure that there is no oil or grease on them.
  9. Use an arbor to center the clutch disc during installation. Install the clutch disc with the long end of its hub facing the transmission/transaxle.

    NOTE: Use an old input shaft to center the clutch disc, if an arbor is not available.

  10. Align the O-mark on the clutch cover with the reamed hole of the O-mark on the flywheel.
  11. Tighten the clutch cover bolts, using 2–3 passes of a crisscross pattern, to 13–20 ft. lbs. (18–27 Nm). Remove the arbor/input shaft and flywheel braking device.
  12. Grease the pivot pin. Insert the release fork through its boot so that its retaining spring contacts the pivot pin.
  13. Lightly grease the face of the throwout bearing and its clutch housing retainer.
  14. Install the throwout bearing and return spring. Check the operation of the release fork and throwout bearing for smoothness.
  15. Install the transmission or transaxle.

Previous Next