Previous Next

U-JOINT OVERHAUL

Perform this procedure with the driveshaft removed from the car.

  1. Matchmark both the yoke and the driveshaft so that they can be returned to their original balancing position during assembly.
  2. Remove the bearing snaprings from the yoke.
  3. Use a hammer and a brass drift to drive in one of the bearing cups. Remove the cup which is protruding from the other side of the yoke.
  4. Remove the other bearing cups by pressing them from the spider. On the GLC and 626, bearings may be removed by tapping on the base of the yoke with a hammer.

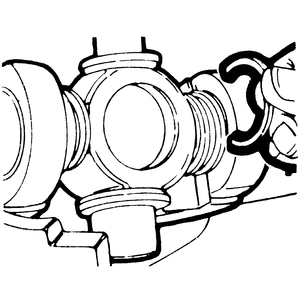
    Fig. 1: Removing the U-joint spider. Note the protruded position of the bearing cup

  5. Withdraw the spider from the yoke.
  6. Examine the spider journals for rusting or wear. Check the bearing for smoothness or pitting.
  7. Measure the spider diameter. On the 626 the minimum diameter is 0.58 in. (14.7mm), and on the GLC it is 0.50 in. (12.7mm). If diameter is too small, replace the spider. Mazda does not provide spider diameter for the RX-7 and 929.

    NOTE: The spider and bearing are replaced as a complete assembly only.

  8. Check the seals and rollers for wear or damage.

    To assemble:

  9. Pack the bearing cups with grease.
  10. Fit the rollers into the cups and install the dust seals.
  11. Place the spider in the yoke and them fit one of the bearing cups into its bore in the yoke.
  12. Press the bearing cup home, while guiding the spider into it, so that a snapring can be installed.
  13. Press-fit the other bearings into the yoke.

    Fig. 2: Installing a bearing snapring

  14. Select a snapring to obtain minimum end-play of the spider. Use snaprings of the same thickness on both sides to center the spider.

    NOTE: When assembled, the U-joint should have a slight drag but should not bind. If it does bind, use different thickness snaprings. Selective fit snaprings are available in sizes ranging from 0.05 in. (1.2mm) to 0.06 in. (1.4mm).

  15. Install the spider/yoke assembly and bearings into the driveshaft in the same manner as the spider was assembled to the yoke.
  16. Test the operation of the U-joint assembly. The spider should move freely with no binding.

Previous Next