Previous Next

STEERING

Steering Wheel

REMOVAL & INSTALLATION

Except RX-7
  1. Remove the screws which secure the ornament or crash pad/horn button assembly to the steering wheel. If there are no mounting screws, pry the pad off, starting at the top. Remove the assembly.
  2. Make matchmarks on the steering wheel and steering shaft.

    Fig. 1: Common Mazda steering wheel

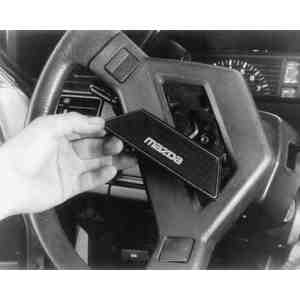
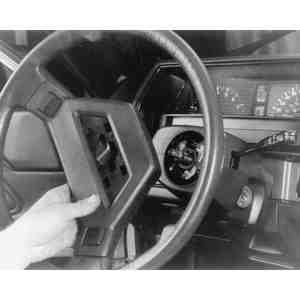
    Fig. 2: If applicable, unfasten the screws which retain the cover ornament . . .

    Fig. 3: . . . and remove the ornament from the wheel

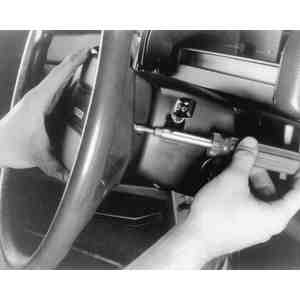
    Fig. 4: Unfasten the steering wheel hub nut

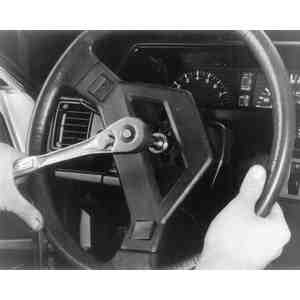
    Fig. 5: Install a suitable puller and tighten the center bolt to disengage the steering wheel

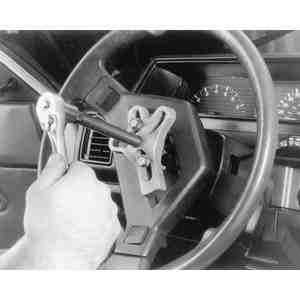
    Fig. 6: When the wheel comes free of the column, remove the puller and then the wheel

  3. Unfasten the steering wheel hub nut. Attach a suitable puller and remove the steering wheel by tightening the puller's center bolt.

    CAUTION
    The steering column is collapsible; pounding on it or applying excessive pressure to it may cause it to deform, in which case the entire column will have to be replaced.

  4. Installation of the steering wheel is performed in the reverse order of removal. Tighten the steering wheel nut to 25–36 ft. lbs. (34–49 Nm).
RX-7
  1. Disconnect the negative battery cable.
  2. Remove the horn cap and make matchmarks on the steering column shaft and the steering wheel to insure that the wheel is installed in the correct position.
  3. Pull the steering wheel off with a puller.

    CAUTION
    The steering column is collapsible; pounding on it or applying excessive pressure to it may cause it to deform, in which case the entire column will have to be replaced.

  4. Install the steering wheel in the reverse order of removal, being sure to align the matchmarks made during removal. Tighten the steering wheel nut to 22–29 ft. lbs. (30–39 Nm).

Previous Next