Previous Next

Door Glass and Regulator

REMOVAL & INSTALLATION

Except RX-7
  1. Lower the door glass, then remove the inner handle cover, door lock knob (if necessary), window regulator handle and door trim panel.

    NOTE: On vehicles with power windows, unfasten the electrical connectors.

  2. Carefully peel off the door screen so that it can be reused.
  3. On 1978–83 models remove the six bolts attaching the window regulator to the door.
  4. On 1984–89 models replace the window regulator handle and position the door glass so that the door glass installation bolts can be removed from the service hole.
  5. Remove the door glass installation bolts.
  6. On 1978–83 models, remove the door glass, then take out the window regulator through the large access hole.

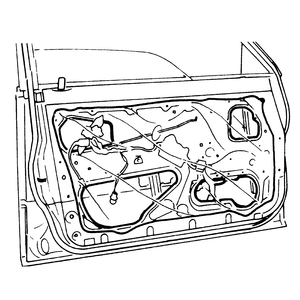
    Fig. 1: The door screen is accessible after the door trim panel has been removed

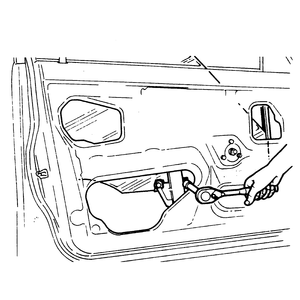
    Fig. 2: Removing the door glass installation bolts

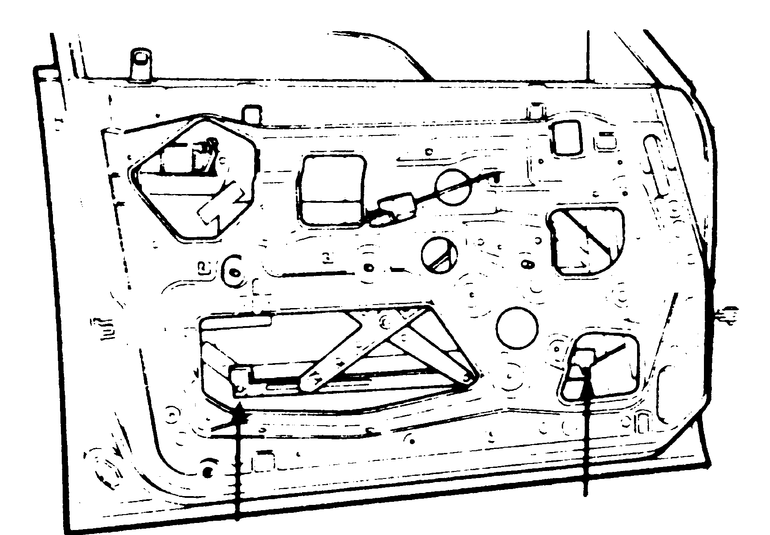
    Fig. 3: Window regulator attaching bolts

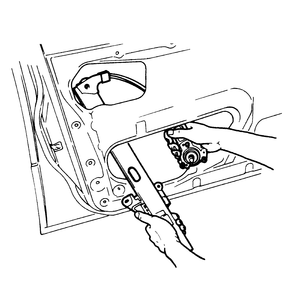
    Fig. 4: Removing the window regulator

  7. On 1983–89 models, remove the door glass. Unfasten the window regulator installation bolts, then remove the regulator through the service access hole. Remove the window motor mounting bolts and separate the motor from the regulator.
  8. Installation is the reverse of the removal procedure. If the vehicle is equipped with power windows, connect the leads of the motor to a battery and run the regulator to the down position before installing the motor. Cycle the window several times to make sure that everything is in good working order.
1979–85 RX-7
  1. Remove the regulator handle and the inner handle cover.
  2. Remove the attaching screws and remove the arm rest.
  3. Remove the trim panel and the inner handle assembly.
  4. Remove the watershield. Remove the screws and screw grommets that attach the glass and regulator. Remove the glass.
  5. Remove the regulator attaching bolts and pull the regulator out through the access hole. On vehicles equipped with power windows, remove the power window mounting bolts and separate the motor from the regulator.

    CAUTION
    Exercise extreme caution when removing the power window motor. Once free, the assembly will release the actuating spring and allow the regulator gear to return to the up position.

  6. During installation, adjust the regulator as required. If the vehicle is equipped with power windows, connect the leads of the motor to a battery and run the regulator to the down position before installing the motor.
1986–89 RX-7
  1. Remove the sail inner garnish located opposite the rear view mirror.
  2. Remove the inner handle cover by removing the attaching screws. Remove the door trim.
  3. Disconnect the courtesy light electrical connectors. Operate the power window switch to raise the glass 9.06 in. (230mm) from the fully open position. Disconnect the negative battery cable and power window switch connector.
  4. Remove the inner handle.
  5. Disconnect the speaker wire and remove the speaker.
  6. Remove the upper stopper by removing the attaching nuts.
  7. Remove the weather strip.
  8. Using a suitable length extension, remove the door glass attaching bolts through the bolt access holes. Remove the door glass by pulling upward and out of the guide.
  9. Remove the regulator attaching bolts and pull the regulator out through the access hole. On vehicles equipped with power windows, remove the power window mounting bolts and remove the motor from the regulator.
  10. During installation, adjust the regulator as required. If the vehicle is equipped with power windows, connect the leads of the motor to a battery and run the regulator to the down position before installing the motor.

Previous Next