The automatic transmission fluid is a long lasting type, and Mazda does not
specify that it need ever be changed. However, if you have brought the truck
used, driven it in water deep enough to reach the transmission, or used the
truck for trailer pulling or delivery service, you may want to change the
fluid and filter. It is a good idea to measure the amount of fluid drained
from the transmission, and to use this as a guide when refilling. Some parts
of the transmission, such as the torque converter, will not drain completely,
and using the dry refill capacity listed in the Capacities Chart may lead
to overfilling.
- Drive the truck until it is at normal operating temperature.
- If a hoist is not being used, park the truck on a level surface, block
the wheels, and set the parking brake. If you raise the truck on jackstands,
check to see that it is reasonably level before draining the transmission.
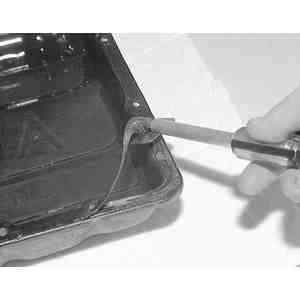
| Fig. 1: Using a 10 mm socket, remove the transmission
oil pan bolts except for one mounting bolt at each corner

|
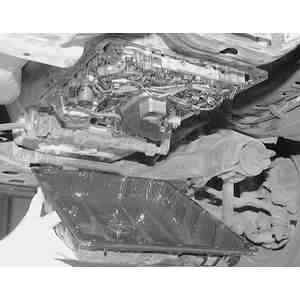
| Fig. 2: After removing the rear corner pan bolts,
carefully lower the pan by hand, making sure that a minimal amount
of trans fluid spills out and soaks your arm
|
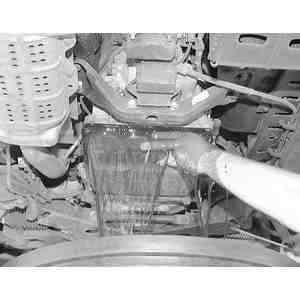
| Fig. 3: Lower down the transmission oil pan
|
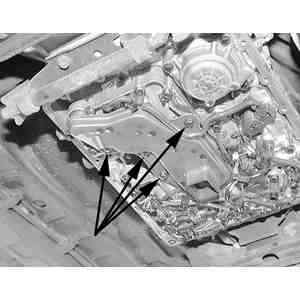
- There is no drain plug, so the transmission pan must be removed to drain
the fluid. Carefully remove the screws from the pan and lower the pan at
the corner. Allow the fluid to drain into a suitable container. After the
fluid has drained, remove the pan.
- The filter is bolted to the lower valve body. Remove the filter attaching
bolts and remove. Clean it thoroughly in solvent, if it is a screen type,
allow it to air dry completely, and replace it. Tightening torque for the
attaching bolts is only 24–36 inch lbs. (3–4 Nm), so be careful
not to overtighten them.
| Fig. 4: Once the pan is removed, discard the old
gasket and insure that the mating surfaces are clean
|
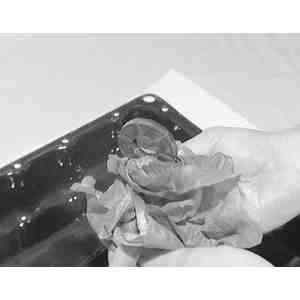
| Fig. 5: Remove the O-magnet from the bottom of
the transmission oil pan and clean it of any dirt or small metallic
fragments using a towel
|
| Fig. 6: Remove the four transmission oil filter
mounting bolts using a 10mm socket
|
| Fig. 7: Remove the transmission filter from the
trans valve body. Be sure that the O-ring seal also comes out with
the filter

|
| Fig. 8: Install a new pan gasket
|
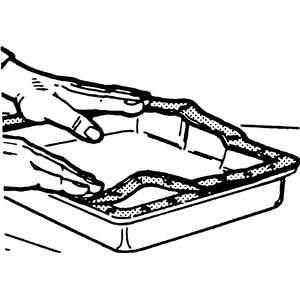
- Remove the old gasket and install a new one. The pan may be cleaned with
solvent, if desired. After cleaning, allow the pan to air dry thoroughly.
Do not use a rag to dry it, or you risk leaving bits of lint in the pan
that will clog the transmission fluid passages. When the pan is completely
dry, replace it, and tighten the bolts in a circular pattern, working from
the center outward. Tighten gently to 40–60 inch lbs. (5–7 Nm).
- Refill the transmission. Fluid is added through the dipstick tube. This
process is considerably easier if you have a funnel and a long tube to pour
through. Add three quarts (2.8 liters) of fluid initially.
- After adding fluid, start the engine and allow it to idle. Shift through
all gear positions slowly to allow the fluid to fill all the hydraulic passages,
and return the shift lever to Park. Do not race the engine.
- Run the engine at fast idle to allow the fluid to reach operating temperature.
Place the selector lever at N or P and
check the fluid level. It should be above the L mark on
the hot side of the dipstick. If necessary, add enough fluid to bring the
level between the L and F marks. Do not
overfill the transmission. Overfilling will cause foaming, fluid loss, and
plate slippage.
- After a few days of running, check the pan bolts. They will, probably
have loosened as the gasket has shrunk. Retorque them.

