Previous Next

REMOVAL & INSTALLATION

Pick-up and MPV

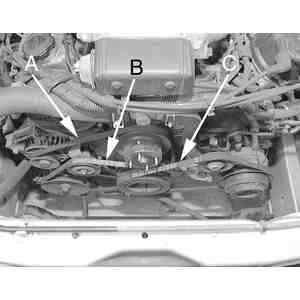
Fig. 1: (A) Alternator belt, (B) Power steering pump belt, (C) A/C compressor belt — MPV with 3.0L engine shown

POWER STEERING PUMP BELT
  1. Turn the ignition OFF and remove the key. Allow the engine to cool.
  2. Loosen the idler pulley locknut to release the drive belt tension.
  3. Remove the power steering belt.

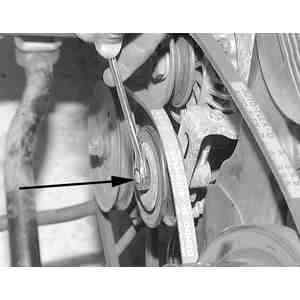
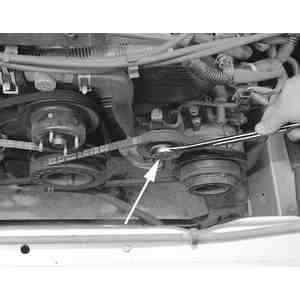
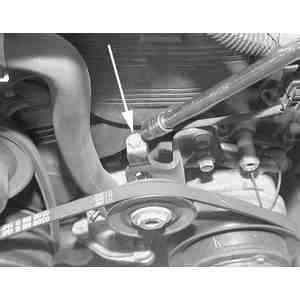
    Fig. 2: Using a box wrench, loosen the power steering pump belt idler pulley lockbolt

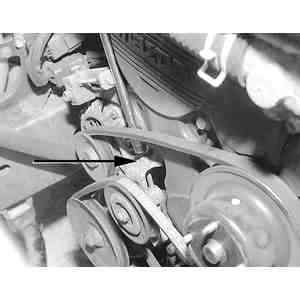
    Fig. 3: Loosen the power steering pump belt by turning the idler pulley adjusting bolt

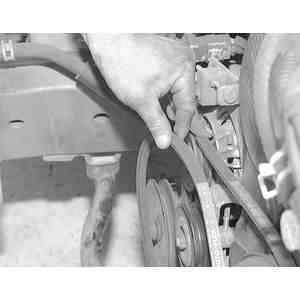
    Fig. 4: Remove the power steering pump belt

    To install:

  4. Install the power steering belt and make sure it is correctly seated on the pulleys.
  5. Adjust the power steering belt tension/deflection by turning the adjusting bolt. A new belt should deflect 0.26–0.28 in. (6.6–7.2mm) and a used belt should deflect 0.28–0.31 in. (7–8mm).
  6. Tighten the idler pulley locknut to 27–38 ft. lbs. (37–52 Nm).
  7. Run the engine for 5 minutes and then recheck the belt deflection.
ALTERNATOR BELT
  1. Turn the ignition OFF and remove the key. Allow the engine to cool.
  2. Remove the power steering pump belt and A/C compressor belt, if necessary.
  3. Loosen the alternator upper bracket adjusting bolt.
  4. Loosen the lower through-bolt.
  5. Remove the alternator belt.

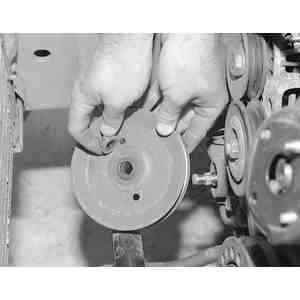
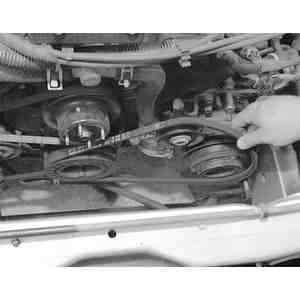
    Fig. 5: To access the alternator pivot bolt, you must first remove the power steering pump pulley

    Fig. 6: Loosen the alternator pivot bolt located just below the alternator assembly

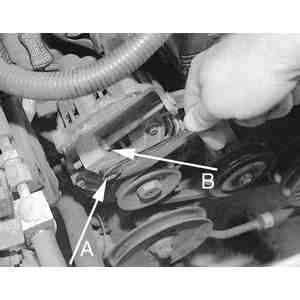
    Fig. 7: Loosen the alternator adjuster lockbolt (A), then turn the adjustment nut (B) to loosen the slack on the belt . . .

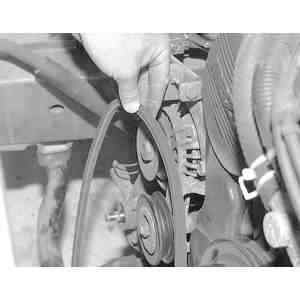
    Fig. 8: . . . then remove the alternator belt

    To install:

  6. Install the alternator belt and make sure it is correctly seated on the pulleys.
  7. Turn the adjusting bolt to adjust the belt deflection. New belts should deflect 0.39–0.47 in. (10–12mm). Used belts should deflect 0.43–0.51 in. (11–13mm).
  8. Once the correct deflection has been reached, tighten the upper bracket lock bolt to 14–19 ft. lbs. (19–25 Nm).
  9. Tighten the lower through-bolt to 28–38 ft. lbs. (38–51 Nm).
  10. Install and tension the power steering pump belt and A/C compressor belt, if necessary.
  11. Run the engine for 5 minutes and then recheck the belt deflection.
A/C COMPRESSOR BELT
  1. Turn the ignition OFF and remove the key. Allow the engine to cool.
  2. Remove the power steering pump belt and alternator belt, if necessary.
  3. Loosen the tensioner bracket adjusting bolt and tensioner pulley center locknut to release the drive belt tension.
  4. Remove the A/C belt.

    Fig. 9: Loosen the A/C compressor belt idler pulley lockbolt using an open end wrench

    Fig. 10: Loosen the A/C compressor belt idler pulley adjusting bolt just enough to be able to remove the belt

    Fig. 11: Remove the A/C compressor belt

    To install:

  5. Install the A/C belt, and make sure it is correctly seated on the pulleys.
  6. Adjust the A/C belt tension/deflection by turning the tensioner bracket adjusting bolt. A new belt should deflect 0.33–0.39 in. (8.5–10mm), and a used belt should deflect 0.39–0.45 in. (10–11.5mm).
  7. Tighten the tensioner pulley center locknut to 27–38 ft. lbs. (37–52 Nm).
  8. Install and tension the alternator belt, if necessary, and the power steering pump belt.
  9. Run the engine for 5 minutes and then recheck the belt deflection.
Navajo

All Navajo and B Series Pick-up engines utilize one wide-ribbed V-belt to drive the engine accessories such as the water pump, alternator, air conditioner compressor, air pump, etc. Because this belt uses a spring loaded tensioner for adjustment, belt replacement tends to be somewhat easier than on engines where accessories are pivoted and bolted in place for tension adjustment, such as the MPV. Basically, all belt replacement involves is to pivot the tensioner to loosen the belt, then slide the belt off of the pulleys. The two most important points are to pay CLOSE attention to the proper belt routing (since serpentine belts tend to be "snaked'' all different ways through the pulleys) and to make sure the V-ribs are properly seated in all the pulleys.

Fig. 12: Accessory location and drive belt routing — Navajo

Previous Next