Previous Next

Engine Fan

REMOVAL & INSTALLATION

Pickup and MPV

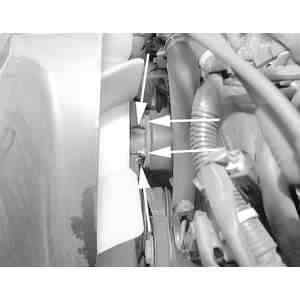
Fig. 1: Remove the four fan assembly-to-water pump pulley mounting nuts

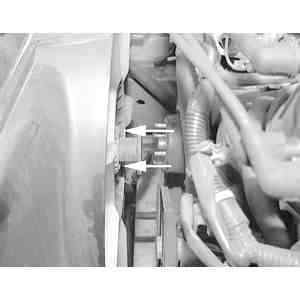
Fig. 2: After the fan mounting nuts have been removed, slide the fan assembly forward and place inside the radiator shroud

  1. Loosen and remove the drive belts.
  2. Remove the bolts that retain the fan shroud to the radiator support. Remove (if there is enough room between the fan blades and radiator) or position the shroud back over the water pump and fan assembly, if necessary to gain working room.
  3. Loosen and remove the fan to water pump mounting bolts or nuts and remove the fan assembly. Don't lay the fan, if equipped with a fan clutch, on its side. Fluid could be lost and the fan clutch might require replacement. Inspect the condition of the fan blades, if any are cracked or damaged, replace the fan.
  4. Install the fan assembly in position on the water pump and pulley. Secure the fan assembly with the mounting nuts or bolts. Tighten the nuts to 69–70 inch lbs. (8–11 Nm). Install the shroud and drive belts. Adjust the drive belts to the proper tension.
Navajo

Fig. 3: Fan clutch removal/installation — remember that the nut is left-handed

  1. Remove the fan shroud.
  2. Using Fan Clutch Pulley Holder T84T–6312–C and Fan Clutch Nut Wrench T84T–6312–D, or their equivalents, loosen the large nut attaching the clutch to the water pump hub.

    NOTE: The nut is loosened clockwise.

  3. Remove the fan/clutch assembly.
  4. Remove the fan-to-clutch bolts.

    To install:

  5. Installation is the reverse of removal. Torque the fan-to-clutch bolts to 55–70 inch lbs.; the hub nut to 50–100 ft. lbs. Don't forget, the hub is tightened counterclockwise.

Previous Next