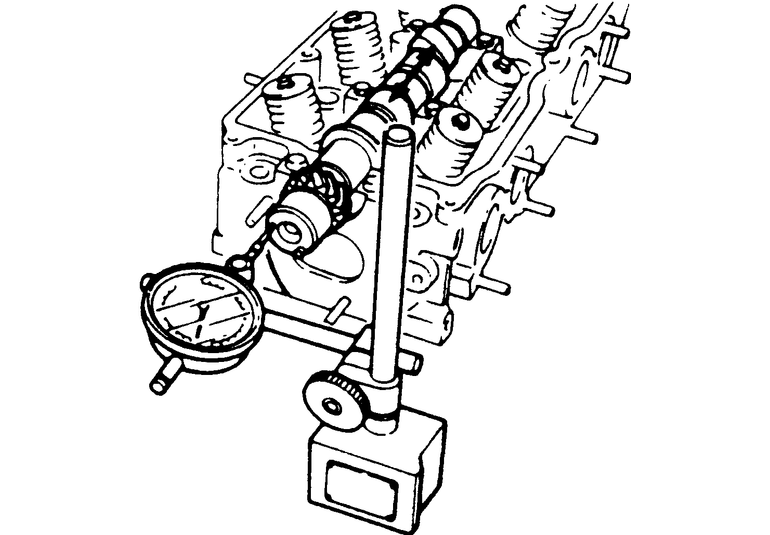
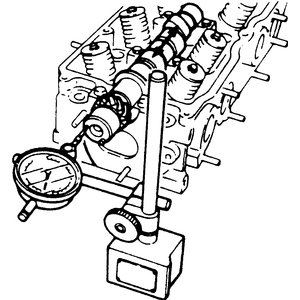
Check the lift of each lobe in consecutive order and make a note of the readings.
Camshaft assembly specifications are sometimes modified by Mazda after production.
Refer to a local reputable machine shop as necessary.
- Remove the valve cover.
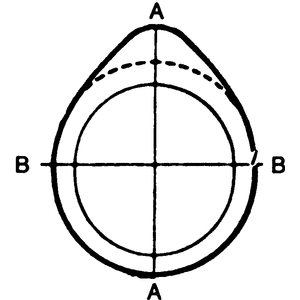
- Measure the distance between the major (A–A) and minor (B–B)
diameters of each cam lobe with a Vernier caliper and record the readings.
The difference in the readings on each cam diameter is the lobe lift.
- If the readings do not meet specifications, replace the camshaft and all
rocker arms/cam followers.
- Install the valve cover.
| Fig. 1: Camshaft lobe height measurements
|
Check the lift of each lobe in consecutive order and make a note of the reading.
Camshaft assembly specifications are sometimes modify by Ford after production.
Refer to a local reputable machine shop as necessary.
- Remove the fresh air inlet tube and the air cleaner. Remove the heater hose
and crankcase ventilation hoses. Remove valve rocker arm cover(s).
- Remove the rocker arm stud nut or fulcrum bolts, fulcrum seat and rocker
arm.
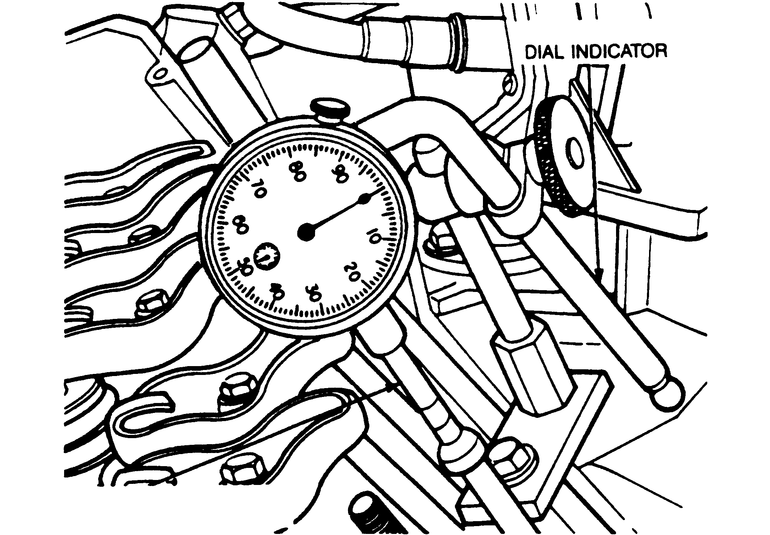
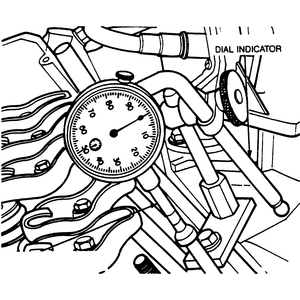
| Fig. 2: Using a dial indicator to measure camshaft
lobe lift
|
- Make sure the push rod is in the valve tappet socket. Install a dial indicator
D78P–4201–B (or equivalent) so that the actuating point of the
indicator is in the push rod socket (or the indicator ball socket adapter
Tool 6565–AB is on the end of the push rod) and in the same plane as
the push rod movement.
- Disconnect the I terminal and the S terminal at the starter relay. Install
an auxiliary starter switch between the battery and S terminals of the starter
relay. Crank the engine with the ignition switch off. Turn the crankshaft
over until the tappet is on the base circle of the camshaft lobe. At this
position, the push rod will be in its lowest position.
- Zero the dial indicator. Continue to rotate the crankshaft slowly until
the push rod is in the fully raised position.
- Compare the total lift recorded on the dial indicator with the specification.To
check the accuracy of the original indicator reading, continue to rotate the
crankshaft until the indicator reads zero. If the lift on any lobe is below
specified wear limits, the camshaft and the valve tappet operating on the
worn lobe(s) must be replaced.
- Remove the dial indicator and auxiliary starter switch.
- Install the rocker arm, fulcrum seat and stud nut or fulcrum bolts. Check
the valve clearance. Adjust if required (refer to procedure in Chapter 2).
- Install the valve rocker arm covers and the air cleaner.
NOTE: On engines with an aluminum or nylon camshaft sprocket,
prying against the sprocket, with the valve train load on the camshaft, can
break or damage the sprocket. Therefore, the rocker arm adjusting nuts must
be backed off, or the rocker arm and shaft assembly must be loosened sufficiently
to free the camshaft. After checking the camshaft end play, check the valve
clearance. Adjust if required (refer to procedure in this chapter).
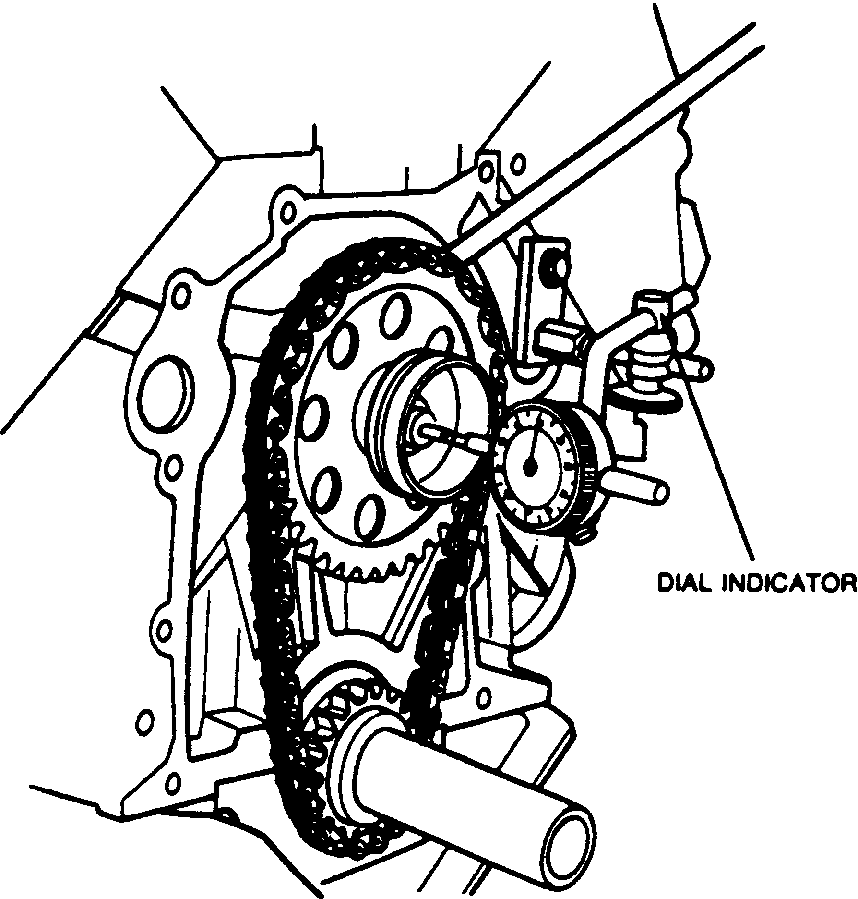
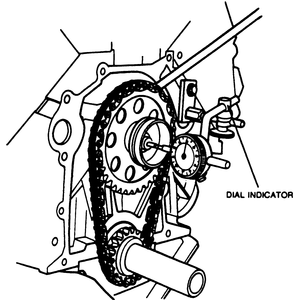
| Fig. 3: Performing the camshaft end play procedure
|
- Push the camshaft toward the rear of the engine. Install a dial indicator
so that the indicator point is on the camshaft sprocket attaching screw.
- Zero the dial indicator. Position a prybar between the camshaft gear and
the block. Pull the camshaft forward and release it. Compare the dial indicator
reading with the specifications.
- If the end play is excessive, check the spacer for correct installation
before it is removed. If the spacer is correctly installed, replace the thrust
plate.
- Remove the dial indicator.
- Push the camshaft toward the rear of the engine. Install a dial indicator
(Tool D78P–4201–C or equivalent so that the indicator point is
on the camshaft sprocket attaching screw.
| Fig. 4: Performing the camshaft end play procedure
|
- Zero the dial indicator. Position a prybar between the camshaft gear and
the block. Pull the camshaft forward and release it. Compare the dial indicator
reading with the specification. The camshaft endplay specification is 0.0008–0.004
inch and the service limit is 0.009 inch (0.007 inch on 3.0L engine). Camshaft
specifications are sometimes modified by the manufacturer after production.
- If the end play is excessive, check the spacer for correct installation
before it is removed. If the spacer is correctly installed, replace the thrust
plate.
NOTE: The spacer ring and thrust plate are available in
two thicknesses to permit adjusting the end play.
- Remove the dial indicator.