Almost all engine block refinishing must be performed by a machine shop. If the cylinders are not to be rebored, then the cylinder glaze can be removed with a ball hone. When removing cylinder glaze with a ball hone, use a light or penetrating type oil to lubricate the hone. Do not allow the hone to run dry as this may cause excessive scoring of the cylinder bores and wear on the hone. If new pistons are required, they will need to be installed to the connecting rods. This should be performed by a machine shop as the pistons must be installed in the correct relationship to the rod or engine damage can occur.
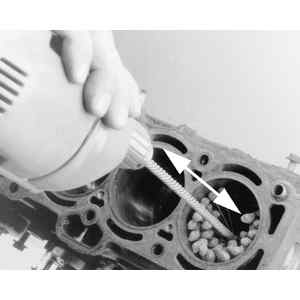
| Fig. 1: Use a ball type cylinder hone to remove any glaze
and provide a new surface for seating the piston rings
|
Only pistons with the wrist pin retained by C-clips are serviceable by the home-mechanic. Press fit pistons require special presses and/or heaters to remove/install the connecting rod and should only be performed by a machine shop.
All pistons will have a mark indicating the direction to the front of the engine and the must be installed into the engine in that manner. Usually it is a notch or arrow on the top of the piston, or it may be the letter F cast or stamped into the piston.
| Fig. 2: Most pistons are marked to indicate positioning
in the engine (usually a mark means the side facing the front)
|
NOTE: Varnish build-up or C-clip groove burrs may increase the difficulty of removing the wrist pin. If necessary, use a punch or drift to carefully tap the wrist pin out.