There are several things to check if a malfunction of the evaporative emission
control system is suspected.
Leaks may be traced by using an infrared hydrocarbon tester. Run the test probe
along the lines an connections. The meter will indicate the presence of a leak
by a high hydrocarbon (HC) reading. This method is much more accurate than a
visual inspection which would indicate only the presence of a leak large enough
to pass liquid.
Leaks may be caused by any of the following, so always check these areas when
looking for them:
- Defective or worn lines
- Disconnected or pinched lines
- Improperly routed lines
- A defective check valve
NOTE: If it becomes necessary to replace any of the lines used
in the evaporative emission control system, use only those hoses which are fuel
resistant or are marked EVAP.
If the fuel tank has collapsed, it may be the fault of clogged or pinched vent
lines, a defective vapor separator, or a plugged or incorrect check valve.
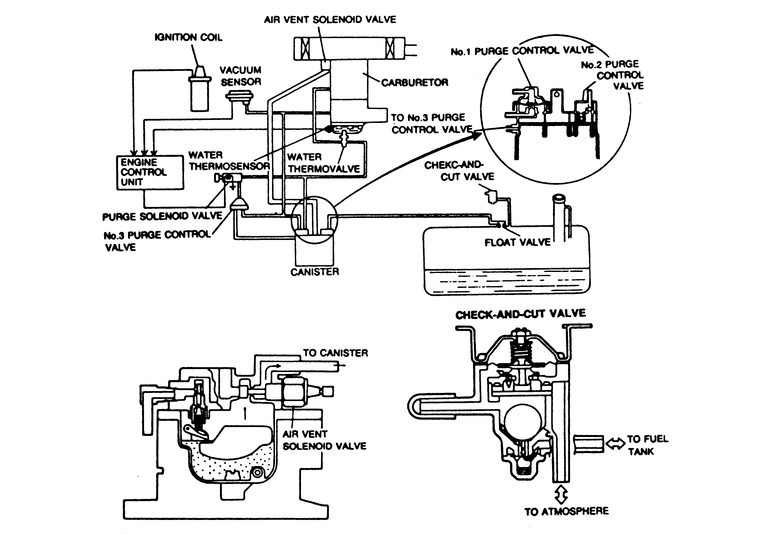
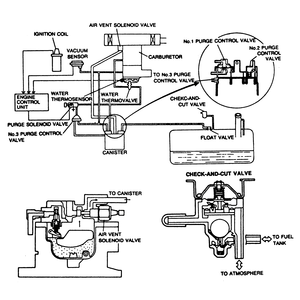
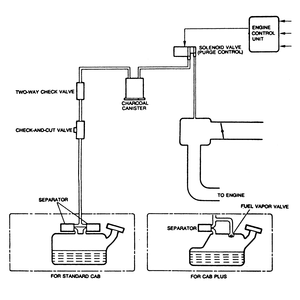
| Fig. 1: Evaporative emission control system
|
The EEC system consists of a canister No. 3 purge control valve, water thermo
valve, check-and-cut valve, purge solenoid valve and an air vent solenoid valve.
The water thermo valve opens the vacuum passage to the No. 1 and No. 3 purge
control valves. The canister incorporates the No. 2 purge control valve (2 way
check valve), and the No. 1 purge control valve, which opens the fuel vapor
passage between the canister and the intake manifold. The No. 3 purge control
valve opens the fuel vapor passage between the canister and the intake manifold
when the purge solenoid valve is ON.
Port vacuum is applied to the No. 1 purge control valve while the engine is
running and to the No. 3 purge control valve during running or heavy load driving.
The check-and-cut valve vents the vapors to the atmosphere if the evaporative
hoses become clogged. It also prevents fuel leakage if the vehicle overturns.
- Check the vacuum hose routing. Repair or replace if necessary.
- Start the engine and allow it to reach normal operating temperature.
- Disconnect the vacuum hose from the No. 1 purge control valve. Connect a
suitable vacuum gauge to the hose.
- Increase the engine speed to 2500 rpm and check that the vacuum gauge reads
more than 5.9 in. Hg. If the required vacuum is not reached, check the thermo
valve. Reconnect the vacuum hose to the control valve.
- Disconnect the vacuum line from the canister. Connect a vacuum gauge to
the hose. Check that vacuum is present when engine speed exceeds 1400 rpm.
- If no vacuum exists, check the purge solenoid valve, No. 3 purge control
valve and the 1V terminal on the emission control unit. Reconnect the vacuum
hose to the canister.
- Disconnect the evaporation hose from the evaporation pipe, then connect
a suitable hand operated vacuum pump to the evaporation pipe. Operate the
hand pump and check that no vacuum is held in the system. If so, examine the
check-and-cut valve and the evaporation pipe for clogging.
- Remove the air cleaner assembly.
- Touch the air vent solenoid on the carburetor.
- Verify that when the ignition switch is turned ON and OFF, the solenoid
clicking is felt and heard.
- If not click is heard or felt, check for voltage at the solenoid or replace
the solenoid.
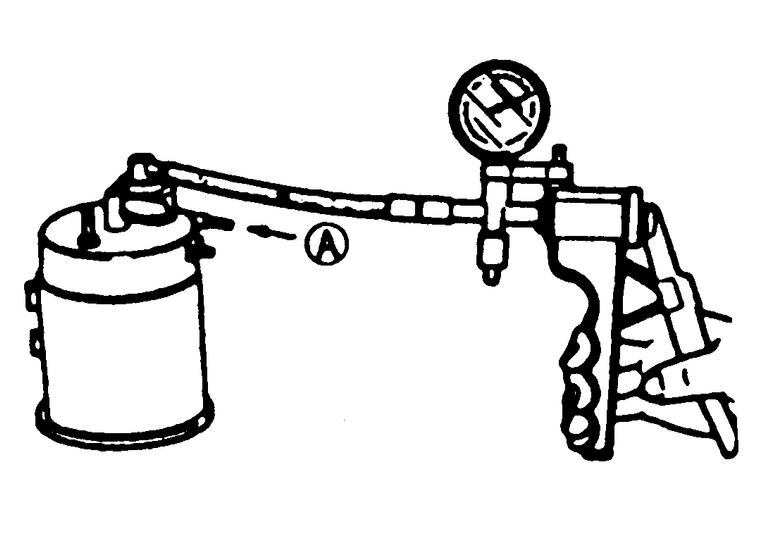
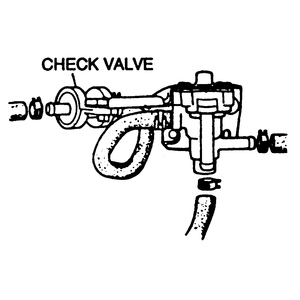
| Fig. 2: Check and cut valve testing
|
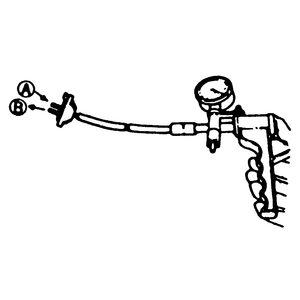
- Remove the valve from its location just before the gas tank. Hold the valve
in the horizontal position, otherwise the weight of the valve will cause it
to move out of position and close the passage.
- Connect a vacuum gauge in line to the passage which normally connects to
the fuel tank — port A.
- Blow air into port A and verify that the valve opens at
a pressure of 0.78-1.00 psi (5.38-6.89kpa).
- Remove the vacuum gauge and connect it to the passage to atmosphere — port B.
- Blow air into port B and verify that the valve opens at
a pressure of 0.14–0.71 psi (0.97–4.89kpa).
- If not as specified, replace the valve.
- Remove the water thermo valve and immerse the valve in a container of water.
- Heat the water gradually and observe the temperature. Remember, you are
working with hot metal and hot water, take steps to prevent burning yourself.
Blow through the valve. If air passes through the valve at 130°F (54°C)
or higher, the valve is operating correctly.
- Run the engine at idle speed and disconnect the slow fuel cut solenoid valve
connector.
- If the engine stalls, the solenoid valve is operating properly. If the engine
does not stall, replace the solenoid valve.
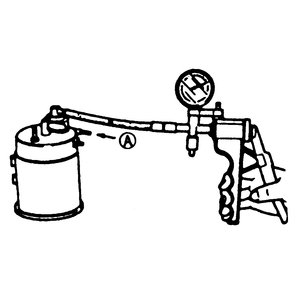
| Fig. 3: No. 1 purge control valve testing
|
- Disconnect the vacuum lines from the canister.
- Blow through port A and verify that the air does not flow.
- Connect a vacuum pump to the purge control valve.
- Apply 4.3 in. Hg of vacuum to the purge control valve.
- Blow air through port B and verify that air does not flow.
- If not as specified, replace the purge control valve.
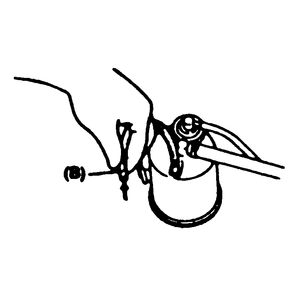
| Fig. 4: No. 2 purge control valve testing
|
- Disconnect the vacuum hose from the fuel tank to the canister at the canister.
- Blow air into the canister.
- Verify that the air flows freely and there are no restrictions.
- If not as specified, replace the canister.
| Fig. 5: No. 3 purge control valve testing
|
- Remove the No. 3 purge control valve.
- Connect a hand vacuum pump to the thermosensor side of the valve.
- Blow air through the valve from port A while applying 3-4
in. Hg of vacuum to the valve.
- Verify that air flows through the valve from port A to
port B.
- If not as specified, replace the No. 3 purge control valve.
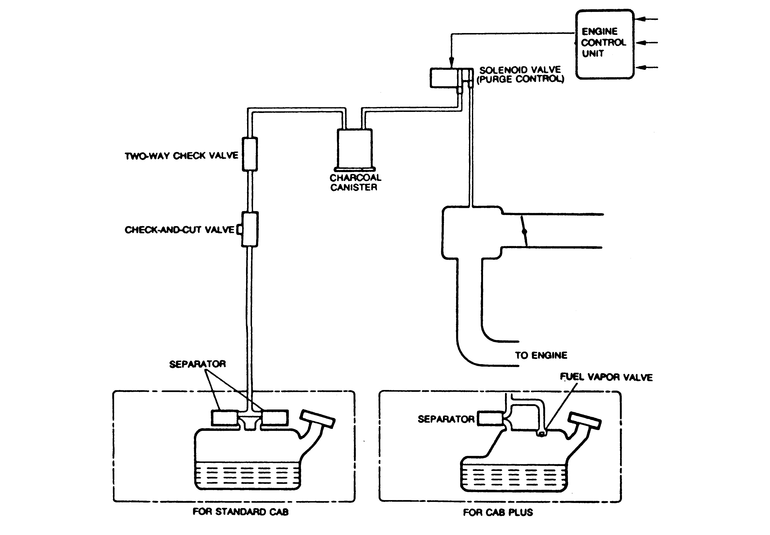
| Fig. 6: Evaporative emission control system — 2.2L
and 2.6L fuel injected engines
|
The EEC system consists of a fuel separator, a fuel vapor valve, a check-and-cut
valve, a 2 way check valve, a purge control solenoid valve, the engine control
unit and input devices.
The amount of evaporative fumes introduced into and burned by the engine is
controlled by the solenoid valve and control unit to correspond to the engine's
operating conditions.
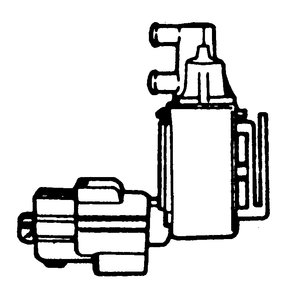
| Fig. 7: Purge control solenoid valve — 2.6L
and 3.0L fuel injected engines
|
- Start the vehicle and warm the engine.
- Disconnect the vacuum hose (usually white) closest to the wire connector
from the solenoid valve.
- Verify there is no vacuum at the solenoid valve at idle speed.
- If there is vacuum at the solenoid valve, turn the engine OFF.
- Disconnect the other vacuum hose and apply air pressure. Verify that no
air flows through the valve.
- Next, supply 12 volts to the terminals of the solenoid. Apply air pressure
and verify that air does flow through the valve.
- If not as specified, replace the solenoid valve.
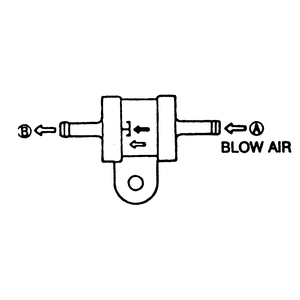
- Remove the valve from its location just before the gas tank. Hold the valve
in the horizontal position, otherwise the weight of the valve will cause it
to move out of position and close the passage.
- Connect a vacuum gauge in line to the passage which normally connects to
the fuel tank — port A.
- Blow air into port A and verify that the valve opens at
a pressure of 0.78–1.00 psi (5.38–6.89kpa).
- Remove the vacuum gauge and connect it to the passage to atmosphere — port B.
- Blow air into port B and verify that the valve opens at
a pressure of 0.14–0.71 psi (0.96–4.89kpa).
- If not as specified, replace the valve.
| Fig. 8: 2 way check valve testing
|
The 2 way check valve is not serviceable and should be replaced if damage or
leaking is evident.
- Remove the valve and blow through from port A and check
that air flows.
- Blow through from the opposite side port and check that air does not flow
through. Replace the valve as required.
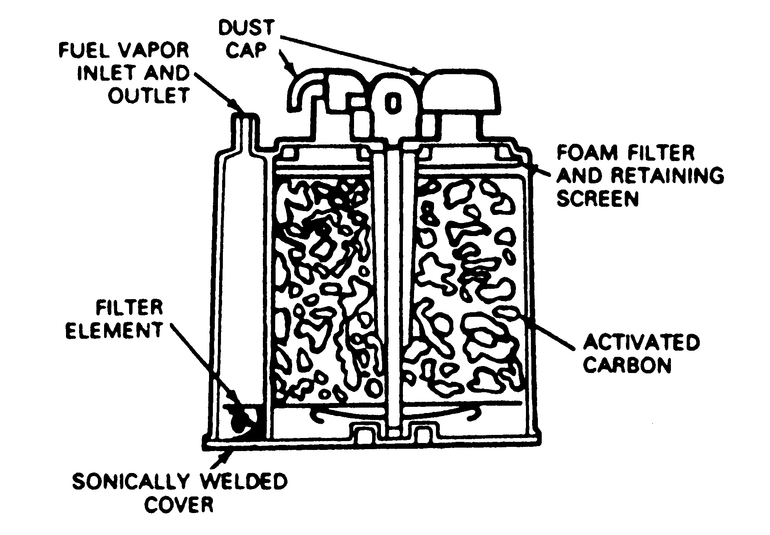
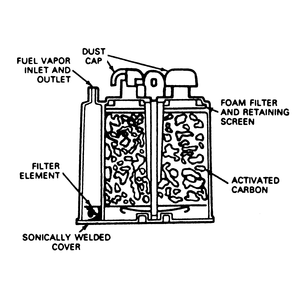
| Fig. 9: Evaporative canister
|
Other than a visual check to determine that none of the vapor lines are broken,
there is no test for this equipment.
The only maintenance on the evaporative system is to periodically check all
hoses and connections for leaks and deterioration. Replace any hoses which are
found to be damaged in any way. Under normal circumstances, the charcoal canister
is expected to last the life of the vehicle, but it should be periodically inspected
for any damage or contamination by raw gasoline. Replace any gasoline soaked
canister found. Refer to the illustrations for canister mounting and evaporative
hose routing on the various engines. Filler cap damage or contamination that
clogs the pressure/vacuum valve may result in deformation of the fuel tank.