- Relieve the fuel system pressure.
- Disconnect the vacuum hose.
- Disconnect the fuel return hose.
- Unbolt and remove the unit.
- Install in the reverse order. Tighten the bolts to 95 inch lbs. (11 Nm).
Refer to Fuel Charging Assembly Removal and Installation procedure above.
- Depressurize the fuel system.
CAUTION
The fuel system is under pressure. Release pressure slowly and contain spillage.
Observe no smoking/no open flame precautions. Have a Class B–C (dry
powder) fire extinguisher within arm's reach at all times.
- Remove the vacuum and fuel lines at the pressure regulator.
- Remove the 2 or 3 Allen retaining screws from the regulator housing.
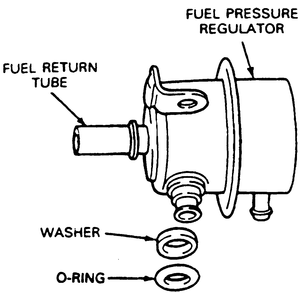
- Remove the pressure regulator assembly, gasket and O-ring. Discard the gasket
and check the O-ring for signs of cracks or deterioration.
| Fig. 1: Fuel pressure regulator components

|
To install:
- Clean the gasket mating surfaces. If scraping is necessary, be careful not
to damage the fuel pressure regulator or supply line gasket mating surfaces.
- Lubricate the pressure regulator O-ring with light engine oil. Do not use
silicone grease; it will clog the injectors.
- Install the O-ring and a new gasket on the pressure regulator.
- Install the pressure regulator on the fuel manifold and tighten the retaining
screws to 6–8 ft. lbs. (8–11 Nm).
- Install the vacuum and fuel lines at the pressure regulator. Build up fuel
pressure by turning the ignition switch ON and OFF at least 6 times, leaving
the ignition on for at least 5 seconds each time. Check for fuel leaks.


