Previous Next

Signal and Marker Lights

REMOVAL & INSTALLATION

Front Turn Signal, Parking and Side Marker Lights
PICKUPS

The combination parking/side marker light housing is separate from the turn signal housing. However, the bulbs are replaced in the same manner.

  1. Disconnect the negative battery cable.
  2. Remove the lens mounting screws and pull off the lens.
  3. Carefully push in on the bulb and twist it counterclockwise to remove it.
  4. Installation is the reverse of removal.
MPV

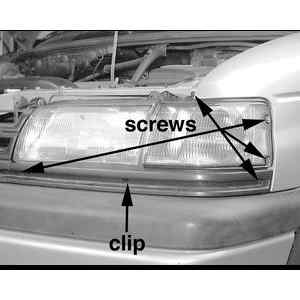
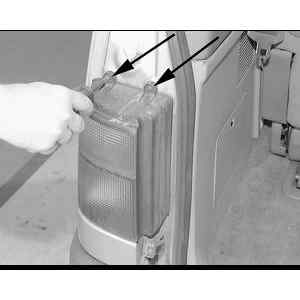
Fig. 1: To change the front turn signal/side marker bulb, five mounting screws must be removed and one clip disengaged

  1. Disconnect the battery ground cable.
  2. Remove the grille side moldings.

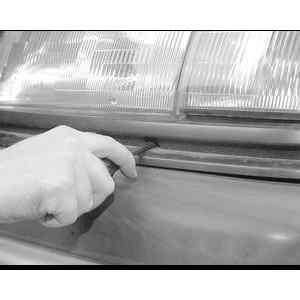
    Fig. 2: Disengage the retaining clip in the middle of the trim panel below the headlight and turn signal housing

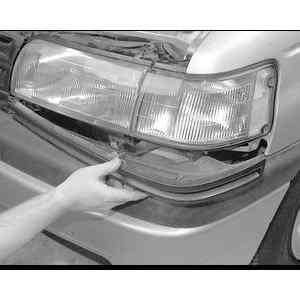
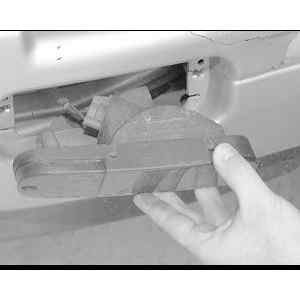
    Fig. 3: Pull out the trim panel to aid in turn signal/side marker light housing removal

    NOTE: The grille side molding pieces are retained by both screws and snap-clips. The snap-clips can be freed by depressing the tabs with a small screwdriver.

  3. Remove the lens mounting screws and pull off the lens.
  4. Turn the socket counterclockwise and pull it straight out of the back of the housing.

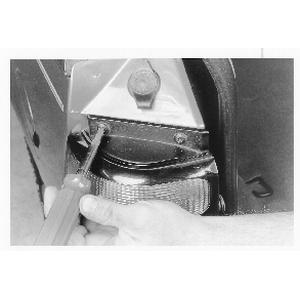
    Fig. 4: When removing the turn signal housing, pull firm enough to disengage the locating pin from the location hole

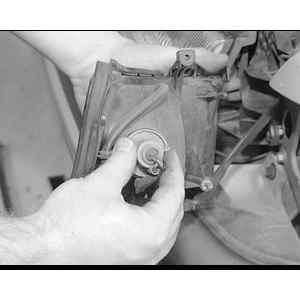
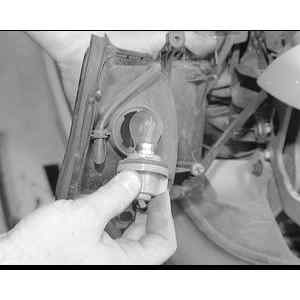
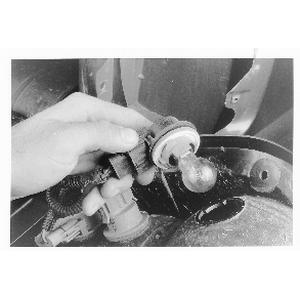
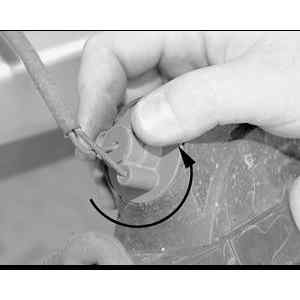
    Fig. 5: To remove the turn signal light bulb socket from the housing, turn the socket counterclockwise

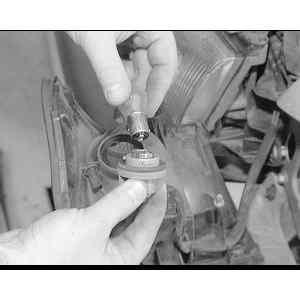
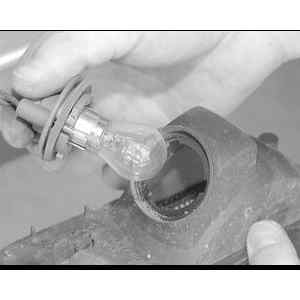
    Fig. 6: Pull the socket straight out of the turn signal housing . . .

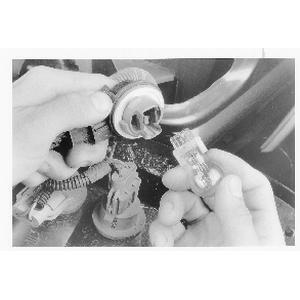
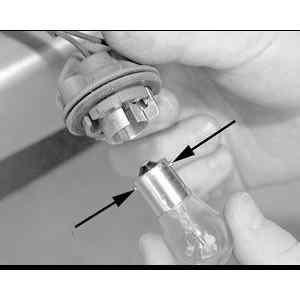
    Fig. 7: . . . then press in and turn to remove the front turn signal bulb from the socket

  5. Carefully push in on the bulb and twist it counterclockwise to remove it from the socket.
  6. Installation is the reverse of removal.
NAVAJO

The combination parking/turn signal lamp housing is separate from the side marker lamp housing.

  1. Loosen the two mounting nuts and remove the parking/turn signal lamp assembly.
  2. Loosen the one mounting screw and remove the side marker lamp housing.
  3. To remove the side marker, parking/turn signal bulbs and sockets from their housings, simply turn the socket(s) counterclockwise and pull straight out.
  4. Remove the bulb from the socket by pulling straight out of the socket.

    To install:

  5. Install the new bulb straight into the socket.
  6. Install the socket into the rear of the housing and turn clockwise to lock into place.
  7. Install the side marker lamp housing and tighten the one mounting screw.
  8. Place the parking/turn signal lamp assembly into position and tighten the two mounting nuts.
  9. Check the operation of the lights.
Rear Combination Lights
PICKUPS

Fig. 8: Exploded view of the rear combination light assembly

  1. Remove the lens mounting screws and pull off the lens.
  2. Carefully push in on the bulb and twist it counterclockwise to remove it.
  3. Installation is the reverse of removal.
MPV

Fig. 9: Remove the two rear combination light assembly mounting screws

Fig. 10: When removing the rear combination light housing, be careful not to brake the locating pegs that fit into the mounting holes of the body

Fig. 11: To remove the socket from the back of the combination light housing, turn the socket counterclockwise . . .

Fig. 12: . . . then carefully pull the socket out of the opening in the housing unit

Fig. 13: Gently press in and turn the bulb, then pull it out of the socket

  1. Remove the lens mounting screws and pull off the lens.
  2. Carefully push in on the bulb and twist it counterclockwise to remove it.
  3. Installation is the reverse of removal.

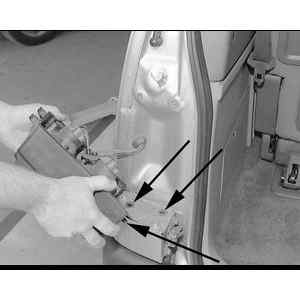
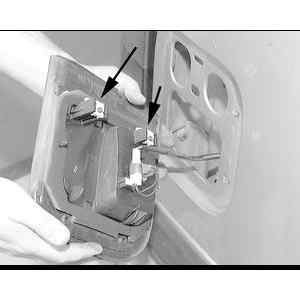
    Fig. 14: Remove the two inboard combination light retaining screws . . .

    Fig. 15: . . . then gently push the assembly inward of the door to free it from the retaining tabs

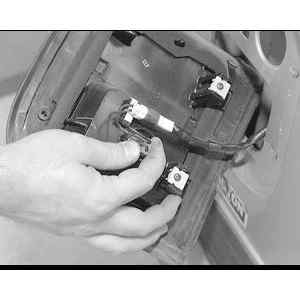
    Fig. 16: Part of the inboard combination light assembly is held in place by retaining tabs secured against the door metal

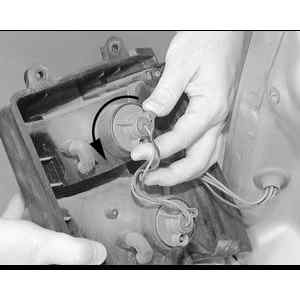
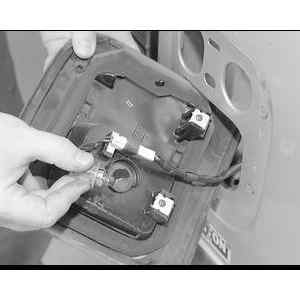
    Fig. 17: Hold the inboard combination light assembly fimly and turn the socket counterclockwise . . .

    Fig. 18: . . . then pull the bulb and socket out of the housing

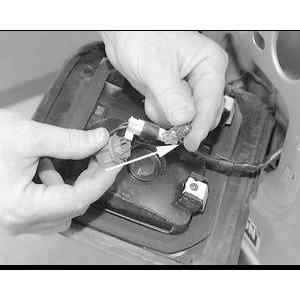
    Fig. 19: While holding the socket, pull the light bulb straight out

NAVAJO

Fig. 20: Navajo models only use two upper lens retaining screws, the bottom utilize retaining pins

  1. Remove the 2 screws retaining the lamp assembly to the vehicle.
  2. Remove the lamp assembly from the vehicle by pulling it outward. Make sure the 2 retainers at the bottom of the assembly release.
  3. Remove the lamp sockets from the lens housing by twisting it, then pulling outward.
  4. Remove the bulb from the socket by pulling it straight outward.

    Fig. 21: Grasp the bulb socket then twist and pull it out of the lens assembly

    Fig. 22: Remove the bulb from the socket by pulling it straight out

    To install:

  5. Install the bulb into the lamp socket.
  6. Install the lamp socket to the lens and twist it to lock it in position.
  7. Position the lens assembly to the body. Ensure that the retainers are aligned with their mounting clips, and press the assembly until fully seated.
  8. Install the 2 lens assembly retaining screws.
  9. Check the operation of the lights.
Back Up Lights

Only the MPV comes equipped with separately mounted back up lights.

  1. Remove the back up light lens mounting screws and pull the lens away from the bumper.
  2. Turn the reverse light bulb socket counterclockwise to release the retaining tabs, then pull the socket straight out from behind the housing.
  3. Carefully push in on the bulb and twist it counterclockwise to remove it.
  4. Installation is the reverse of removal.

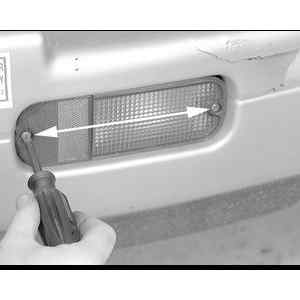
    Fig. 23: Remove the two reverse light housing mounting screws . . .

    Fig. 24: . . . then pull the reverse light housing straigh out of the rear bumper

    Fig. 25: Turn the reverse light bulb socket counterclockwise to release the retaining tabs . . .

    Fig. 26: . . . then pull the socket straight out from behind the housing

    Fig. 27: When replacing bulbs (reverse light bulb shown) of any kind, be sure to note the type of bulb retaining ears that exist on each side, they can be different

High Mount Brake Light

Only the Navajo comes equipped with a high mount brake light.

  1. Remove the screws retaining the lamp to the liftgate.
  2. Pull the lamp away from the vehicle and disconnect the wiring connector.
  3. Remove the lamp socket from the lens by twisting it and pulling outward.
  4. Pull the bulb straight out from the lamp socket to remove it.

    To install:

  5. Install the bulb into the lamp socket.
  6. Install the lamp socket to the lens and twist it to lock it in position.
  7. Position the lens assembly to the body.
  8. Install the lens assembly retaining screws.
  9. Check the operation of the lights.
Dome Light

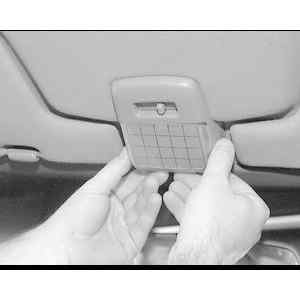
Fig. 28: Interior lamp assemblies — Pickup shown

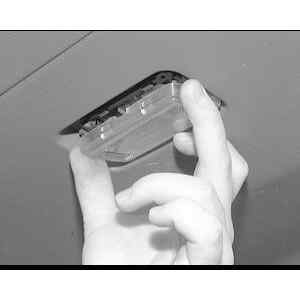
Fig. 29: Using slight hand pressure, release the tabs . . .

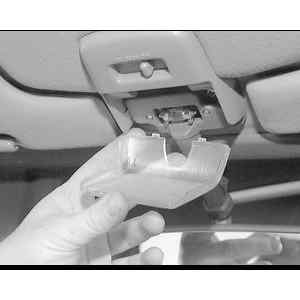
Fig. 30: . . . then pull the dome lamp lens away from the light fixture

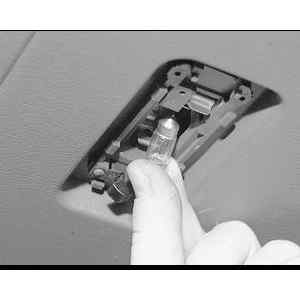
Fig. 31: Pull the bulb out from the contacts

  1. Remove the plastic cover.
  2. Pull the map and/or area bulb from the dome light assembly.
  3. Installation is the reverse of the removal procedure.
Cargo or Passenger Area Lamps

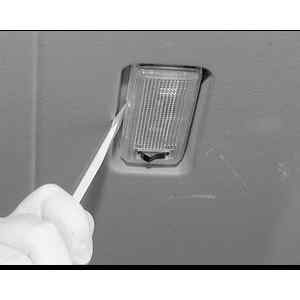
The Navajo has a cargo light mounted on the roof headliner near the tailgate, the MPV has a cargo light located on the liftgate door and the Cab Plus Pickup model has an additional passenger area lamp mounted on the headliner toward the rear. To replace the bulbs, simply pry off the lens and pull out the bulb. Install the new bulb.

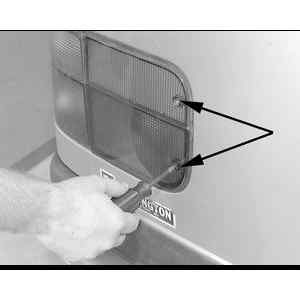
Fig. 32: Using a small prying tool, release the tabs of the tailgate inner door light lens

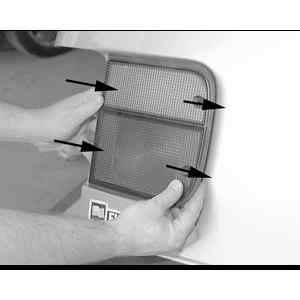
Fig. 33: Pull off the tailgate inner door light lens . . .

Fig. 34: . . . then pull the glass bulb out from between the bulb holder/connectors

License Plate Lights
PICKUPS
  1. Remove the lens mounting screws and pull off the lens.
  2. Carefully push in on the bulb and twist it counterclockwise to remove it.
  3. Installation is the reverse of removal.
MPV
  1. Remove the lens mounting screws and pull off the lens.
  2. Pull the assembly down and separate the lens from the mounting gasket.
  3. Pull the license plate light bulb straight out of the socket.
  4. Installation is the reverse of removal.
NAVAJO
  1. From underneath the rear of the vehicle, grasp the lamp socket and rotate it 14 turn.
  2. Pull the lamp socket from the lens.
  3. Pull the bulb from the socket
  4. Installation is the reverse of the removal procedure.

Previous Next