WARNING
Never operate the radio with one of the speaker disconnected. Damage to the
radio can occur.
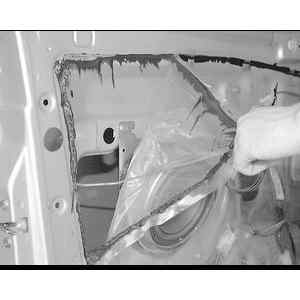
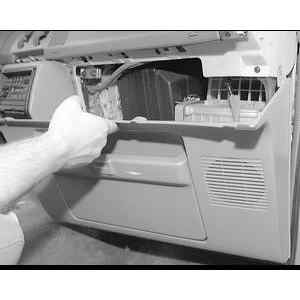
| Fig. 1: Carefully peel away the inner door liner to
access the speaker mounting bolts
|
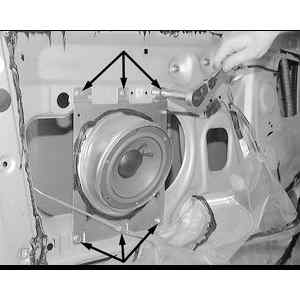
| Fig. 2: Remove the door speaker mounting bolts
|
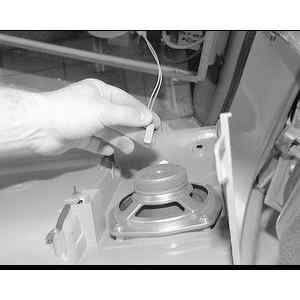
| Fig. 3: Disengage the door mounted speaker wiring connector
and remove from the vehicle
|
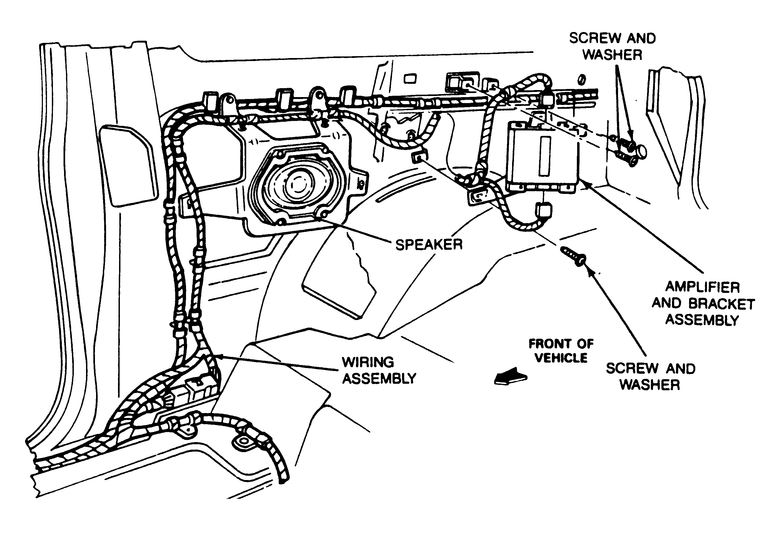
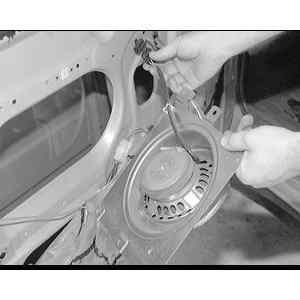
- Remove the door trim panel.
- If necessary, peel away the plastic inner liner.
- Remove the speaker attaching screws.
- Pull the speaker out from the door frame and disconnect the wire harness
plug.
- Installation is the reverse of the removal procedure.
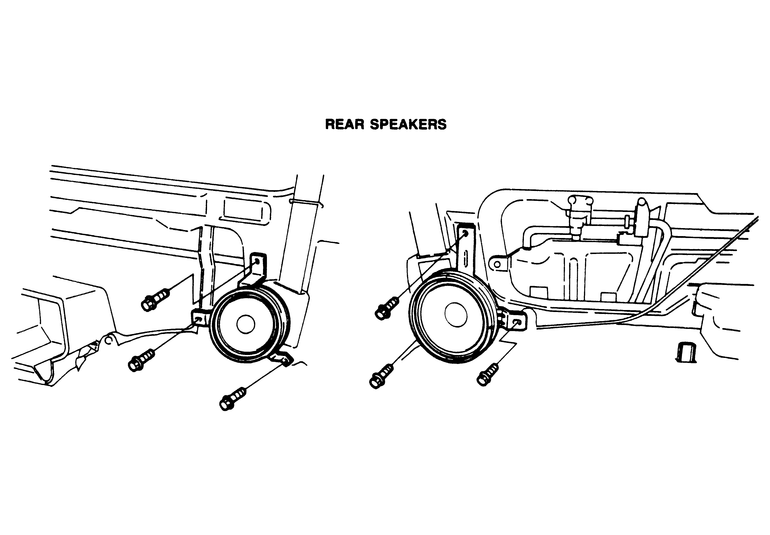
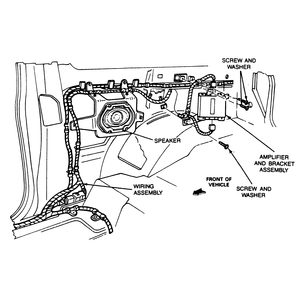
| Fig. 4: Rear mounted speaker unit components
|
- Gently pry the speaker grille from the trim panel.
- Remove the 4 screws that mount the speaker unit to the mounting bracket.
- Pull the speaker out from the trim panel and disconnect the wire harness
plug.
- Installation is the reverse of the removal procedure.
| Fig. 5: Rear mounted speaker unit removal/installation

|
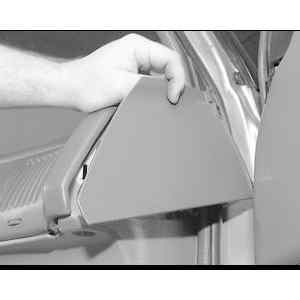
- Remove the rear interior side trim.
- Remove the three speaker mounting screws.
- Carefully pull the speaker out and disconnect the wire harness plug.
- Installation is the reverse of the removal procedure.
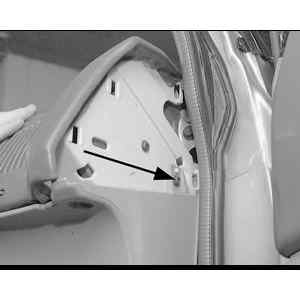
- Remove the seat belt upper anchor retaining bolt.
- Remove the back upper garnish and B pillar trim.
- Remove the 4 speaker mounting screws.
- Carefully pull the speaker out and disconnect the wire harness plug.
- Installation is the reverse of the removal procedure.
- Remove the seat belt upper anchor retaining bolt.
- Remove the quarter window glass.
- Remove the back upper garnish, B pillar upper and lower trim.
- Remove the 3 speaker mounting screws.
- Carefully pull the speaker out and disconnect the wire harness plug.
- Installation is the reverse of the removal procedure.
| Fig. 6: Disengage the metal clips and remove the side
dashboard end cover . . .
|
| Fig. 7: . . . then remove the lower cover end mounting
screw
|
| Fig. 8: Remove the lower dash panel cover mounting
screws

|
| Fig. 9: Carefully pull away the lower dash cover .
. .
|
| Fig. 10: . . . then unplug the wire from the lower
dash cover speaker, loosen the mounting fasteners and remove from the
vehicle
|
NOTE: This procedure applies to both right and left side
dash mounted speakers.
- Remove the dashboard end panel by carefully prying outward to disengage
the retaining clips.
- Remove all of the dashboard lower panel mounting screws.
- Carefully pull the lower panel outward and unplug the speaker wiring connector.
- Remove the speaker mounting fasteners and remove from the vehicle.
- Installation is the reverse of the removal procedure.
NOTE: This procedure applies to both right and left side
dash mounted speakers.
- Remove the speaker grille mounting screws. Remove the speaker grille.
- Remove the speaker unit mounting screws.
- Carefully pull the speaker unit out just enough to unplug the wiring harness.
- Remove the speaker from the vehicle.
- Installation is the reverse of the removal procedure.