Previous Next

Center Bearing

REPLACEMENT

The center support bearing is a sealed unit which requires no periodic maintenance. The following procedure should be used if it becomes necessary to replace the bearing. You will need a pair of snapring pliers for this job.

  1. Remove the driveshaft assembly.

    Fig. 1: Before separating the two halves of the rear driveshaft assembly, matchmark the positioning of the halves for correct reassembly

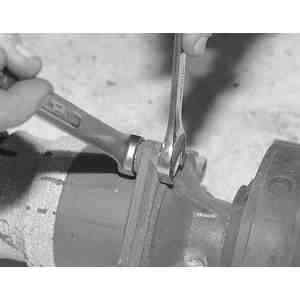
    Fig. 2: When separating the front half from the rear half, use two, 14 mm box wrenches and remove the four mounting nuts

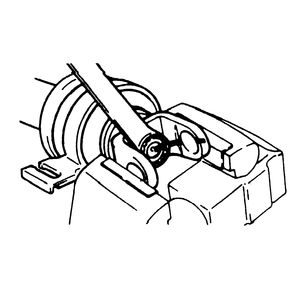
    Fig. 3: Remove the nut and washer securing the center yoke to the front driveshaft

  2. To maintain driveline balance, matchmark the rear driveshaft, the center yoke and the front driveshaft so that they may be installed in their original positions.
  3. Remove the center universal joint from the center yoke, leaving it attached to the rear driveshaft. See the following section for the correct procedure.
  4. Remove the nut and washer securing the center yoke to the front driveshaft.
  5. Slide the center yoke off the splines. The rear oil seal should slide off with it.

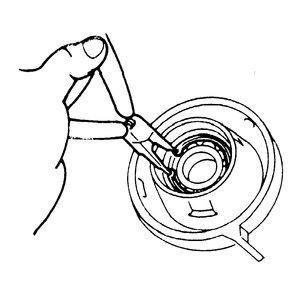
    Fig. 4: Remove the snapring using snapring pliers

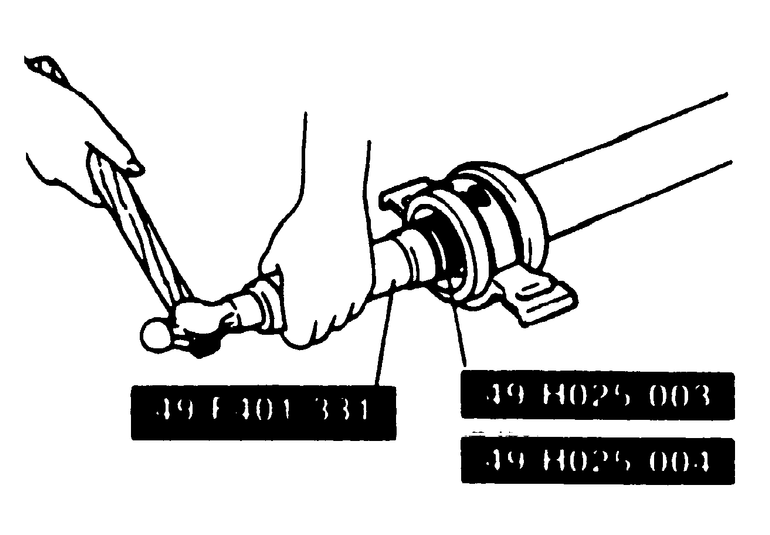
    Fig. 5: If necessary, use a puller tool to remove the center support bearing assembly

  6. If the oil has remained on top of the snapring, remove and discard the seal. Remove the snapring from its groove. Remove the bearing.
  7. Slide the center support and front oil seal from the front driveshaft. Apuller tool may be necessary. Discard the seal.
  8. Install the new bearing into the center support. Secure it with the snapring.

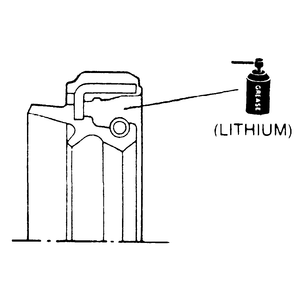
    Fig. 6: Before installing the front seal, apply a coat of lithium grease to the seal lips

    Fig. 7: Install the center bearing assembly onto the driveshaft

  9. Apply a coat of grease to the lips of the new oil seals, and install them into the center support on either side of the bearing.
  10. Coat the splines of the front driveshaft with grease. Install the center support assembly and the center yoke onto the front driveshaft, being sure to match up the marks made during disassembly.
  11. Install the washer and nut. Torque the nut to 116–130 ft. lbs.
  12. Check that the center support assembly rotates smoothly around the driveshaft.
  13. Align the mating marks on the center yoke and the rear driveshaft, and assemble the center universal joint.
  14. Install the driveshaft. Be sure that the rear yoke and the axle flange are aligned properly.

Previous Next