CAUTION
The clutch driven disc may contain asbestos, which has been determined to be
a cancer causing agent. Never clean clutch surfaces with compressed air! Avoid
inhaling any dust from any clutch surface! When cleaning clutch surfaces, use
a commercially available brake cleaning fluid.
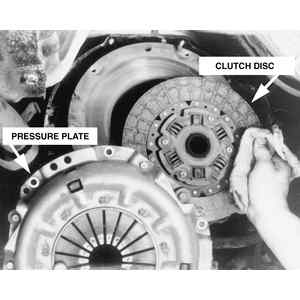
| Fig. 1: Exploded view of the clutch and pressure plate
assembly
|
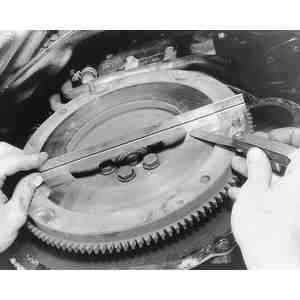
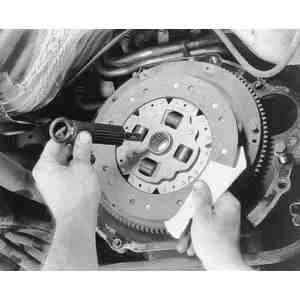
| Fig. 2: Loosen and remove the clutch and pressure plate
bolts evenly, a little at a time . . .
|
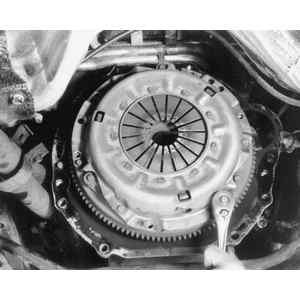
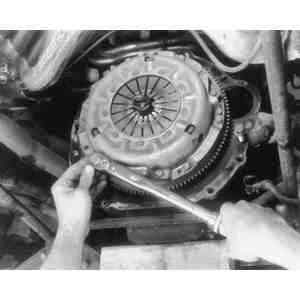
| Fig. 3: . . . then carefully remove the pressure plate
and clutch assembly from the flywheel
|
| Fig. 4: Check the flywheel surface for flatness and,
if necessary, remove it from the engine for truing
|
- Remove the transmission.
- Remove the four attaching and two pilot bolts holding the clutch cover to
the flywheel. Loosen the bolts evenly and a turn or two at a time. If the
clutch cover is to be reinstalled, mark the flywheel and clutch cover to show
the location of the two pilot holes.
- Remove the clutch disc.
- Install the clutch disc on the flywheel. Do not touch the facing or allow
the facing to come in contact with grease or oil. The clutch disc can be aligned
using a tool made for that purpose, or with an old mainshaft.
- Install the clutch cover on the flywheel and install the four standard bolts
and the two pilot bolts.
- To avoid distorting the pressure plate, tighten the bolts evenly a few turns
at a time until they are all tight.
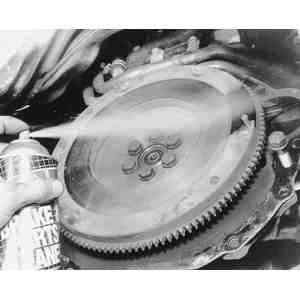
| Fig. 5: Be sure that the flywheel surface is clean
before installing the clutch
|
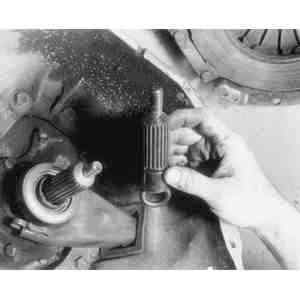
| Fig. 6: Typical clutch alignment tool, note how the
splines match the transmission's input shaft
|
| Fig. 7: Use the clutch alignment tool to align the
clutch disc during assembly.
|
| Fig. 8: Be sure to use a torque wrench to tighten
all of the bolts
|
- Tighten the bolts to 13–20 ft.lbs. (18–27 Nm). using a crossing
pattern.
- Remove the aligning tool.
- Apply a light film of lubricant to the release bearing, release lever contact
area on the release bearing hub and to the input shaft bearing retainer.
- Install the transmission.
- Check the operation of the clutch and if necessary, adjust the pedal free-play
and the release lever.
| Fig. 9: Exploded view of the clutch components
|
- Disconnect the negative battery cable.
- Disconnect the clutch hydraulic system master cylinder from the clutch pedal
and remove.
- Raise the vehicle and support it safely.
- Remove the starter.
- Disconnect the hydraulic coupling at the transmission.
NOTE: Clean the area around the hose and slave cylinder
to prevent fluid contamination.
- Remove the transmission from the vehicle.
- Mark the assembled position of the pressure plate and cover the flywheel,
to aid during re-assembly.
- Loosen the pressure plate and cover attaching bolts evenly until the pressure
plate springs are expanded, and remove the bolts.
- Remove the pressure plate and cover assembly and the clutch disc from the
flywheel. Remove the pilot bearing only for replacement.
To install:
- Position the clutch disc on the flywheel so that the Clutch Alignment Shaft
Tool T74P–7137–K or equivalent can enter the clutch pilot bearing
and align the disc.
| Fig. 10: Pressure plate bolt torque sequence
|
- When reinstalling the original pressure plate and cover assembly, align
the assembly and flywheel according to the marks made during the removal operations.
Position the pressure plate and cover assembly on the flywheel, align the
pressure plate and disc, and install the retaining bolts that fasten the assembly
to the flywheel. Tighten the bolts to 15–25 ft.lbs. (21–35 Nm)
in the proper sequence. Remove the clutch disc pilot tool.
- Install the transmission into the vehicle.
- Connect the coupling by pushing the male coupling into the slave cylinder.
- Connect the hydraulic clutch master cylinder pushrod to the clutch pedal.