Previous Next

KICK-DOWN SWITCH

1987-89 L3N71B
  1. Connect an ohmmeter across the terminals of the kick-down switch, depress the accelerator pedal fully and make sure that there is continuity. If not, proceed:
  2. Loosen the switch locknut.
  3. Depress the accelerator pedal fully and adjust the switch until continuity is observed.
  4. Tighten the locknut.
L4N71B
  1. Connect an ohmmeter across the 2 lower terminals of the kick-down switch. Make sure that there is continuity when the tip of the switch is depressed 6.0-6.5mm (0.236-0.256 in.). If not, proceed:
  2. Loosen the switch locknut.
  3. Depress the accelerator pedal fully and adjust the switch until continuity is observed when the tip of the switch is depressed 6.0-6.5mm (0.236-0.256 in.).
  4. Tighten the locknut.
N4A-HL
  1. Connect an ohmmeter across the 2 lower terminals of the kick-down switch. Make sure that there is continuity when the tip of the switch is depressed 6.0–6.5mm. If not, proceed:
  2. Disconnect the wiring.

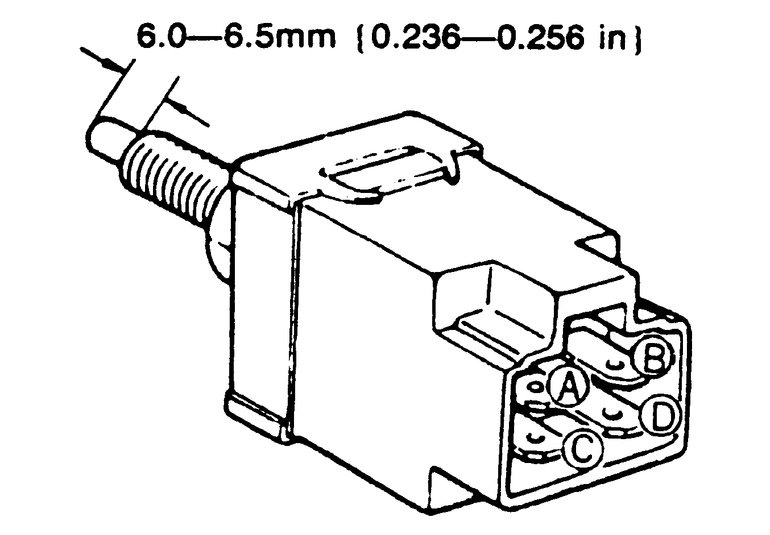
    Fig. 1: Measure the continuity between terminals C and D with the switch depressed

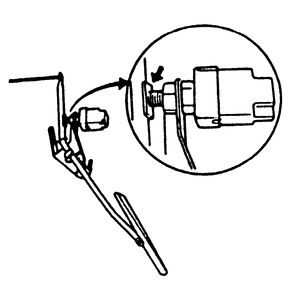
    Fig. 2: With the pedal held down, turn the kick-down switch clockwise until a click is heard, then, turn it 14 turn further

  3. Loosen the switch locknut and back the switch out fully.
  4. Depress the accelerator pedal fully and hold it.
  5. With the pedal held down, turn the kick-down switch clockwise until a click is heard, then, turn it 14 turn further.
  6. Tighten the locknut.
  7. Release the pedal and reconnect the wiring.
  8. Apply 12 volts to the kick-down solenoid and observe that a click is heard. If not, replace the solenoid.

Previous Next