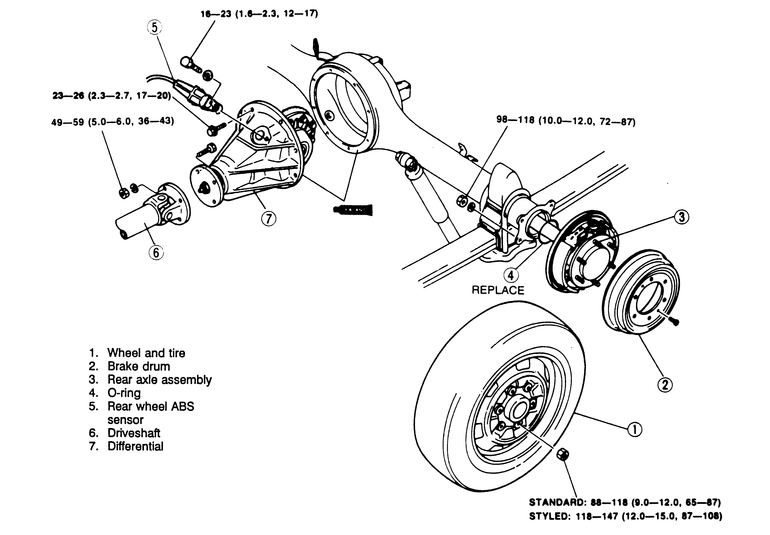
| Fig. 1: Exploded view of the rear differential and axle
shaft components
|
CAUTION
Wear some kind of protective goggles when grinding the collar and breaking
the collar from the shaft!
To install:
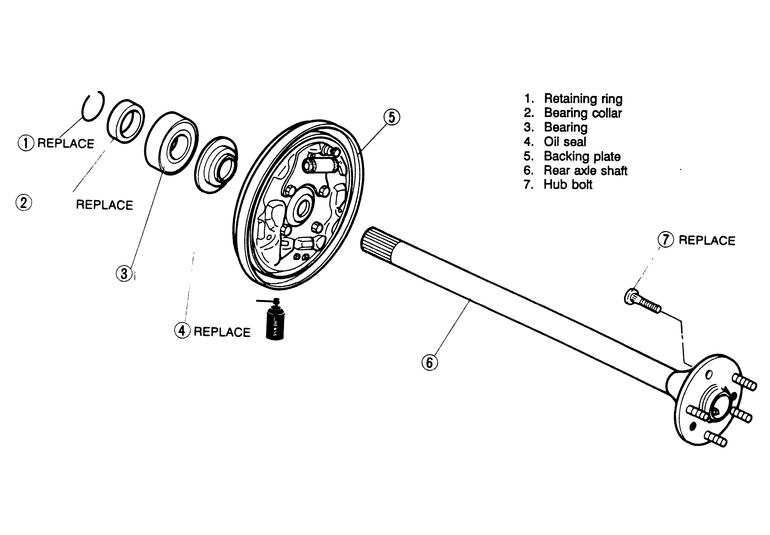
| Fig. 2: Rear axle shaft components
|
CAUTION
Wear some kind of protective goggles when grinding the collar and breaking
the collar from the shaft!
To install:
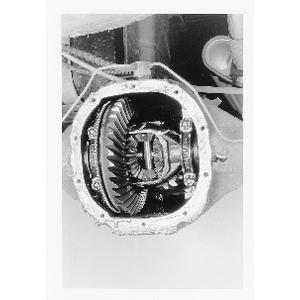
| Fig. 3: To remove the axle, first remove the rear axle
cover and drain the fluid
|
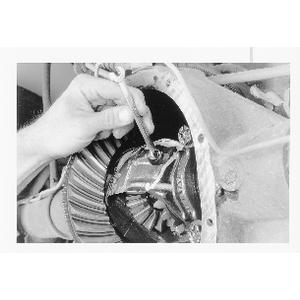
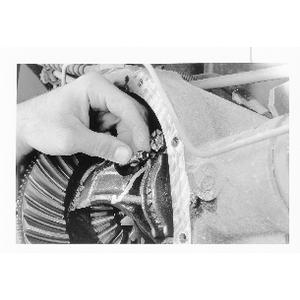
| Fig. 4: Next, loosen the pinion shaft lock bolt . . .
|
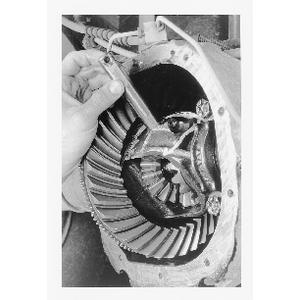
| Fig. 5: . . . and remove it from the axle carrier
|
NOTE: The pinion gears may be left in place. Once the axle shafts are removed, reinstall the pinion shaft and lock bolt.
| Fig. 6: Pull the pinion shaft out of the axle
carrier. DO NOT rotate the axle with the pinion shaft removed!
|
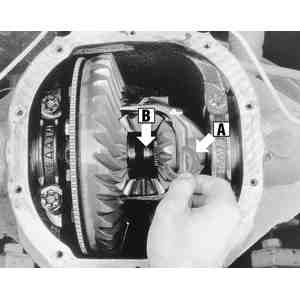
| Fig. 7: Push in on the axle flange (wheel side)
and remove the axle C-lock (A) from the end of the axle (B)
|
| Fig. 8: Slide the axle out of the axle tube.
Use care to not damage the bearing or seal
|
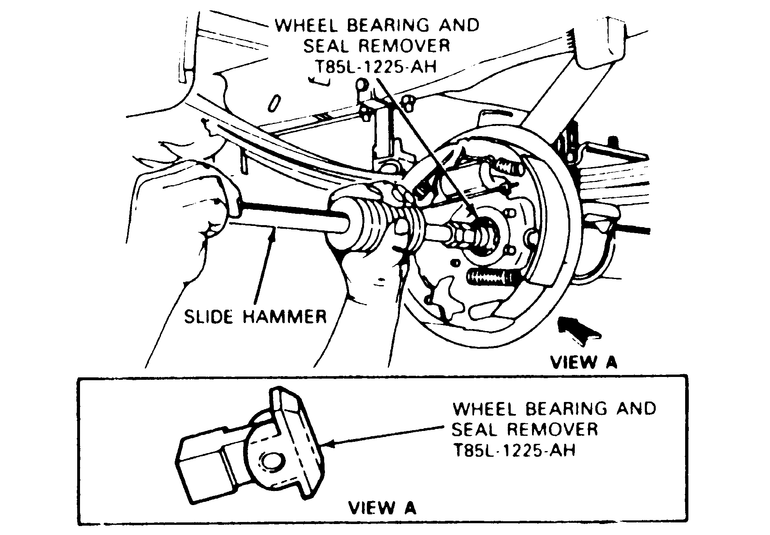
| Fig. 9: Axle shaft seal and bearing removal
|
To install:
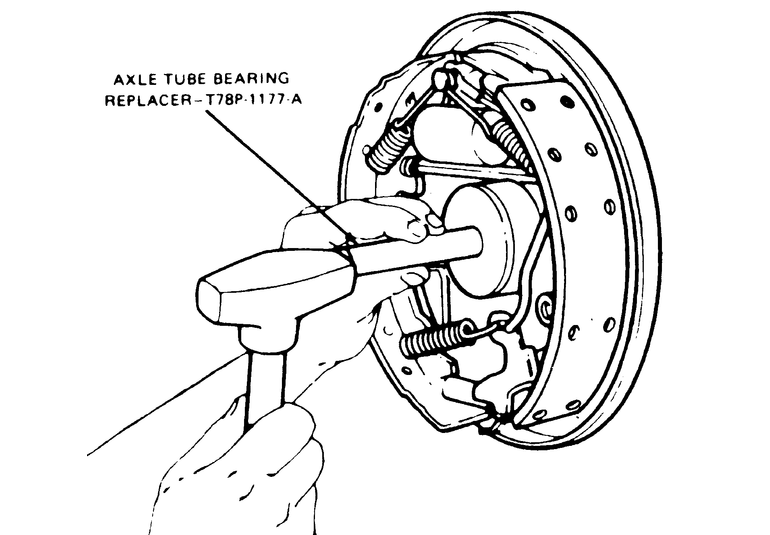
| Fig. 10: Axle shaft bearing and seal installation
|
NOTE: To permit axle shaft installation on 3.73:1 and 4.10:1 ratio axles, make sure the differential pinion shaft contacts the ring gear before performing Step 11.
NOTE: The cover assembly must be installed within 15 minutes of application of the silicone sealant.