Previous Next

Torsion Bar

REMOVAL & INSTALLATION

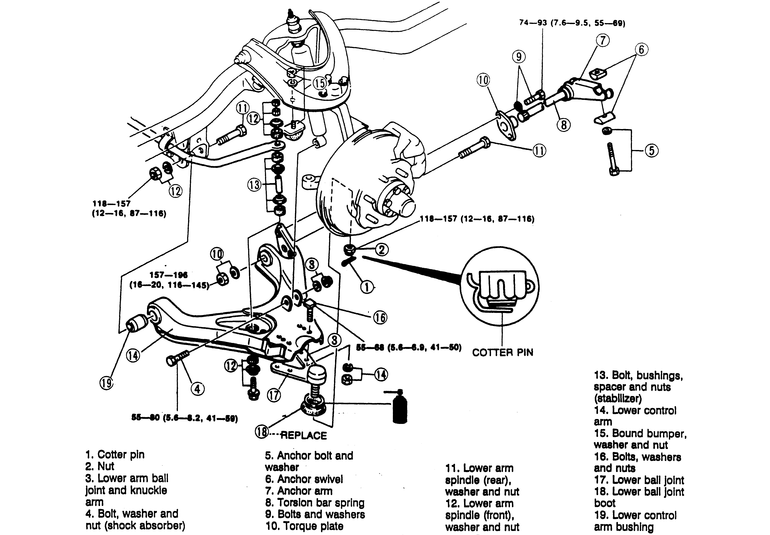
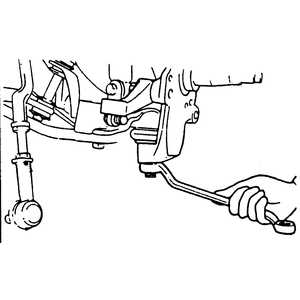
Fig. 1: B Series Pickup 4WD torsion bar spring and lower control arm assembly

Fig. 2: B Series Pickup 2WD torsion bar spring and lower control arm assembly

  1. Raise and safely support the vehicle. Remove the wheel and tire assembly.
  2. Support the lower control arm with a jack.
  3. Remove the cotter pin and nut from the lower ball joint stud. Separate the ball joint from the knuckle using tool 49 0727 575 or equivalent.
  4. Remove the bolt, washer and nut attaching the shock absorber to the lower control arm.
  5. Mark the position of the anchor bolt and swivel for reference during reassembly and remove the anchor bolt and swivel.
  6. Mark the position of the torsion bar on the anchor arm and remove the anchor arm.
  7. Mark the position of the torsion bar on the torque plate and remove the torsion bar. If removing the torsion bar from both sides of the vehicle, mark their positions as the torsion bars are not interchangeable.
  8. Remove the attaching bolts and remove the torque plate.
  9. Check the torsion bar for bending or for looseness between the serrations of the torsion bar and anchor arm and/or torque plate, replace as necessary.

    To install:

    Fig. 3: Installation of the torque plate

    Fig. 4: Connecting the torsion bar to the torque plate

  10. Install the torque plate and tighten the attaching bolts to 55–69 ft. lbs. (75–93 Nm).
  11. Coat the serrations of the torsion bar with grease and install in the torque plate, aligning the marks made during the removal procedure. If both torsion bars were removed, make sure the correct torsion bar is being installed.
  12. Coat the serrations on the other end of the torsion bar with grease and install the anchor arm onto the torsion bar, aligning the marks made during the removal procedure.

    Fig. 5: Connecting the anchor arm to the torsion bar

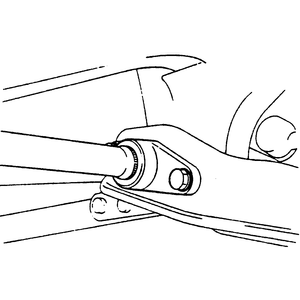
    Fig. 6: Installation of the anchor bolt

  13. Install the anchor bolt and swivel. Tighten the anchor bolt until the marks made during removal are aligned.
  14. Connect the shock absorber to the lower control arm and loosely tighten the nut and bolt. Connect the lower ball joint to the knuckle; install the nut and tighten to 87–116 ft. lbs. (118–157 Nm). Install a new cotter pin.
  15. Install the wheel and tire assembly and lower the vehicle. With the vehicle unladen, tighten the shock absorber-to-lower control arm bolt and nut to 41–59 ft. lbs. (55–80 Nm).

    Fig. 7: Tighten the lower ball joint-to-knuckle mounting nut

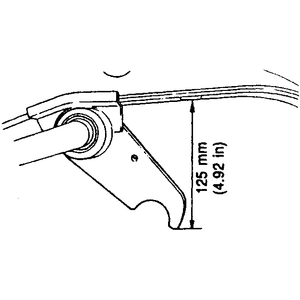
    Fig. 8: Ride height measuring points

  16. Check vehicle ride height as follows:
    1. Check the front and rear tire pressures and bring to specification.
    2. Measure the distance from the center of each front wheel to the fender brim. The difference must not be greater than 0.39 inch (10mm).
    3. If the difference is not as specified, turn the necessary torsion spring anchor bolt to adjust.
  17. Check the front end alignment.

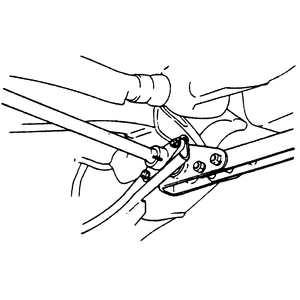
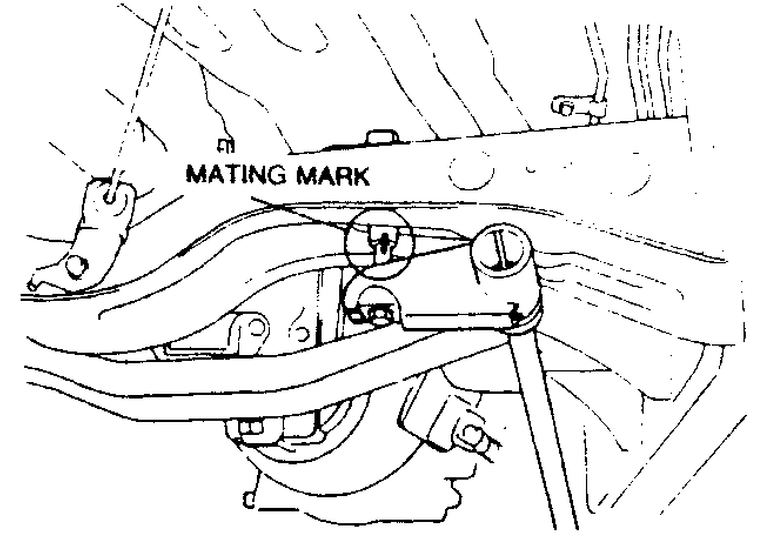
    Fig. 9: Anchor arm installation when reference marks are not available

    NOTE: If, for some reason, you didn't matchmark the torsion bar anchor bolt, or the matchmarks were lost, or you're installing a new, unmarked torsion bar, here's a procedure to help you attain the correct ride height:

    1. Install the anchor arm on the torsion bar so that there is 4.92 inches (125mm) between the lowest point on the arm and the crossmember directly above it.
    2. Tighten the anchor bolt until the anchor arm contacts the swivel. Then, tighten the bolt an additional 1.77 inches (45mm) travel.

Previous Next