Previous Next

Brake Drums

REMOVAL & INSTALLATION

Pickups and MPV

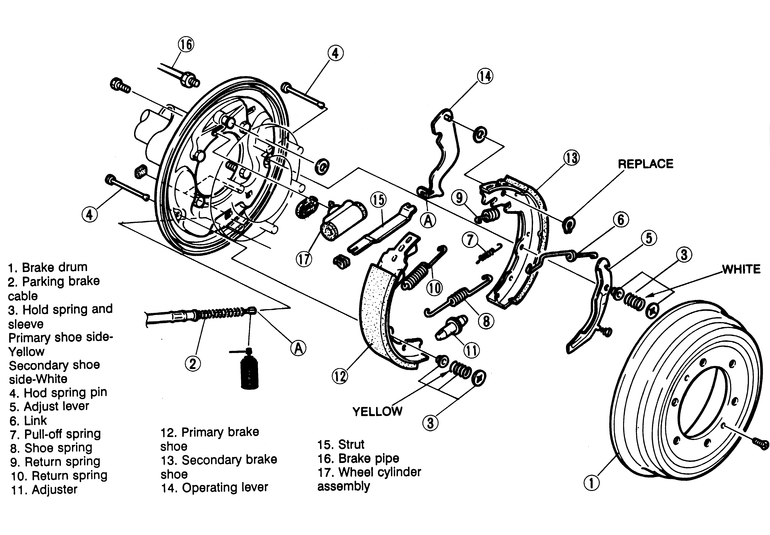
Fig. 1: Exploded view of the rear brake assembly

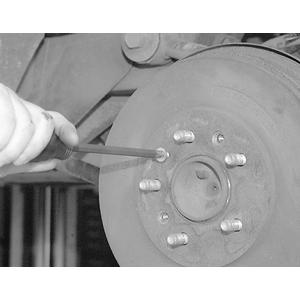
Fig. 2: Loosen the rear drum mounting screw. If the screw will not rotate very easily, an impact driver can be utilized first

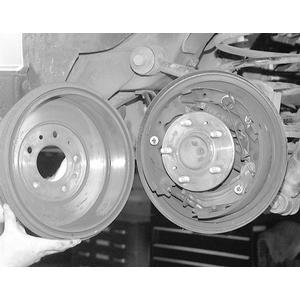
Fig. 3: Once the mounting screw is removed, pull the drum right off

  1. Raise and support the rear end on jackstands.
  2. Remove the wheels.
  3. Remove the drum attaching screws and insert them in the threaded holes in the drum. Turn the screws inward, evenly, to force the rum off the hub.
  4. Thoroughly inspect the drum. Discard a cracked drum. If the drum is suspected of being out of round, or shows signs of wear or has a ridged or rough surface, have it turned on a lathe at a machine shop. The maximum oversize is stamped into the drum.
  5. Installation is the reverse of removal. Make sure that the holes are aligned for the attaching screws. Tighten the screws evenly to install the drum.
Navajo
  1. Raise the vehicle so that the wheel to be worked on is clear of the floor and install jackstands under the vehicle.
  2. Remove the hub cap and the wheel/tire assembly. Remove the 3 retaining nuts and remove the brake drum. It may be necessary to back off the brake shoe adjustment in order to remove the brake drum. This is because the drum might be grooved or worn from being in service for an extended period of time.
  3. Before installing a new brake drum, be sure and remove any protective coating with carburetor degreaser.
  4. Install the brake drum in the reverse order of removal and adjusts the brakes.

Previous Next