Previous Next

Caliper

REMOVAL & INSTALLATION

Pickups and MPV

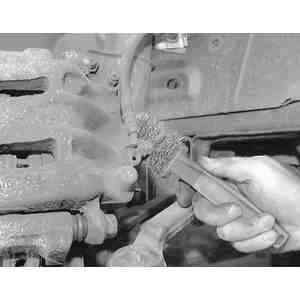
Fig. 1: Before disconnecting the brake hose at the caliper, clean any dirt or debris from the hose and banjo bolt connection using a wire brush

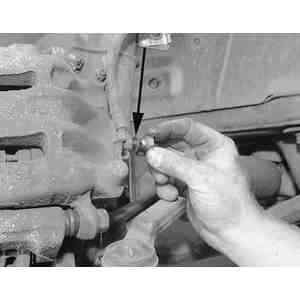
Fig. 2: Remove the banjo bolt from the caliper connection. Be careful not to lose the crush washer that is located between the brake hose and banjo bolt

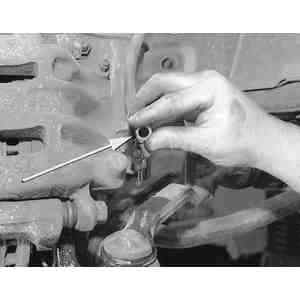
Fig. 3: Be careful not to lose the crush washer that is located between the caliper and the hose fitting. Note that the two crush washers at the brake hose fitting are of different sizes and must not be mixed up

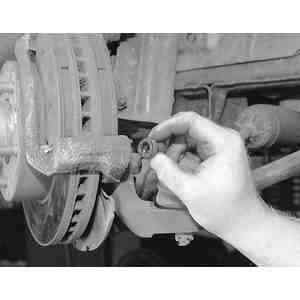
Fig. 4: Inspect the condition of the caliper sliding bolt rubber boots and replace if necessary

  1. Raise and safely support the vehicle. Remove the wheel and tire assembly.
  2. Remove the banjo bolt and disconnect the brake hose from the caliper. Plug the hose to prevent fluid leakage.
  3. On pickups, remove the caliper mounting bolt and pivot the caliper about the mounting pin and off of the brake rotor. Remove the caliper from the pin.
  4. On MPV, remove the caliper mounting bolts and remove the caliper.
  5. To install, place the caliper in position and secure the mounting bolts following the reverse order of removal. Lubricate the caliper mounting bolts or bolt and pin prior to installation.
  6. Tighten the caliper mounting bolt(s) to 23–30 ft. lbs. (31–41 Nm) on pickups; 61–69 ft. lbs. (83–93 Nm) on MPV. Bleed the brake system.
Navajo
  1. Siphon part of the brake fluid out of the master cylinder to avoid overflow when the caliper piston is pressed into the caliper bore.
  2. Raise the vehicle and support it safely. Remove the wheel and tire assembly.

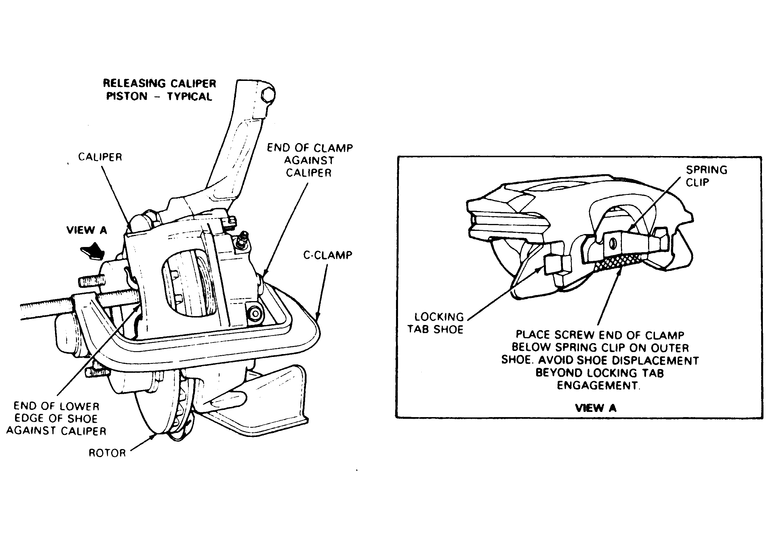
    Fig. 5: Use a C-clamp to push the caliper piston back into the bore slightly before removing the caliper

  3. Position an 8 inch (203mm) C-clamp on the caliper and tighten the clamp to move the caliper piston into the bore approximately 18 inch (3mm). Avoid clamp contact with the outer shoe spring clip. Remove the clamp.

    NOTE: Do not pry the piston away from the rotor.

  4. Clean excess dirt from the pin tab area.
  5. Using a 14 inch drive socket, 38 inch deep and a light hammer, tap the upper caliper pin towards the outboard side until the pin tabs pass the spindle face.
  6. Place one end of a 1/6 inch (11mm) diameter punch against the end of the caliper pin and tap the pin out of the caliper slide groove.
  7. Repeat the procedure to remove the lower caliper pin.
  8. Disconnect and plug the brake hose at the caliper. Remove the caliper from the rotor.

    To install:

  9. Make sure the caliper mounting surfaces are free of dirt. Lubricate the caliper grooves with disc brake caliper grease and install the caliper.
  10. From the caliper outboard side, position the pin between the caliper and spindle grooves. The pin must be positioned so the tabs will be installed against the spindle outer face.
  11. Tap the pin on the outboard end with a hammer until the retention tabs on the sides of the pin contact the spindle face.
  12. Repeat the procedure to install the lower pin.

    NOTE: During installation, do not allow the tabs of the caliper pin to be tapped too far into the spindle groove. If this happens, it will be necessary to tap the other end of the caliper pin until the tabs snap in place. The tabs on each end of the pin must be free to catch on the spindle face.

  13. Connect the brake hose to the caliper. Bleed the brake system.
  14. Install the wheel and tire assembly and lower the vehicle. Check the brake fluid level and check the brakes for proper operation.

Previous Next