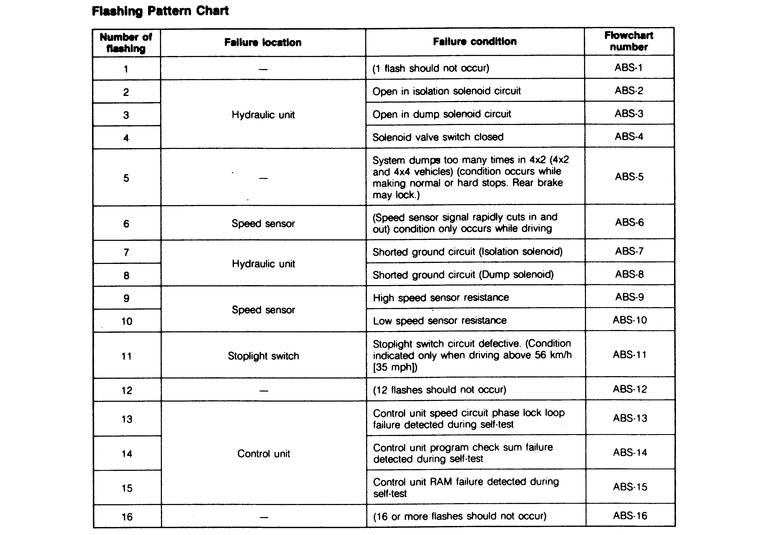
| Fig. 3: RABS trouble code index — Pickup
and MPV models
|
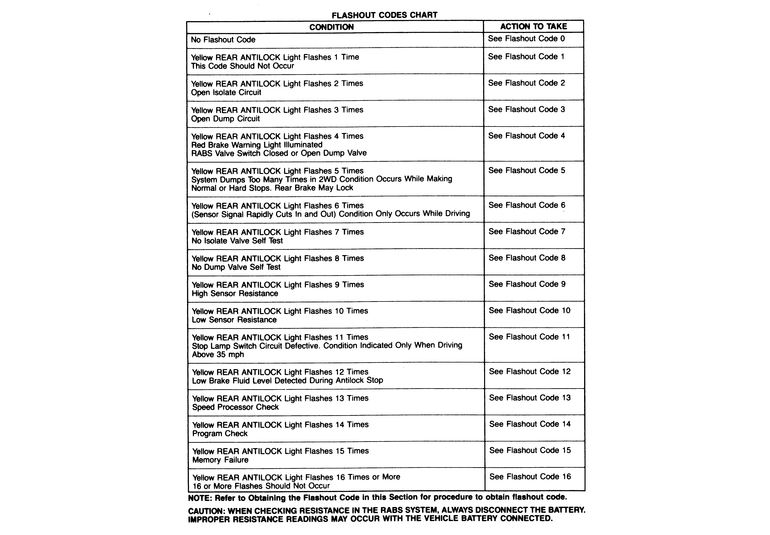
| Fig. 4: RABS trouble code index — Navajo
models
|
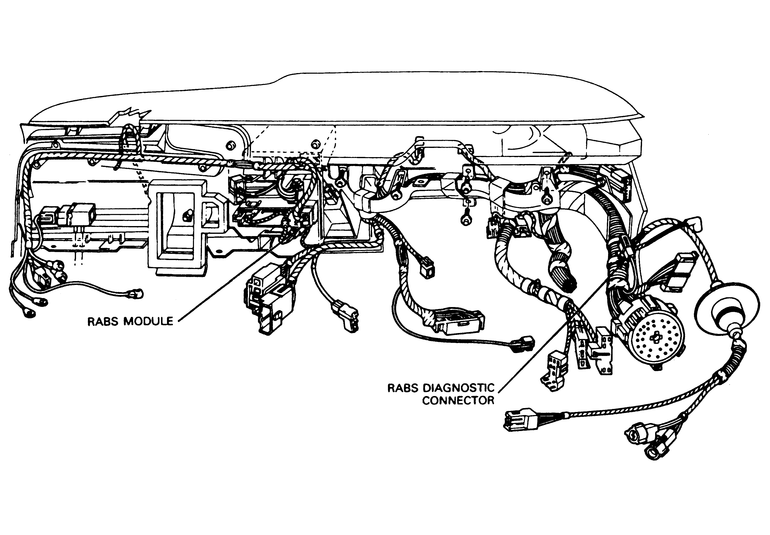
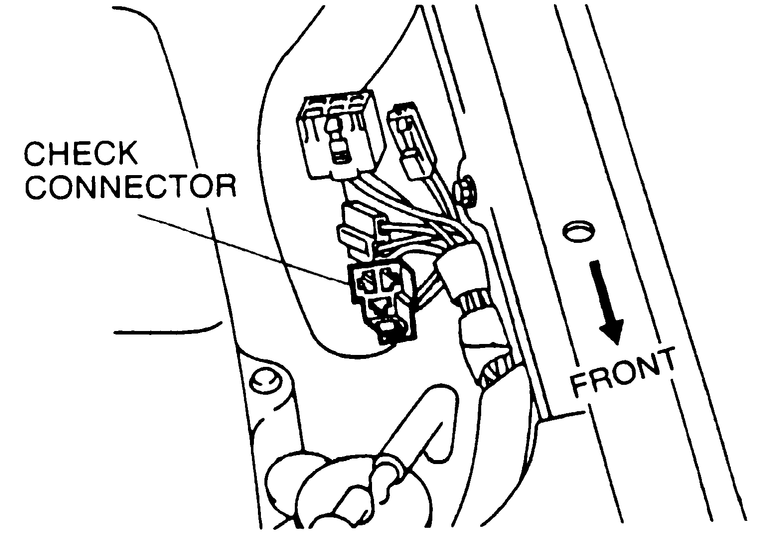
| Fig. 5: Location of the RABS diagnostic connector(s) — Navajo
models
|
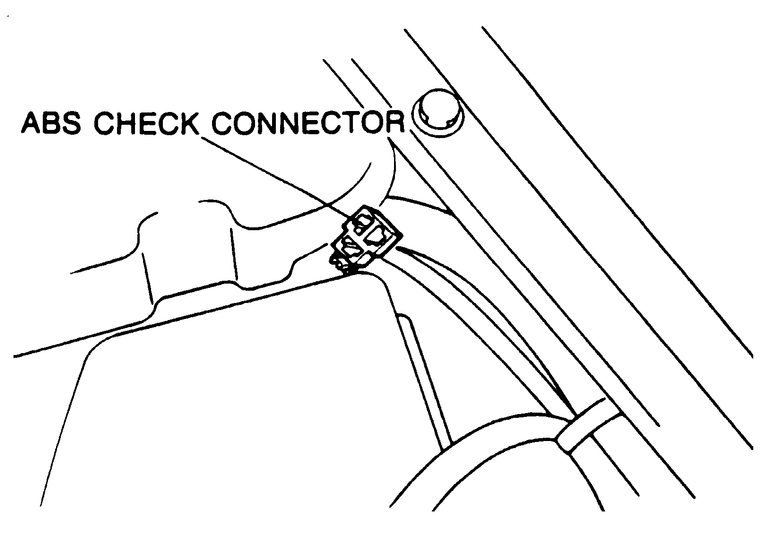
| Fig. 6: Location of the RABS diagnostic connector(s) — Pickup
models
|
| Fig. 7: Location of the RABS diagnostic connector(s) — MPV
models
|
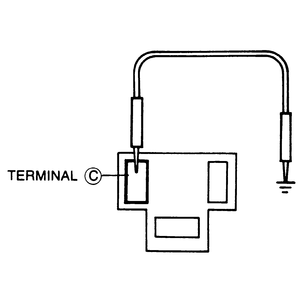
| Fig. 8: Access the flashcodes by connecting a jumper
wire between terminal C and ground of the diagnostic connector — Pickup
and MPV models
|
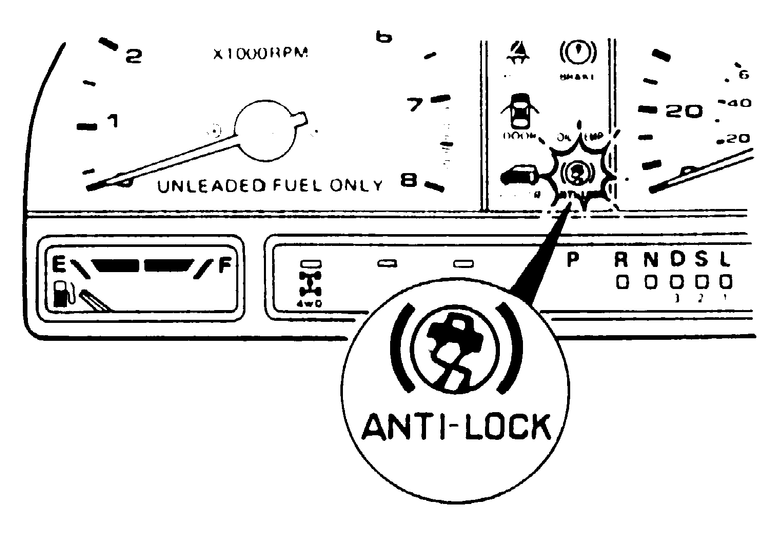
| Fig. 9: A code will flash on the instrument cluster
|
The control module performs system tests and self-tests during start up and normal operation. The valve, sensor, and fluid level circuits are monitored for proper operation. If a fault is found, the anti-lock system will be deactivated and the warning light will be illuminated. Most faults will cause the warning light to stay on until the ignition is turned off. While the light is illuminated a diagnostic flashout code may be obtained. However, there are certain faults (those associated with the fluid level switch or loss of power to the module), which cause the system to be deactivated and the warning light to be illuminated, but will not provide a diagnostic flashout code.
In most cases, the code will be lost if the vehicle is shut off. In other cases, the code may reappear when the vehicle is restarted, or the vehicle may have to be driven to reproduce the problem. If the problem was associated with an intermittent condition, it may be difficult to reproduce. Whenever possible, the code should be read before the vehicle is shut off.
CAUTION
Place blocks behind the rear wheels and in front of the front wheels to prevent
the vehicle from moving while the flashout code is being taken.
If the red brake light is also on, due to a grounding of the fluid level circuit (perhaps low brake fluid), no flashout code will be flashed and the anti-lock warning lamp will remain on steadily. If there is more than one system fault, only the first recognized code may be obtained.
A flashout code may be obtained only when the anti-lock warning light is on. No code will be flashed when the system is OK.
To check the anti-lock warning light for normal operation, insert the key in the ignition lock and turn it to the ON or START positions. The light should perform a self-check, glowing for about two seconds.
To obtain the flashout code, keep the ignition key in the ON position.
CAUTION
Place blocks behind the rear wheels and in front of the front wheels to prevent
the vehicle from moving while the flashout code is being taken.
NOTE: A flashing pattern consists of short flashes and ends with a long flash. Count the short flashes and include the long flash in the count. A same flashing pattern repeats until the ignition switch is turned OFF. Count the flash sequence several times to verify the number of flashes.