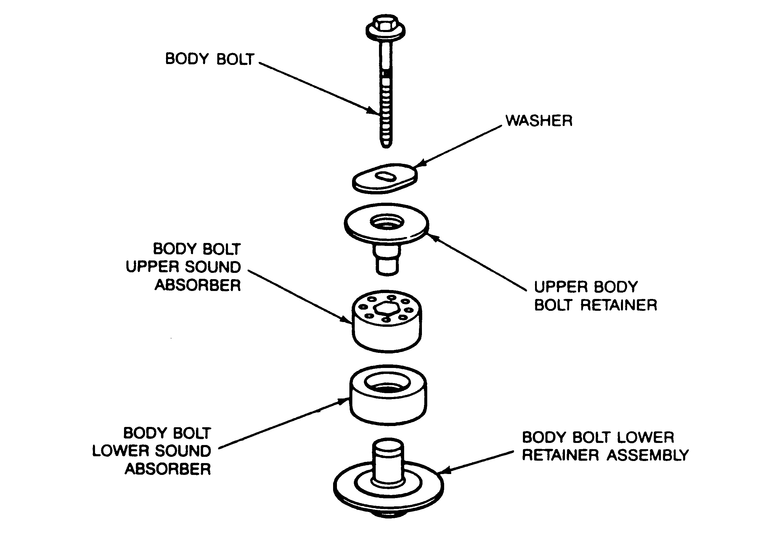
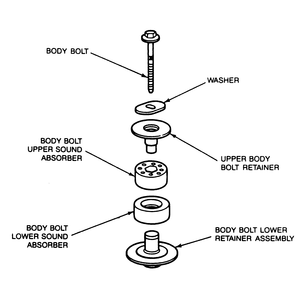
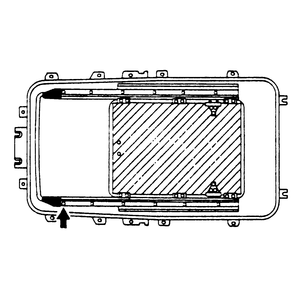
| Fig. 1: Exploded view of sunroof components
|
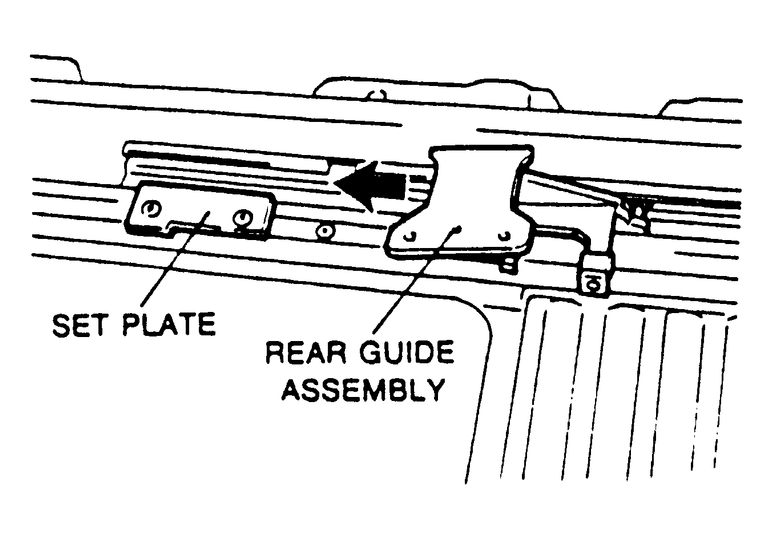
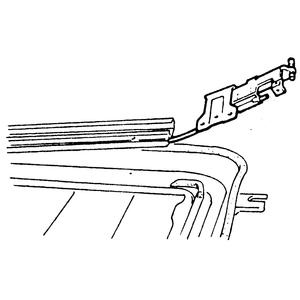
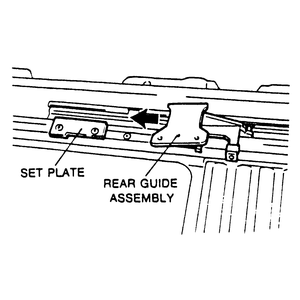
| Fig. 2: Remove the guide mounting screws, lift the guide
rail up and pull the rear guide assembly backward
|
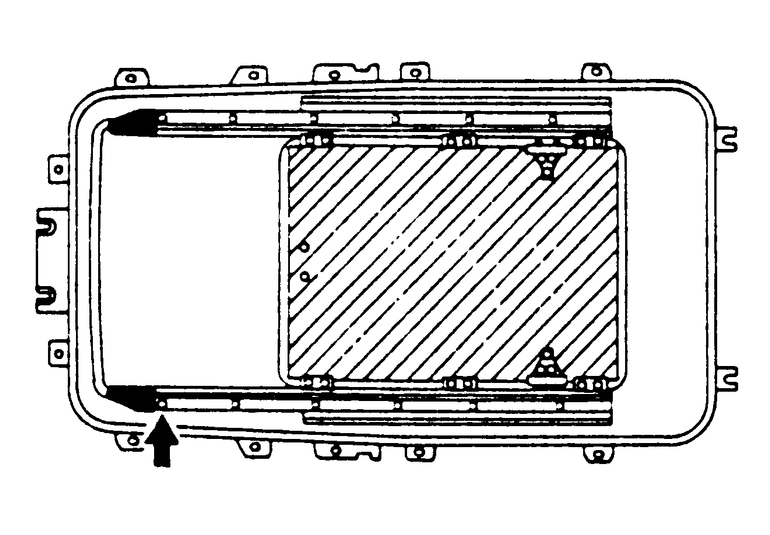
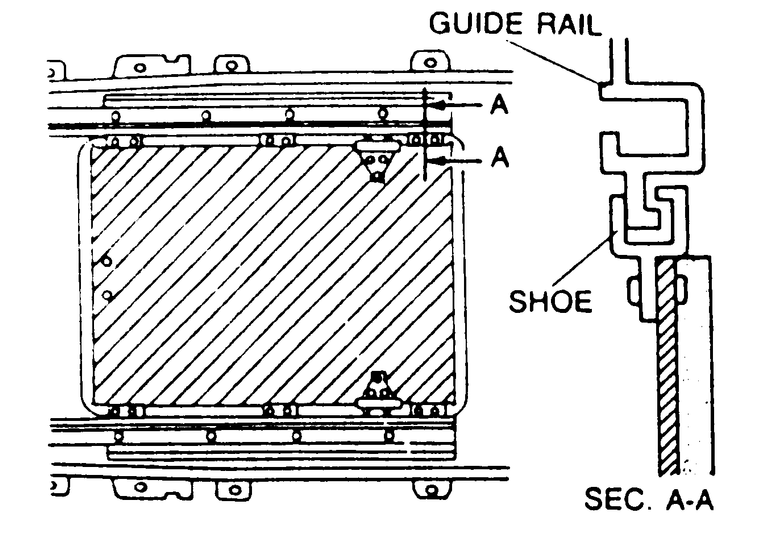
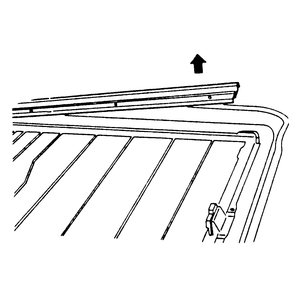
| Fig. 3: Remove the guide rail from the sliding roof frame,
lifting up the rear end of the guide rail
|
NOTE: Service to the sunroof harness, sunroof relay, drive
unit assembly, sunroof frame, sunshade and guide rail require headliner removal.
- Make sure the sunroof is fully closed, if possible. Disconnect the negative
battery cable.
- Remove the headliner.
- Slide the sunshade all the way to the rear. Fully close the sliding panel.
Remove the decoration cover mounting screws from the right and left decoration
covers and remove the covers.
- Remove the retaining nuts from the sliding panel and bracket. Remove the
sliding panel by pushing it upward from inside the vehicle. Take care to remove
the shims between the sliding panel and brackets before removing the sliding
panel.
- Remove the front guide assembly.
- Remove the air deflector. Remove the E-ring at the rear of the deflector
link, and remove the pin. Remove the screws and the deflector. Take care not
to damage the deflector link or connector.
- Remove the guide rail cover.
- Remove the sliding roof unit. Remove the mounting nuts securing the drive
unit and sliding roof unit to the body. With an assistant to help you, remove
the unit.
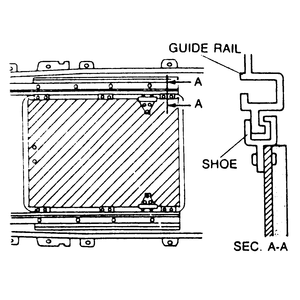
- Remove the sunshade from the guide rail. Remove the set plate. Remove the
guide rail mounting screws. Lift up the rear end of the guide rail and pull
out the rear guide assembly. Remove the guide rail from the sliding roof frame,
lifting up the rear end of the guide rail.
- Remove the sliding roof harness, sliding roof relay, drive unit assembly
and the sliding roof frame.
| Fig. 4: Install the guide rail to the sliding roof
|
| Fig. 5: Install the set plate to the guide rail
|
| Fig. 6: Install the sunshade
|
| Fig. 7: Insert the guide rail cover hook into the
sliding roof frame and secure with mounting screw
|
To install:
- Place the roof frame, drive unit, relay and harness in position.
- Put the guide rail on the sliding roof frame after applying sealant to the
underside of the guide rail.
- Set the guide rail to the sliding roof frame and install bolts to the second
screw holes.
- Install the set plate to the guide rail. Lift up the rear end of the rail
and insert the rear guide assembly until it reaches the set plate. Be sure
to assemble the bracket and drive cable before insertion.
- Lift up on the guide rail and install the sunshade sliding shoes into the
guide rail. Secure the guide rail to the sliding roof frame. Secure the sliding
roof unit to the body roof.
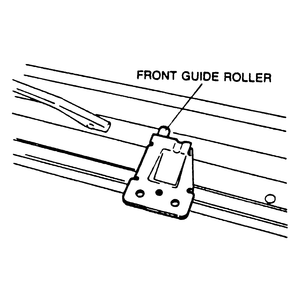
- Install the guide rail covers. Insert the front guide assembly into the
guide rail and set it to press the deflector link (sunroof in fully closed
position). The front guide rollers face forward.
- Install the sliding panel, rear end first. Insert the sliding panel bolts
into the bracket holes of the front and rear guide assemblies, tighten the
nuts. Be sure to install the shims in the same position from which they were
removed. Install the direction covers.
- Install the headliner.
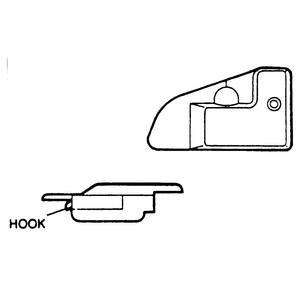
| Fig. 8: Install the front guide roller assembly,
roller faces forward
|
| Fig. 9: Insert the sliding panel
|
| Fig. 10: Temporary stop position

|