Previous Next

DRAIN & REFILL

Drain and refill the drive axle housings every 100,000 miles (160,000 km) on B Series Pickup/Navajo models, 60,000 miles (96,000 km) on MPV models, or any time the vehicle is driven in high water (up to the axle). Although some fluid can be removed using a suction gun, the best method is to remove the axle housing cover (if equipped) to ensure that all of any present contaminants are removed. As with any fluid change, the oil should be at normal operating temperature to assure the best flow and removal of fluid/contaminants.

NOTE: If there is no housing cover or drain plug, you will need to use a suction gun through the fill hole to remove the fluid.

Drive Axle Equipped with a Housing Cover
  1. Drive the vehicle until the lubricant reaches normal operating temperature.
  2. If necessary for access, raise and support the vehicle safely using jackstands, but be sure that the vehicle is level so you can properly refill the axle when you are finished.

    NOTE: If a suction gun is used to drain the fluid, remove the fill plug and insert the suction tube into the fill hole until it rests at the lowest most point inside the housing. Operate the suction gun as per the manufacturers directions. When the fluid is completely removed, skip to the differential filling procedure.

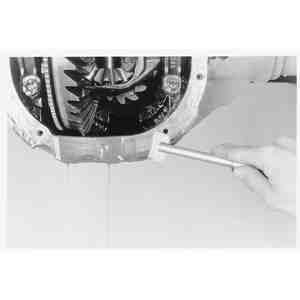
    Fig. 1: Remove the fill plug, then clean the area around the axle housing cover to prevent dirt from entering it

  3. Use a wire brush to clean the area around the differential. This will help prevent dirt from contaminating the differential housing while the cover is removed.
  4. Position a drain pan under the drive axle.

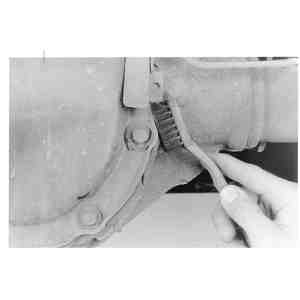
    Fig. 2: Loosen and remove all but two of the cover retaining bolts. Don't lose the axle identification tag

  5. Loosen and remove all but 2 of the housing cover's upper or side retaining bolts. The remaining 2 bolts should then be loosened to within a few turns of complete removal. Use a small prytool to carefully break the gasket seal at the base of the cover and allow the lubricant to drain. Be VERY careful not to force or damage the cover and gasket mating surface.

    Fig. 3: With the remaining bolts loose, carefully pry out on the cover (to break the seal) and allow the fluid to drain

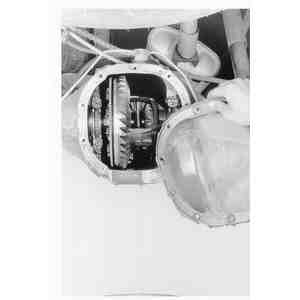
    Fig. 4: Once most of the fluid has drained, remove the remaining bolts and pull the cover from the housing

  6. Once most of the fluid has drained, remove the final retaining bolts and separate the cover from the housing.

    To fill the differential:

  7. Carefully clean the gasket mating surfaces of the cover and axle housing of any remaining gasket or sealer. A putty knife is a good tool to use for this. You may want to cover the differential gears using a rag or piece of plastic to prevent contaminating them with dirt or pieces of the old gasket.

    Fig. 5: Remove any old gasket material from the sealing surfaces then clean them of any residual oil

  8. Install the housing cover using a new gasket and sealant. Tighten the retaining bolts using a crisscross pattern.

    NOTE: Make sure the vehicle is level before attempting to add fluid to the drive axle, otherwise an incorrect fluid level will result.

  9. Refill the drive axle housing using the proper grade and quantity of lubricant. Install the filler plug, operate the vehicle and check for any leaks.
Drive Axle Equipped with a Drain Plug

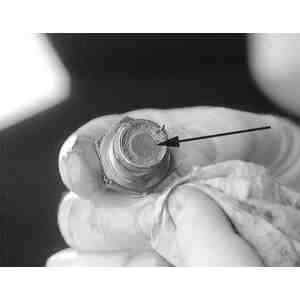
Fig. 6: Be careful not to lose the fill plug washer, however, inspect the condition of the washer and replace it if necessary

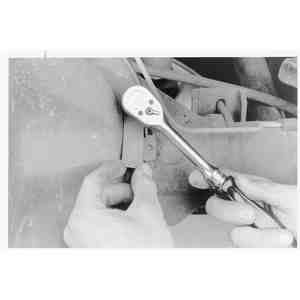
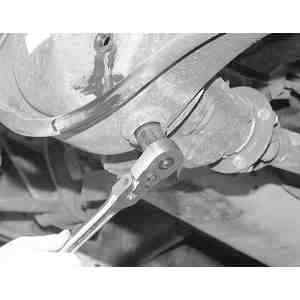
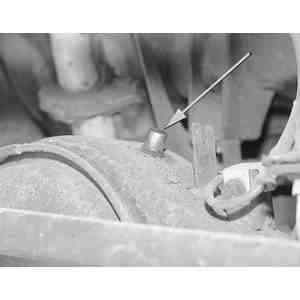
Fig. 7: Using a 24 mm socket, loosen the differential housing fluid drain plug

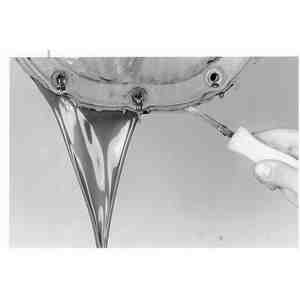
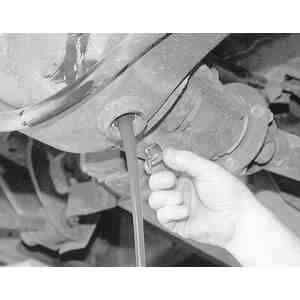
Fig. 8: Remove the differential drain plug and allow the fluid to drain in an approved container

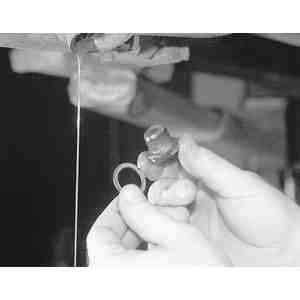
Fig. 9: Be careful not to lose the differential drain plug washer, inspect and replace if necessary

Fig. 10: Most differential drain plugs have a small magnet in the center to catch any small metallic fragments in the fluid

Fig. 11: Always inspect the air vent tube or cap (located on the top of the differential housing) for obstructions and clean if necessary

  1. Drive the vehicle until the lubricant reaches normal operating temperature.
  2. If necessary for access, raise and support the vehicle safely using jackstands, but be sure that the vehicle is level so you can properly refill the axle when you are finished.
  3. Use a wire brush to clean the area around the drain and fill plugs. This will help prevent dirt from contaminating the differential housing while the plugs are removed.
  4. Position a drain pan under the drive axle.
  5. Remove the fill plug and washer first, then the drain plug and washer second. Wipe the plugs clean.
  6. Once most of the fluid has drained, install the drain plug with a new washer. Tighten the drain plug to 29–39 ft. lbs. (40–53 Nm).

    To fill the differential:

    NOTE: Make sure the vehicle is level before attempting to add fluid to the drive axle, otherwise an incorrect fluid level will result.

  7. Refill the drive axle housing using the proper grade and quantity of lubricant. Install the fill plug with a new washer. Tighten the fill plug to 29–39 ft. lbs. (40–53 Nm).
  8. Lower the vehicle.
  9. Operate the vehicle and check for any leaks.

Previous Next