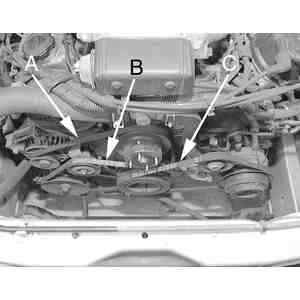
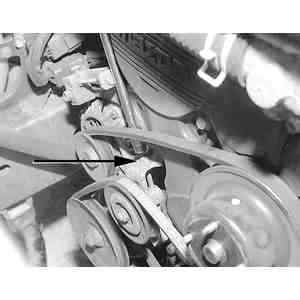
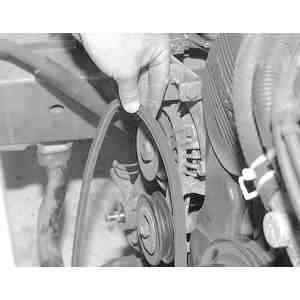
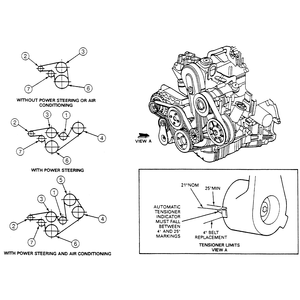
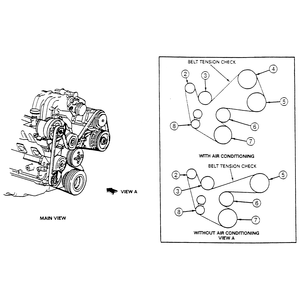
| Fig. 1: (A) Alternator belt, (B) Power steering pump
belt, (C) A/C compressor belt — MPV with 3.0L engine shown
|
- Turn the ignition OFF and remove the key. Allow the engine
to cool.
- Loosen the idler pulley locknut to release the drive belt tension.
- Remove the power steering belt.
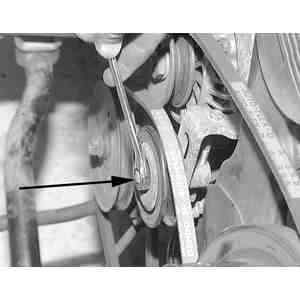
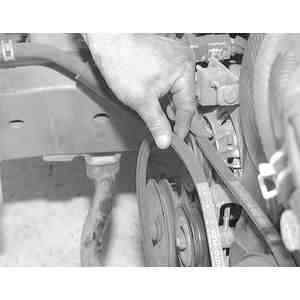
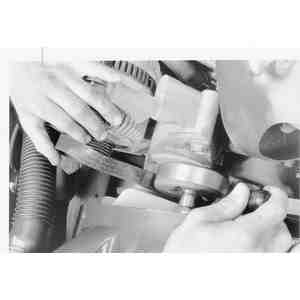
| Fig. 2: Using a boxwrench, loosen the power steering
pump belt idler pulley lockbolt
|
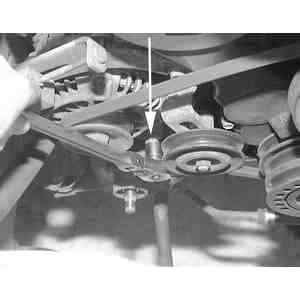
| Fig. 3: Loosen the power steering pump belt by turning
the idler pulley adjusting bolt
|
| Fig. 4: Remove the power steering pump belt
|
To install:
- Install the power steering belt and make sure it is correctly seated on
the pulleys.
- Adjust the power steering belt tension/deflection by turning the adjusting
bolt. A new belt should deflect 0.26–0.28 in. (6.6–7.2mm) and
a used belt should deflect 0.28–0.31 in. (7–8mm).
- Tighten the idler pulley locknut to 27–38 ft. lbs. (37–52 Nm).
- Run the engine for 5 minutes and then recheck the belt deflection.
- Turn the ignition OFF and remove the key. Allow the engine
to cool.
- Remove the power steering pump belt and A/C compressor belt, if necessary.
- Loosen the alternator upper bracket adjusting bolt.
- Loosen the lower through-bolt.
- Remove the alternator belt.
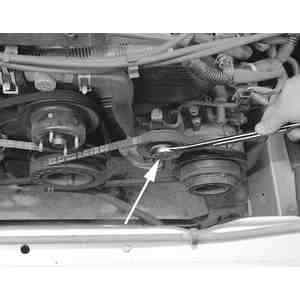
| Fig. 5: To access the alternator pivot bolt, you
must first remove the power steering pump pulley

|
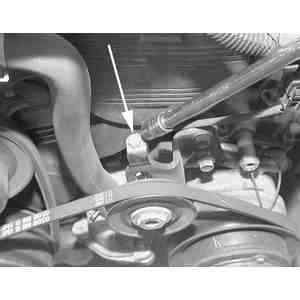
| Fig. 6: Loosen the alternator pivot bolt located
just below the alternator assembly
|
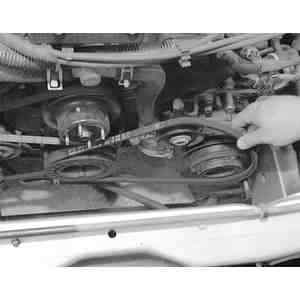
| Fig. 7: Loosen the alternator adjuster lockbolt (A),
then turn the adjustment nut (B) to loosen the slack on the belt .
. .
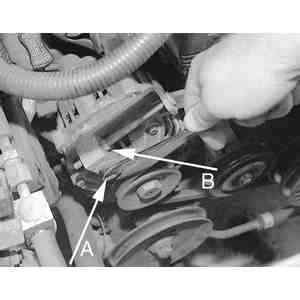
|
| Fig. 8: . . . then remove the alternator belt
|
To install:
- Install the alternator belt and make sure it is correctly seated on the
pulleys.
- Turn the adjusting bolt to adjust the belt deflection. New belts should
deflect 0.39–0.47 in. (10–12mm). Used belts should deflect 0.43–0.51
in. (11–13mm).
- Once the correct deflection has been reached, tighten the upper bracket
lock bolt to 14–19 ft. lbs. (19–25 Nm).
- Tighten the lower through-bolt to 28–38 ft. lbs. (38–51 Nm).
- Install and tension the power steering pump belt and A/C compressor belt,
if necessary.
- Run the engine for 5 minutes and then recheck the belt deflection.
- Turn the ignition OFF and remove the key. Allow the engine
to cool.
- Remove the power steering pump belt and alternator belt, if necessary.
- Loosen the tensioner bracket adjusting bolt and tensioner pulley center
locknut to release the drive belt tension.
- Remove the A/C belt.
| Fig. 9: Loosen the A/C compressor belt idler pulley
lockbolt using an open end wrench
|
| Fig. 10: Loosen the A/C compressor belt idler pulley
adjusting bolt just enough to be able to remove the belt
|
| Fig. 11: Remove the A/C compressor belt
|
To install:
- Install the A/C belt, and make sure it is correctly seated on the pulleys.
- Adjust the A/C belt tension/deflection by turning the tensioner bracket
adjusting bolt. A new belt should deflect 0.33–0.39 in. (8.5–10mm),
and a used belt should deflect 0.39–0.45 in. (10–11.5mm).
- Tighten the tensioner pulley center locknut to 27–38 ft. lbs. (37–52
Nm).
- Install and tension the alternator belt, if necessary, and the power steering
pump belt.
- Run the engine for 5 minutes and then recheck the belt deflection.
All Navajo and B Series Pick-up engines utilize one wide-ribbed V-belt to drive
the engine accessories such as the water pump, alternator, air conditioner compressor,
air pump, etc. Because this belt uses a spring loaded tensioner for adjustment,
belt replacement tends to be somewhat easier than on engines where accessories
are pivoted and bolted in place for tension adjustment, such as the MPV. Basically,
all belt replacement involves is to pivot the tensioner to loosen the belt,
then slide the belt off of the pulleys. The two most important points are to
pay CLOSE attention to the proper belt routing (since serpentine belts tend
to be "snaked'' all different ways through the pulleys) and to make sure the
V-ribs are properly seated in all the pulleys.
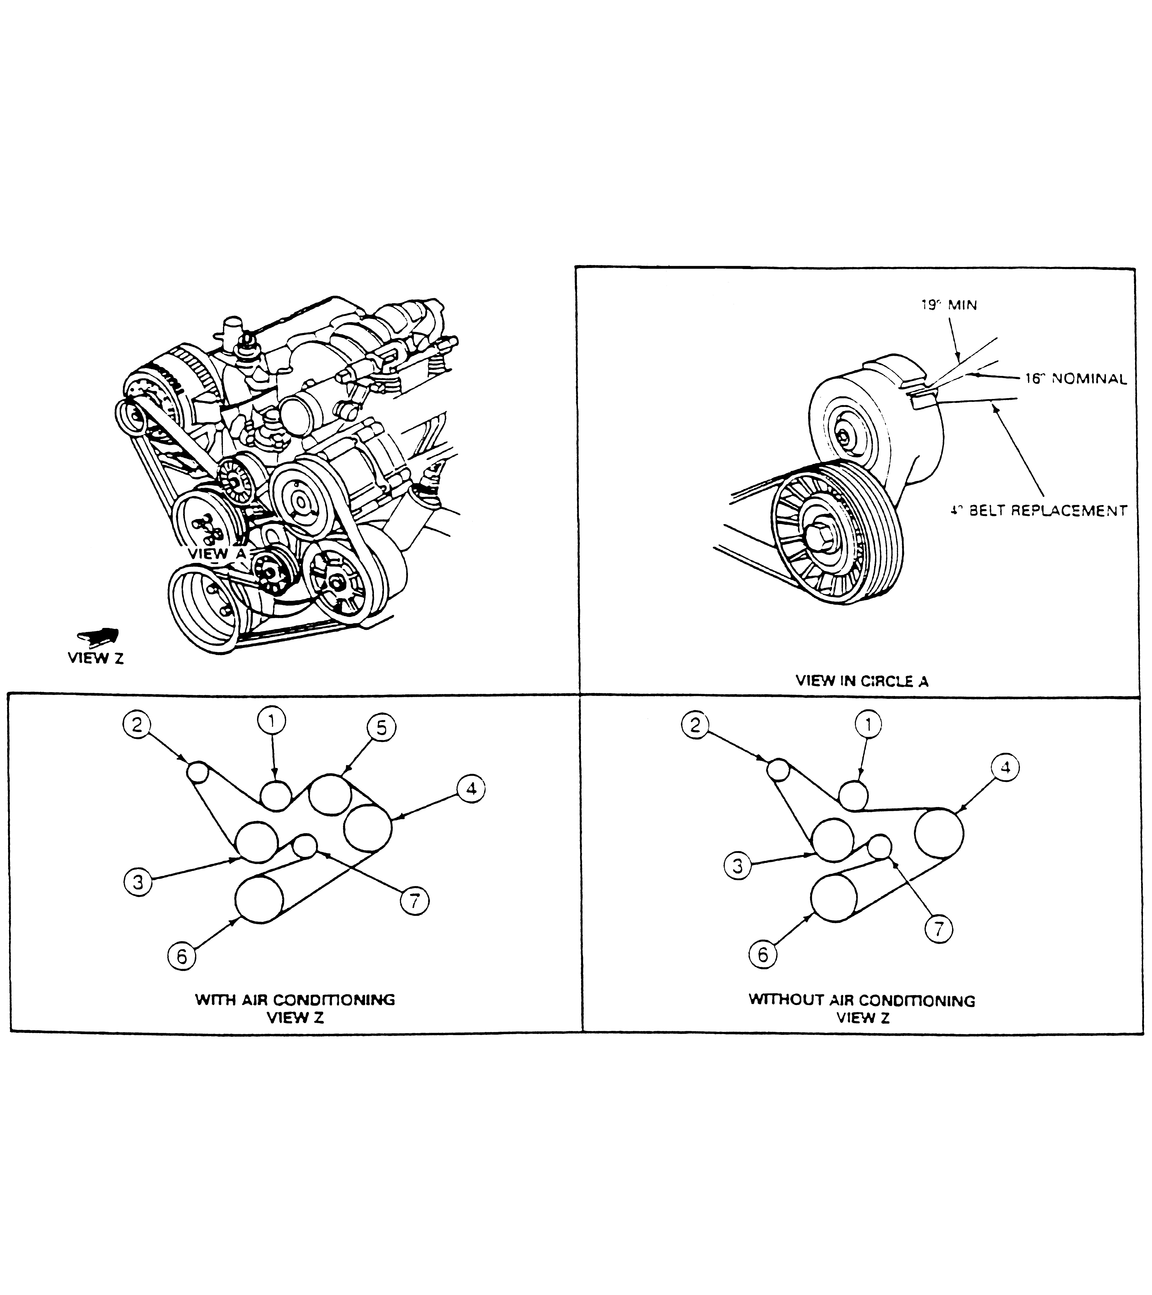
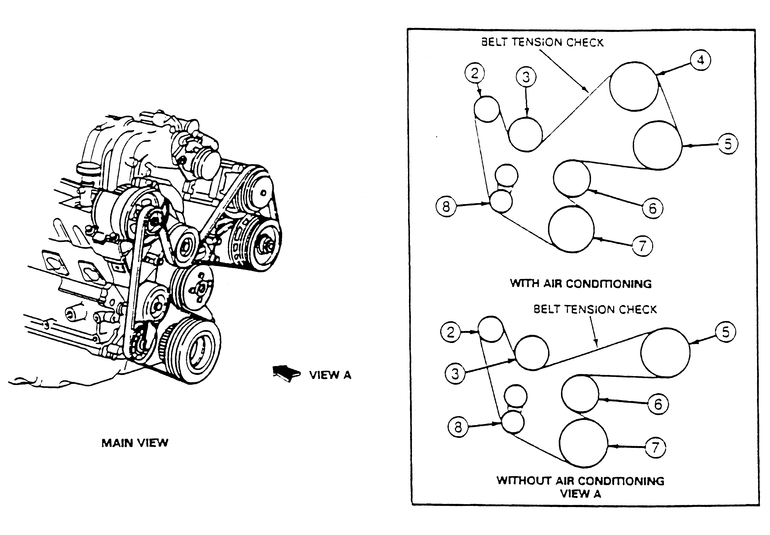
| Fig. 12: Belt routing diagram — 2.3L/2.5L
engines
|
| Fig. 13: Belt routing diagram — 3.0L
engines
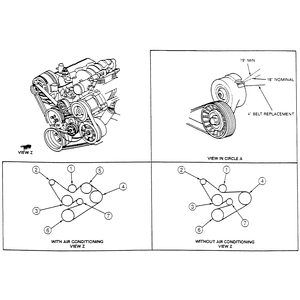
|
| Fig. 14: Belt routing diagram — 4.0L
engines
|
Although belt routing diagrams have been included in this section, the first
places you should check for proper belt routing are the labels in your engine
compartment. These should include a belt routing diagram which may reflect changes
made during a production run.
| Fig. 15: A belt routing label can usually be found under
the hood

|
- Disconnect the negative battery cable for safety. This will help assure
that no one mistakenly cranks the engine over with your hands between the
pulleys.
NOTE: Take a good look at the installed belt and make a
note of the routing. Before removing the belt, make sure the routing matches
that of the belt routing label or one of the diagrams in this book. If for
some reason a diagram does not match (you may not have the original engine
or it may have been modified,) carefully note the changes on a piece of
paper.
- For tensioners equipped with a 1⁄2 inch
square hole, insert the drive end of a large breaker bar into the hole. Use
the breaker bar to pivot the tensioner away from the drive belt. For tensioners
not equipped with this hole, use the proper-sized socket and breaker bar (or
a large handled wrench) on the tensioner idler pulley center bolt to pivot
the tensioner away from the belt. This will loosen the belt sufficiently that
it can be pulled off of one or more of the pulleys. It is usually easiest
to carefully pull the belt out from underneath the tensioner pulley itself.
| Fig. 16: Once the tension is relieved, slip the belt
off the pulley then slowly release the tensioner
|
- Once the belt is off one of the pulleys, gently pivot the tensioner back
into position. DO NOT allow the tensioner to snap back, as this could damage
the tensioners internal parts.
- Now finish removing the belt from the other pulleys and remove it from the
engine.
To install:
- While referring to the proper routing diagram (which you identified earlier),
begin to route the belt over the pulleys, leaving whichever pulley you first
released it from for last.
- Once the belt is mostly in place, carefully pivot the tensioner and position
the belt over the final pulley. As you begin to allow the tensioner back into
contact with the belt, run your hand around the pulleys and make sure the
belt is properly seated in the ribs. If not, release the tension and seat
the belt.
- Once the belt is installed, take another look at all the pulleys to double
check your installation.
- Connect the negative battery cable, then start and run the engine to check
belt operation.
- Once the engine has reached normal operating temperature, turn the ignition OFF and
check that the belt tensioner arrow is within the proper adjustment range.