Previous Next

REMOVAL & INSTALLATION

Navajo and B Series Pick-up Models

Fig. 1: Alternator installation — 2.3L engine, 2.5L engine similar

  1. Disconnect the negative battery cable.
  2. Remove the accessory drive belt.
  3. Label and disengage all of the wiring connectors from the alternator. To disconnect push-on type terminals, disengage the lock tab and pull straight off.
  4. Remove the alternator bolts, then remove the alternator from the engine

    To install:

  5. Position the alternator on the engine.
  6. Install the alternator mounting bolts. Tighten the mounting bolts to 30–40 ft. lbs. (40–55 Nm).
  7. Install the accessory drive belt. Ensure that the drive belt is properly installed on the pulleys before starting the engine.
  8. Attach all engine wiring harness connectors to the alternator.
  9. Connect the negative battery cable.
MPV Models
2.6L ENGINE

Fig. 2: Alternator installation — 2.6L engine

  1. Disconnect the negative battery cable.
  2. Tag and disconnect the wire and connector from the alternator.
  3. Remove the drive belt.
  4. Remove the support mounting bolt and nut.
  5. Remove the alternator assembly.

    To install:

  6. Position the alternator assembly against the engine and install the support bolt.
  7. Install the adjusting strap mounting bolt.
  8. Install and adjust the alternator belt.
  9. Tighten the support mounting bolt to 28–38 ft. lbs. (38–51 Nm), and the adjusting bolt to 14–18 ft. lbs. (19–25 Nm).
  10. Connect all alternator terminals.
  11. Connect the negative battery cable.
3.0L ENGINE

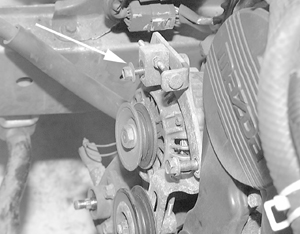
Fig. 3: Remove the top adjuster locking bolt from the alternator . . .

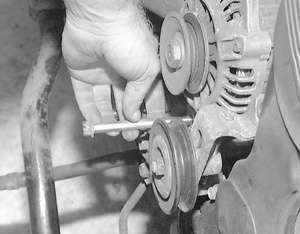
Fig. 4: . . . then loosen and remove the lower alternator pivot bolt

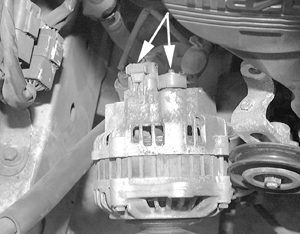
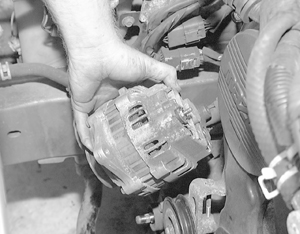
Fig. 5: Pull the alternator out slightly and disconnect the wires behind the alternator

Fig. 6: Remove the alternator unit from the vehicle

  1. Disconnect the negative battery cable. Wait at least 90 seconds before performing any work.
  2. Remove the drive belts.
  3. Remove the power steering pulley.
  4. Remove the mounting and adjusting bolts.
  5. After removing the mounting fasteners, pull the alternator unit out just enough to disconnect the wire and connector from the behind.
  6. Remove the alternator assembly.

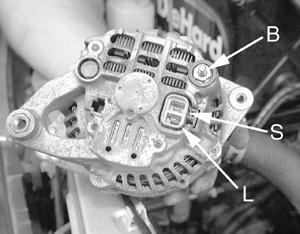
    Fig. 7: Alternator wiring terminal identifications

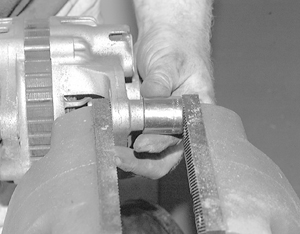
    Fig. 8: Mount the alternator in a bench vise with a correct fitting socket and compress the rubber mounting bushing into the bracket hole

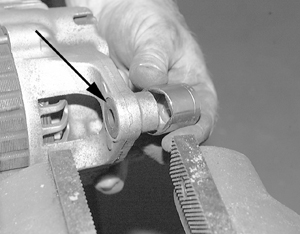
    Fig. 9: Check to make sure that the bushing is not damaged and compressed properly

  7. Mount the alternator onto a bench vise. Using a correct fitting socket, compress the rubber mounting bushing into the bracket hole. Check to make sure that the bushing is compressed properly and not damaged.

    To install:

  8. Position the alternator assembly against the engine and install the support bolt.
  9. Install the adjusting strap mounting bolt.
  10. Install the power steering pulley. Tighten the nut to 29–43 ft. lbs. (40–58 Nm).
  11. Install and adjust the drive belts.
  12. Tighten the support mounting bolt to 28–38 ft. lbs. (38–51 Nm), and the adjusting bolt to 14–18 ft. lbs. (19–25 Nm).
  13. Connect all alternator terminals.
  14. Connect the negative battery cable.

Previous Next