WARNING
When detaching the hardshell connector at the S-terminal, grasp the
plastic shell to pull it off. Do not pull on the wire itself. Ensure
to pull the connector straight off to prevent damage to the connector
and S-terminal. If any part of the connector is damaged, replace the
damaged component.
| Fig. 1: Some starters use a self-threading bolt
to hold the starter cable
|
To install:
Install the starter cable nut to the starter solenoid B-terminal. Tighten the nut to 80–123 inch lbs. (9–14 Nm).
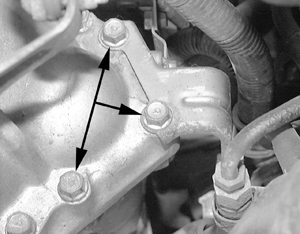
| Fig. 2: Remove the three starter motor-to-transmission
mounting bolts
|
Fig. 3: Pull the starter motor out just far enough
to access the starter motor wiring connections 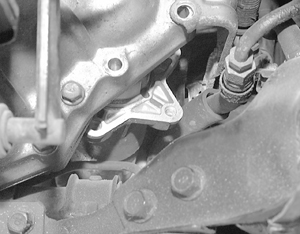 |
Fig. 4: Disconnect the starter motor wiring harness
connectors 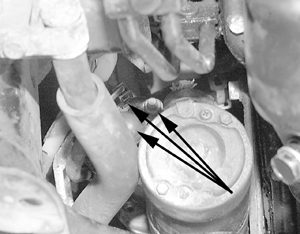 |
Fig. 5: Carefully pull the starter motor forward
and out from below the vehicle 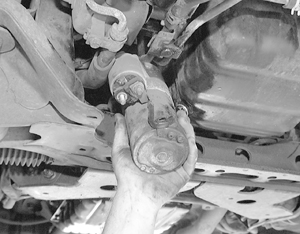 |
Fig. 6: After removing the starter motor, inspect
the starter motor gear teeth . . . 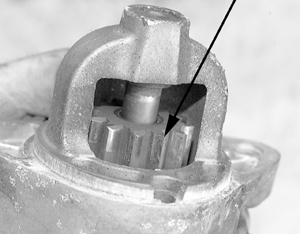 |
Fig. 7: . . . then inspect the flywheel gear
teeth 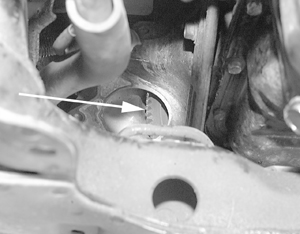 |
To install:
| Fig. 8: Starter installation — 4WD
|
To install: