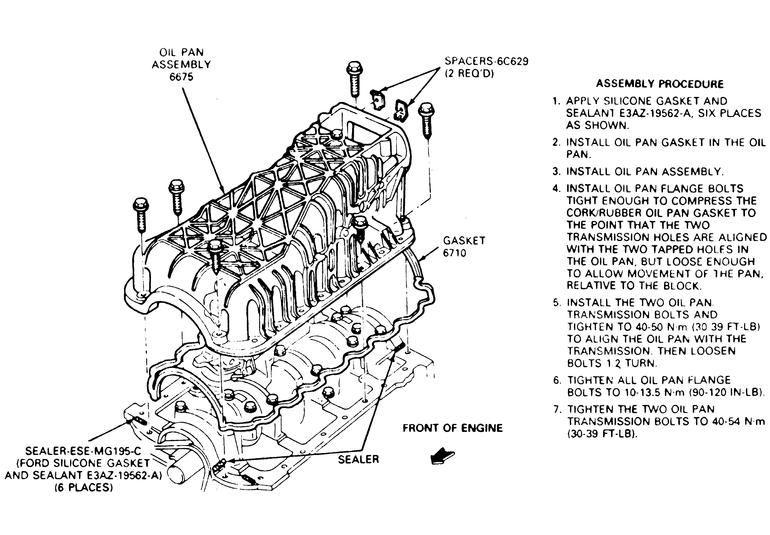
| Fig. 1: Oil pan on the 1994 2.3L engine — 1995 — 98
engines similar
|
CAUTION
Do NOT turn the engine assembly upside down with the oil pan still attached.
Sludge and debris in the oil pan will fall into the cylinders, pistons and
connecting rods, possibly causing rapid wear. Sludge may also plug the engine
oil pickup screen.
To install:
NOTE: Wait no longer than 4 minutes after applying silicone gasket sealant to install the oil pan.
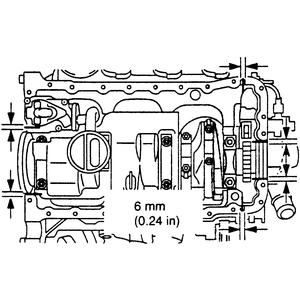
| Fig. 2: Apply silicone gasket sealant in the six
illustrated locations
|
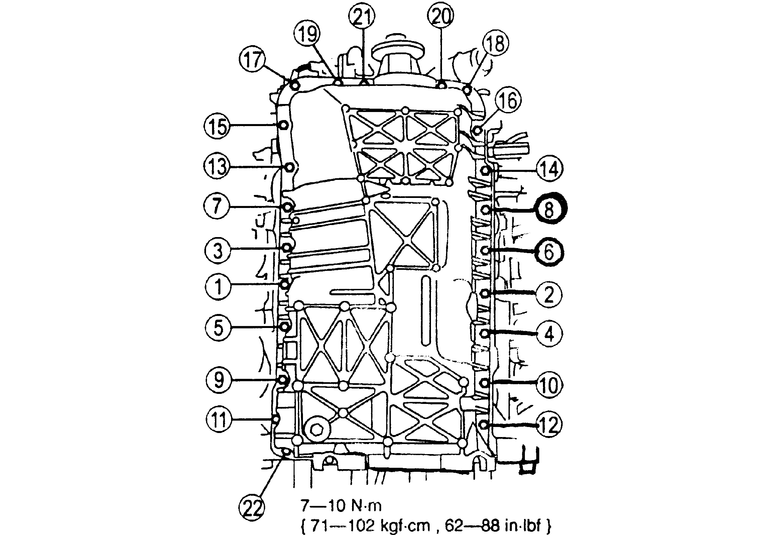
| Fig. 3: Oil pan mounting bolt tightening sequence
|
WARNING
On models equipped with distributor ignition, failure to remove the distributor
will damage or break it when the engine is lifted.
CAUTION
The EPA warns that prolonged contact with used engine oil may cause a number
of skin disorders, including cancer! You should make every effort to minimize
your exposure to used engine oil. Protective gloves should be worn when
changing the oil. Wash your hands and any other exposed skin areas as soon
as possible after exposure to used engine oil. Soap and water, or waterless
hand cleaner should be used.
NOTE: Oil pan fits tightly between the transmission spacer plate and oil pump pickup tube. Use care when removing the oil pan from the engine.
To install:
| Fig. 4: Oil pan installation for the 3.0L engine
|
NOTE: Review the complete service procedure before starting this repair.
To install:
| Fig. 5: Oil pan installation on the 4.0L engine
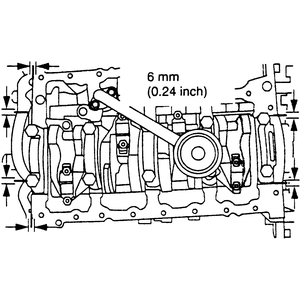
|
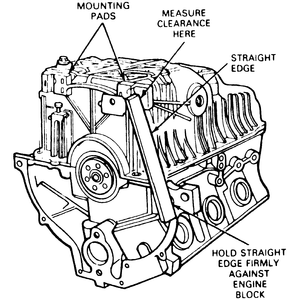
| Fig. 6: Checking oil pan alignment on the 4.0L engine
|
NOTE: Failure to use the correct spacers will result in damage to the oil pan and oil leakage.
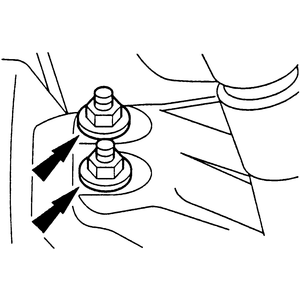
| Fig. 7: Remove the motor mount retaining nuts
|
CAUTION
The EPA warns that prolonged contact with used engine oil may cause a number
of skin disorders, including cancer! You should make every effort to minimize
your exposure to used engine oil. Protective gloves should be worn when
changing the oil. Wash your hands and any other exposed skin areas as soon
as possible after exposure to used engine oil. Soap and water, or waterless
hand cleaner should be used.
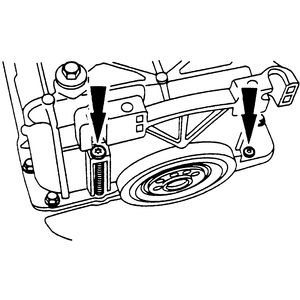
| Fig. 8: Remove the Torx® head bolts at
the front end of the oil pan
|
To install:
| Fig. 9: Apply silicone gasket sealant in the locations
illustrated
|
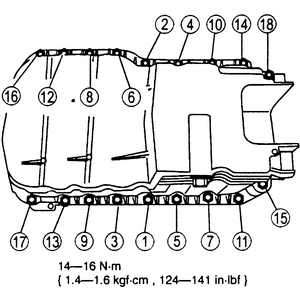
| Fig. 10: Oil pan bolt tightening sequence
|
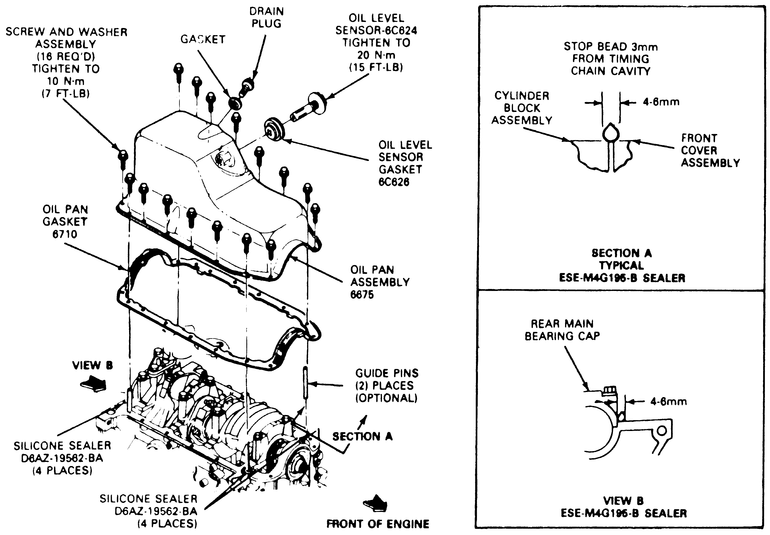
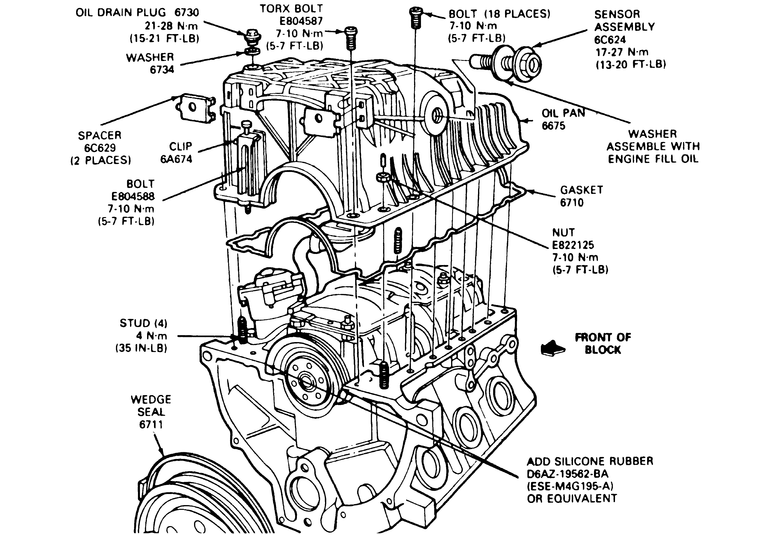
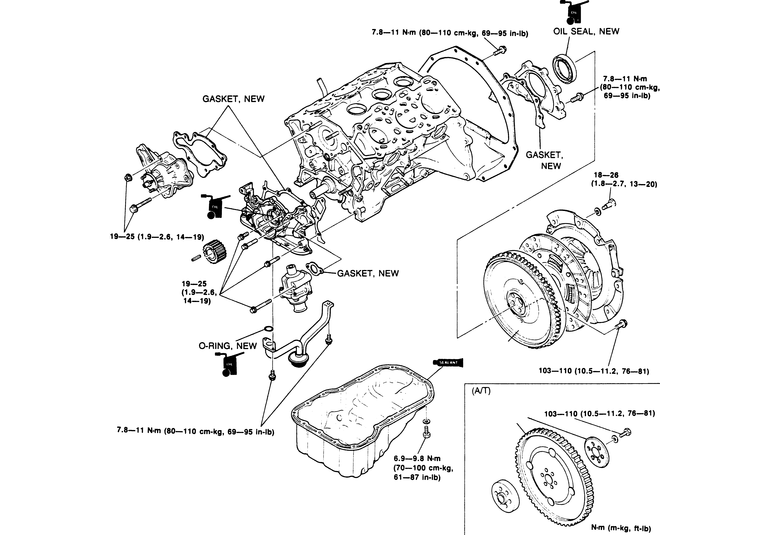
| Fig. 11: Oil pan and components
|
To install:
| Fig. 12: Oil pan and components
|
To install: