CAUTION
Fuel injection systems remain under pressure after the engine has been turned
OFF. Properly relieve fuel pressure before disconnecting any fuel lines. Failure
to do so may result in fire or personal injury. Do not allow fuel spray or fuel
vapors to come in contact with a spark or open flame. Keep a dry chemical fire
extinguisher nearby. Never store fuel in an open container due to risk of fire
or explosion.
- Relieve the fuel system pressure, and disconnect the negative battery cable.
- Remove the timing chain cover bolts and the cover.
- Remove the spacer, the idler sprocket assembly lock bolt, the chain guides,
and the idler sprocket assembly.
- Remove the balancer chain.
- Remove the timing chain adjuster and the timing chain.
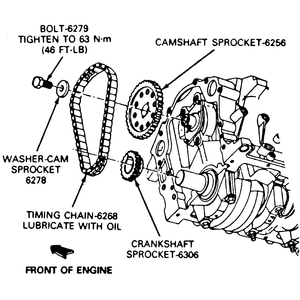
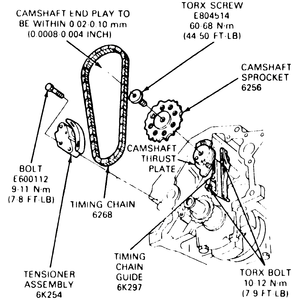
- Remove the lock bolts and remove the crankshaft timing sprocket and the
camshaft sprocket.
- Remove the key and the chain lever and guide.
- Inspect the chain, sprockets and guides for damage and/or wear.
To install:
- Install the timing chain guides and tighten to 7–9 ft. lbs. (10–12
Nm).
- If removed, install the tensioner onto the cylinder block.
- Align the plated links of the timing chain with the timing marks on the
sprockets as the chain and sprockets are assembled. Secure the pulley and
chain with wire to prevent misalignment.
| Fig. 1: Crankshaft sprocket chain alignment — 2.6L
engine
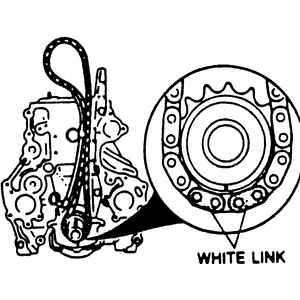
|
| Fig. 2: Camshaft sprocket chain alignment — 2.6L
engine
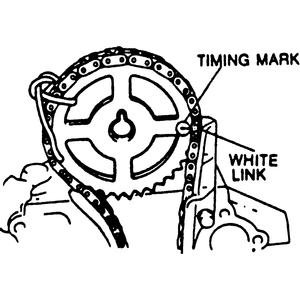
|
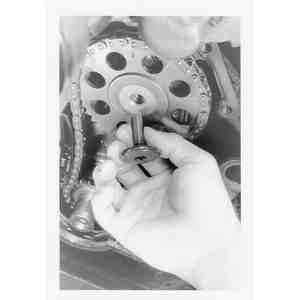
- Hold the chain tensioner head in, then slide the crankshaft sprocket onto
the crankshaft and place the camshaft sprocket on the sprocket holder.
- Install the balancer shaft drive sprocket on the crankshaft. Assemble the
balancer shaft sprockets to the balancer shaft chain, making sure the timing
marks on the sprockets are aligned with the polished links on the chain.
NOTE: Be careful not to confuse the right and left sprockets
as they are installed in opposite directions.
- While holding the assembled sprockets and chain, align the timing mark on
the crankshaft sprocket with the chain and install the balancer shaft sprockets.
Temporarily tighten the bolts by hand.
| Fig. 3: Balancer chain and sprocket alignment — 2.6L
engine
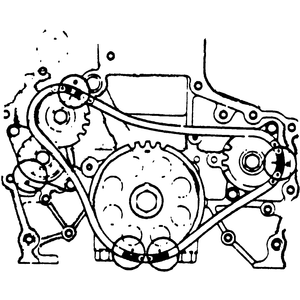
|
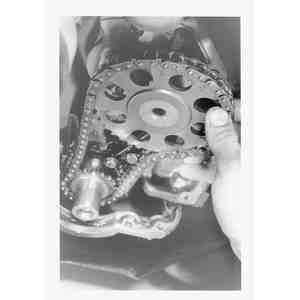
- Install the right and left lower balancer chain guides and tighten the mounting
bolts to 69–95 inch lbs. (7.8–11.0 Nm).
- Install the upper chain guide and loosely tighten the mounting and adjusting
bolts. Set the chain guide to the fully downward position.
- Tighten the idler sprocket assembly lock bolt to 27–38 ft. lbs. (37–52
Nm), and install the spacer.
- Rotate both balancer shaft sprockets slightly to position the chain slack
at the center between the left balancer shaft sprocket and the oil pump sprocket.
- Adjust the balancer chain tension as follows:
- Loosen the upper chain guide adjusting bolt.
- Push on the chain guide just above the adjusting slot with a force of
approximately 11 lbs. (49N), then pull back the guide 0.126–0.149
inch (3.2–3.8mm). Tighten the bolt to 69–95 inch lbs. (7.8–11.0
Nm). Tighten the guide pivot bolt to the same specification.
- The chain slack at the notch in the guide should be 0.12 inch (3mm)
when the guide is properly adjusted.
- Install the timing chain cover with a new gasket.
- Fill the crankcase with the proper type and quantity of engine oil. Fill
and bleed the cooling system. Run the engine and check for leaks and proper
operation.
- Check the idle speed and ignition timing and adjust, if necessary.
- Disconnect the negative battery cable.
- Drain the cooling system and crankcase.
CAUTION
When draining the coolant, keep in mind that cats and dogs are attracted
by ethylene glycol antifreeze, and are quite likely to drink any that is
left in an uncovered container or in puddles on the ground. This will prove
fatal in sufficient quantity. Always drain the coolant into a sealable container.
Coolant should be reused unless it is contaminated or several years old.
- Remove the timing chain cover.
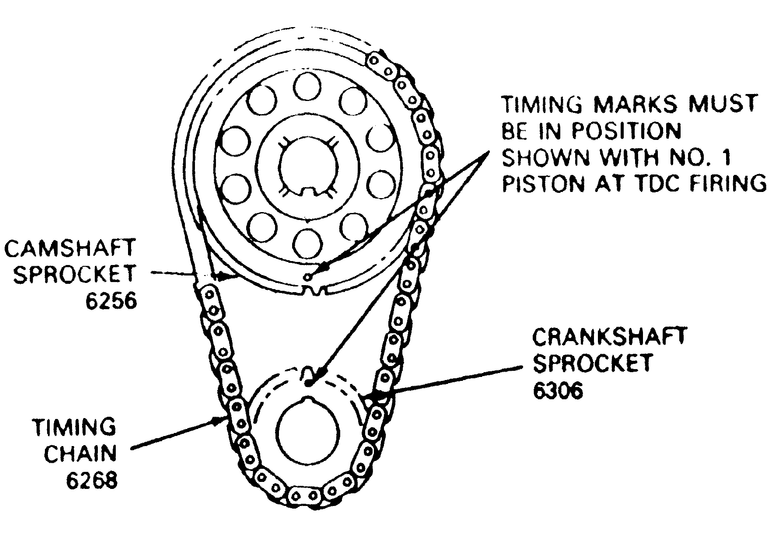
| Fig. 4: Timing mark alignment — 3.0L
engine
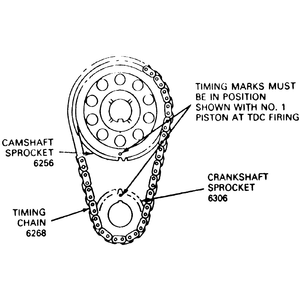
|
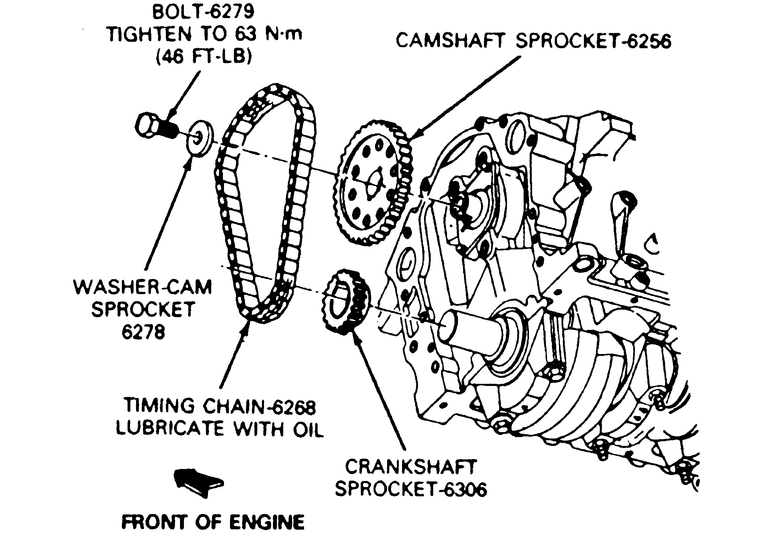
| Fig. 5: Timing chain mounting — 3.0L
engine
|
- Rotate crankshaft until No. 1 piston is at TDC and timing marks are aligned
in the correct position.
- Remove the camshaft sprocket retaining bolt and washer. Check timing chain
deflection for excessive wear.
- Slide sprockets and timing chain forward and remove as assembly.
To install:
- Clean timing cover and oil pan sealing surfaces. Clean and inspect all parts.
The camshaft retaining bolt has a drilled oil passage for timing chain assembly
lubrication. Clean oil passage with solvent. Do not replace with standard
bolt.
- Slide sprockets and timing chain on as assembly with timing marks in the
correct location. Install camshaft retaining bolt and washer. Tighten bolt
to 46 ft. lbs. (62 Nm). Lubricate the timing chain assembly.
- Install timing cover assembly. Install retaining bolts with pipe sealant
and tighten as outlined.
- Refill and bleed cooling system. Connect the negative battery cable. Start
engine check for coolant, oil and exhaust leaks.
NOTE: Review the complete service procedure before starting
this repair. Refer to the necessary service procedures in this section.
- Disconnect the negative battery cable.
- Drain the cooling system.
CAUTION
When draining the coolant, keep in mind that cats and dogs are attracted
by ethylene glycol antifreeze, and are quite likely to drink any that is
left in an uncovered container or in puddles on the ground. This will prove
fatal in sufficient quantity. Always drain the coolant into a sealable container.
Coolant should be reused unless it is contaminated or several years old.
| Fig. 6: To remove the timing chain and sprockets,
first remove the engine front cover

|
- Remove the front cover.
- Remove the radiator.
| Fig. 7: Timing chain mounting — 4.0L
engine
|
- Rotate the engine by hand until the No.1 cylinder is at TDC compression,
and the timing marks are aligned.
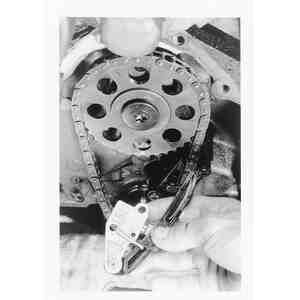
| Fig. 8: Remove the tensioner lower attaching bolt
. . .
|
| Fig. 9: . . . and install a holding clip in the bolt
hole and the slot on the rubbing block
|
| Fig. 10: Unbolt and remove the tensioner
|
| Fig. 11: A close-up view of a homemade holding clip
. . .
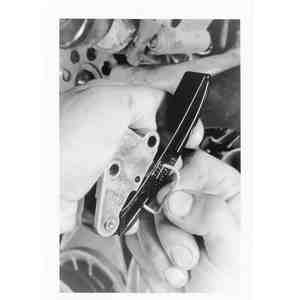
|
| Fig. 12: . . . and its proper positioning on the
tensioner
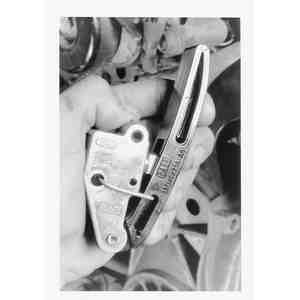
|
- Remove the lower tensioner bolt and install a holding clip in the bolt hole
and the slot on the rubbing block. Unbolt and remove the tensioner.
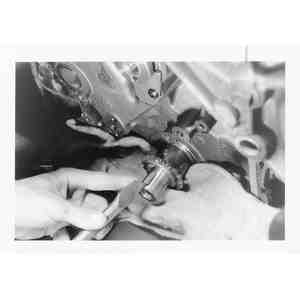
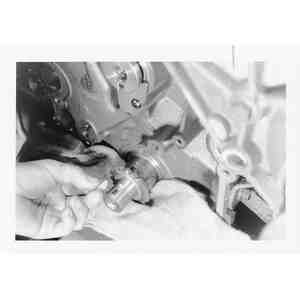
- Remove the camshaft sprocket bolt and sprocket retaining key.
| Fig. 13: Loosen the camshaft sprocket bolt . . .
|
| Fig. 14: . . . then remove it
|
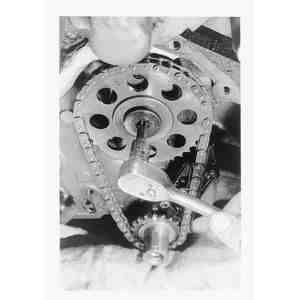
| Fig. 15: Remove the camshaft sprocket and chain
|
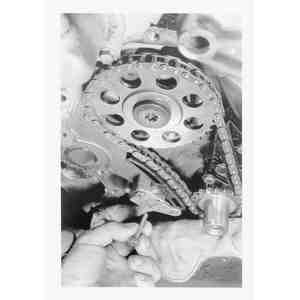
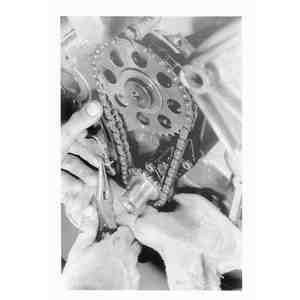
- Remove the camshaft and crankshaft sprockets with the timing chain.
| Fig. 16: If necessary, unbolt the chain guide attaching
bolts . . .
|
| Fig. 17: . . . and remove the guide from the engine
|
| Fig. 18: To remove the crankshaft sprocket, use a
chisel to loosen the keyway . . .
|
| Fig. 19: . . . then remove the keyway from the crankshaft
|
| Fig. 20: Using a jawed puller, tighten the center
bolt . . .
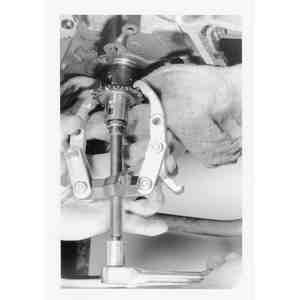
|
| Fig. 21: . . . and pull the crankshaft sprocket from
the engine
|
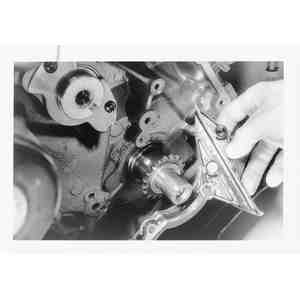
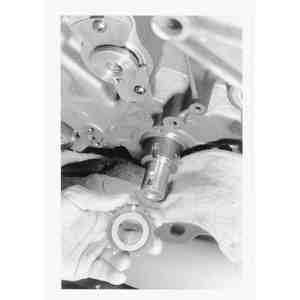
- If necessary, remove the chain guide.
To install:
- Install the timing chain guide. Make sure the pin of the guide is in the
hole in the block. Tighten the bolts to 84–96 inch lbs. (9–11
Nm).
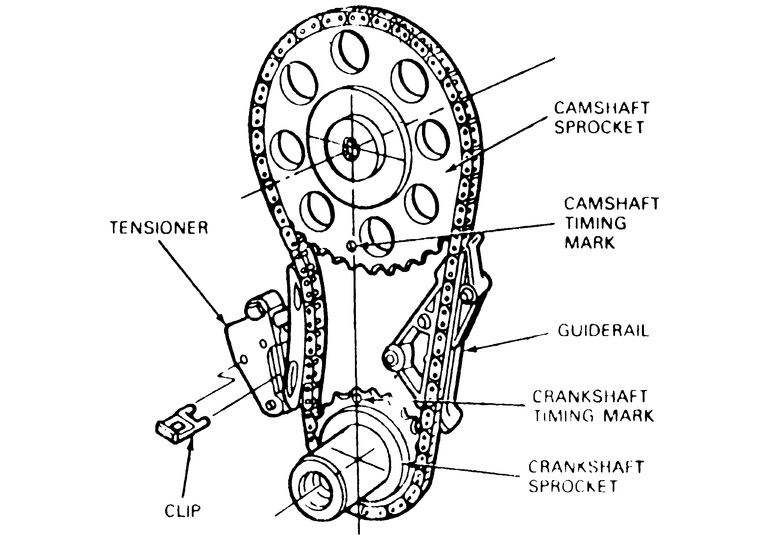
- Align the timing marks on the crankshaft and camshaft sprockets and install
the sprockets and chain.
| Fig. 22: Timing chain alignment — 4.0L
engine

|
- Install the camshaft sprocket bolt and sprocket retaining key. Make sure
that the timing marks are still aligned.
- Install the tensioner with the clip in place to keep it retracted.
- Install the crankshaft key. Make sure the timing marks are still aligned.
- Make sure the tensioner side of the chain is held inward and the other side
is straight and tight.
- Install the camshaft sprocket bolt and tighten it to 50 ft. lbs. (68 Nm).
- Remove the tensioner clip.
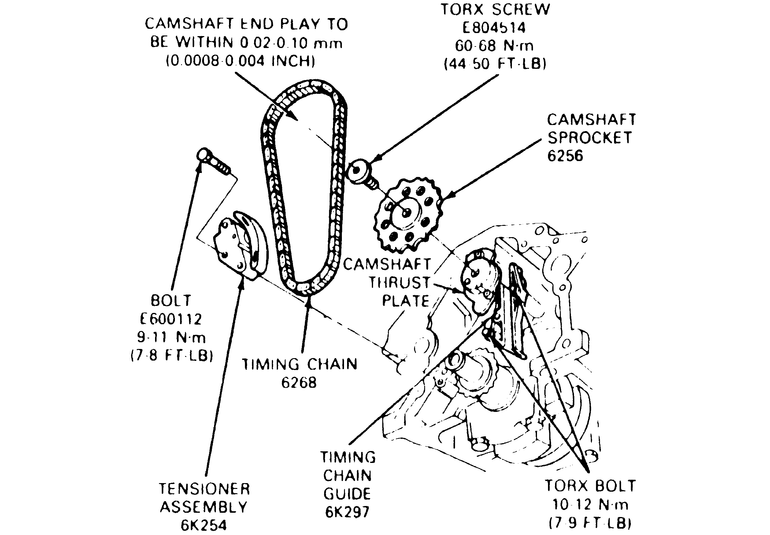
- Check camshaft end-play.
- Install the front cover.
- Install the radiator.
- Fill the cooling system.
- Fill the crankcase to the proper level. Connect the negative battery cable.
Start engine check for leaks and roadtest the vehicle for proper operation.