Previous Next

Water Pump

REMOVAL & INSTALLATION

B Series Pick-up and Navajo
2.3L Engine

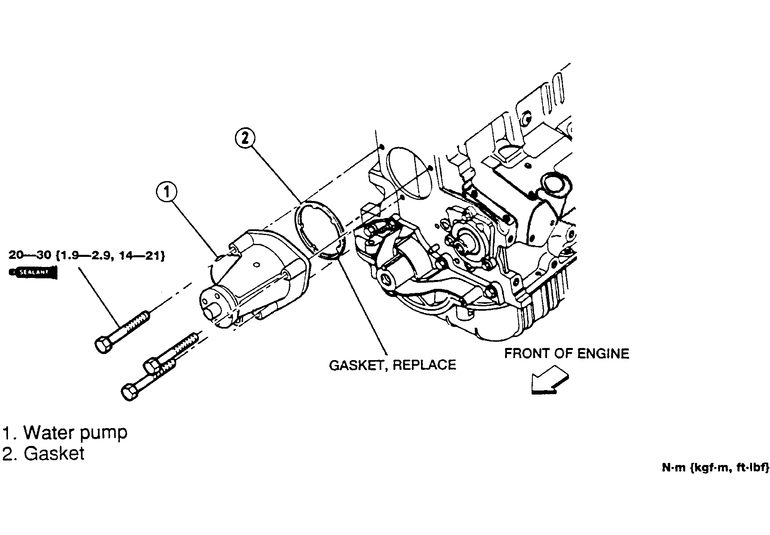
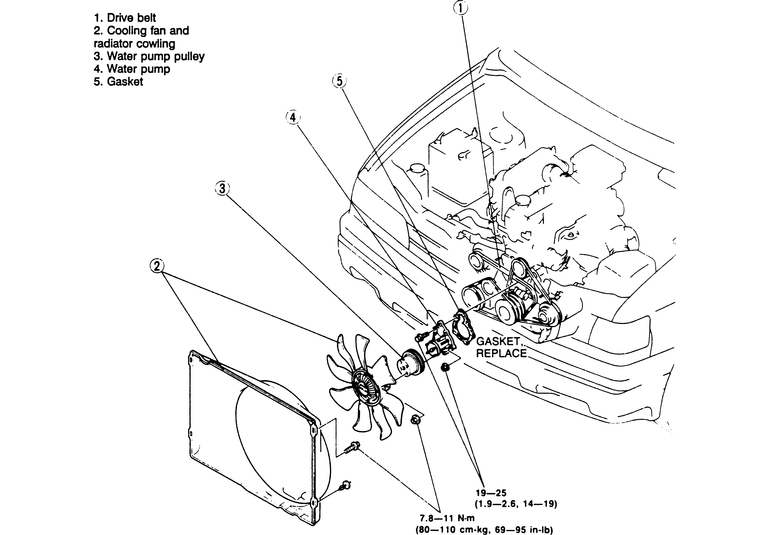
Fig. 1: Exploded view of the water pump and related parts for the 2.3L engine

  1. Disconnect the negative battery cable.
  2. Drain the cooling system.

    CAUTION
    When draining engine coolant, keep in mind that cats and dogs are attracted to ethylene glycol antifreeze and could drink any that is left in an uncovered container or in puddles on the ground. This will prove fatal in sufficient quantity. Always drain coolant into a sealable container. Coolant should be reused unless it is contaminated or is several years old.

  3. Remove the two bolts that retain the fan shroud and position the shroud back over the fan.
  4. Remove the four bolts that retain the cooling fan. Remove the fan and shroud.
  5. Loosen and remove the accessory drive belt.
  6. Remove the water pump pulley.
  7. Remove the heater hose at the water pump.
  8. Remove the timing belt cover. Remove the lower radiator hose from the water pump.
  9. Remove the water pump mounting bolts and the water pump. Clean all gasket mounting surfaces.
  10. Install the water pump in the reverse order of removal. Coat the threads of the mounting bolts with sealer before installation.
  11. Tighten the water pump-to-engine block mounting bolts to 14–21 ft. lbs. (20–30 Nm).
  12. Fill the radiator with the specified amount and type of engine coolant.
  13. Connect the negative battery cable.
  14. Start the engine and check for leaks, then bleed the cooling system.
2.5L Engine

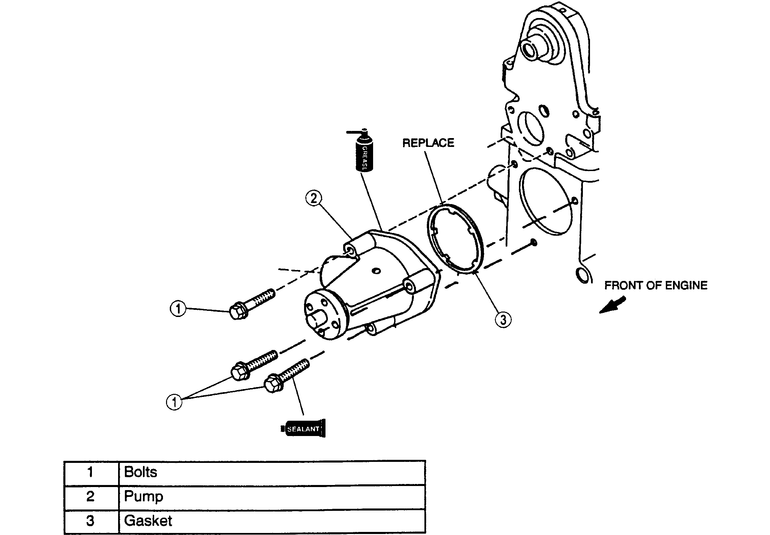
Fig. 2: Exploded view of the water pump and related parts for the 2.5L engine

  1. Disconnect the negative battery cable.
  2. Drain the cooling system.

    CAUTION
    When draining engine coolant, keep in mind that cats and dogs are attracted to ethylene glycol antifreeze and could drink any that is left in an uncovered container or in puddles on the ground. This will prove fatal in sufficient quantity. Always drain coolant into a sealable container. Coolant should be reused unless it is contaminated or is several years old.

  3. Remove the cooling fan and shroud.
  4. Remove the accessory drive belt.
  5. Raise and safely support the vehicle.
  6. Disconnect the lower radiator hose from the water pump.

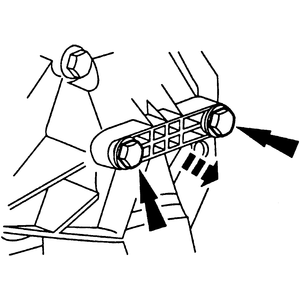
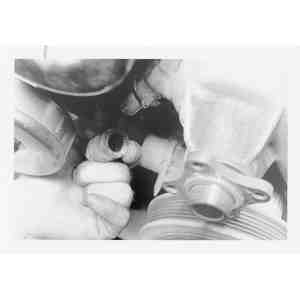
    Fig. 3: Loosen the mounting screws and remove the inlet tube

  7. Disconnect the lower heater water hose from the inlet tube.
  8. Loosen the screws and remove the inlet tube.
  9. Remove the water pump pulley.
  10. Remove the timing belt cover.
  11. Remove the water pump mounting bolts and the water pump. Clean all gasket mounting surfaces.

    To install:

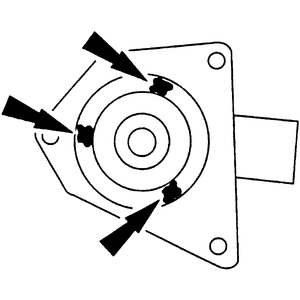
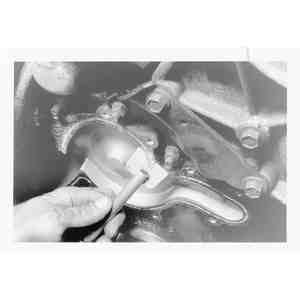
    Fig. 4: Apply grease to three locations on the new water pump

  12. Apply grease to three locations on the new water pump, as illustrated.
  13. Place the new gasket in position and install the water pump onto the engine. Tighten the water pump mounting bolts to 15–20 ft. lbs. (20–30 Nm).
  14. Install the timing belt cover.
  15. Install the water pump pulley.
  16. Apply grease to the new O-ring seal, install the inlet tube and tighten the mounting screws.
  17. Connect the lower heater water hose to the inlet tube. Tighten the hose clamp.
  18. Connect the lower radiator hose to the water pump. Tighten the hose clamp.
  19. Lower the vehicle.
  20. Install the accessory drive belt.
  21. Install the cooling fan and shroud.
  22. Fill the radiator with the specified amount and type of engine coolant.
  23. Connect the negative battery cable.
  24. Start the engine and check for leaks, then bleed the cooling system.
3.0L Engine
  1. Disconnect the battery ground cable.
  2. Drain the cooling system.

    CAUTION
    When draining the coolant, keep in mind that cats and dogs are attracted by ethylene glycol antifreeze, and are quite likely to drink any that is left in an uncovered container or in puddles on the ground. This will prove fatal in sufficient quantity. Always drain the coolant into a sealable container. Coolant should be reused unless it is contaminated or several years old.

  3. Remove the engine fan.
  4. Loosen the 4 water pump pulley bolts.
  5. Remove the accessory drive belts.

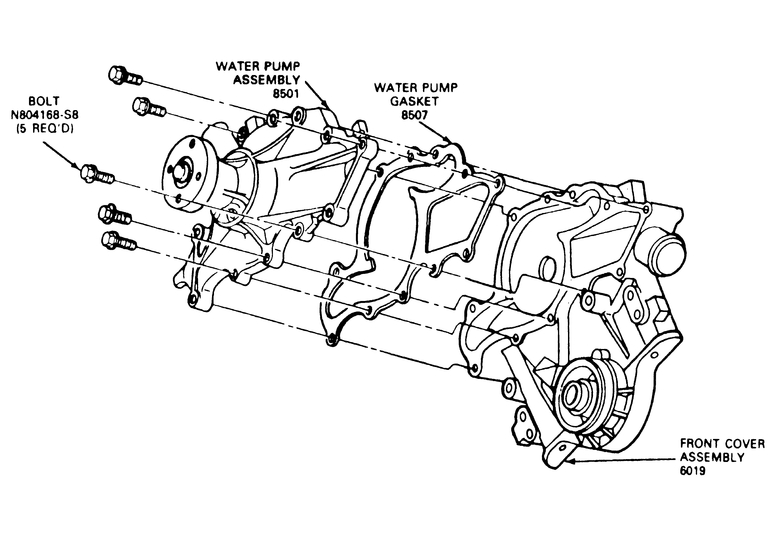
    Fig. 5: Exploded view of the 3.0L engine water pump

  6. Remove the water pump pulley.
  7. Remove the alternator adjusting arm and throttle body brace.
  8. Remove the lower radiator hose.
  9. Disconnect the heater hose at the pump.
  10. Rotate the belt adjuster out of the way.
  11. Remove the water pump attaching bolts. Note their location for installation.
  12. Remove the pump and discard the gasket.
  13. Thoroughly clean the pump and engine mating surfaces.

    To install:

  14. Using an adhesive type sealer, position a new gasket on the timing cover.
  15. Position the water pump and start the bolts. When all the bolts are started, torque them to specifications. Refer to the necessary illustration.

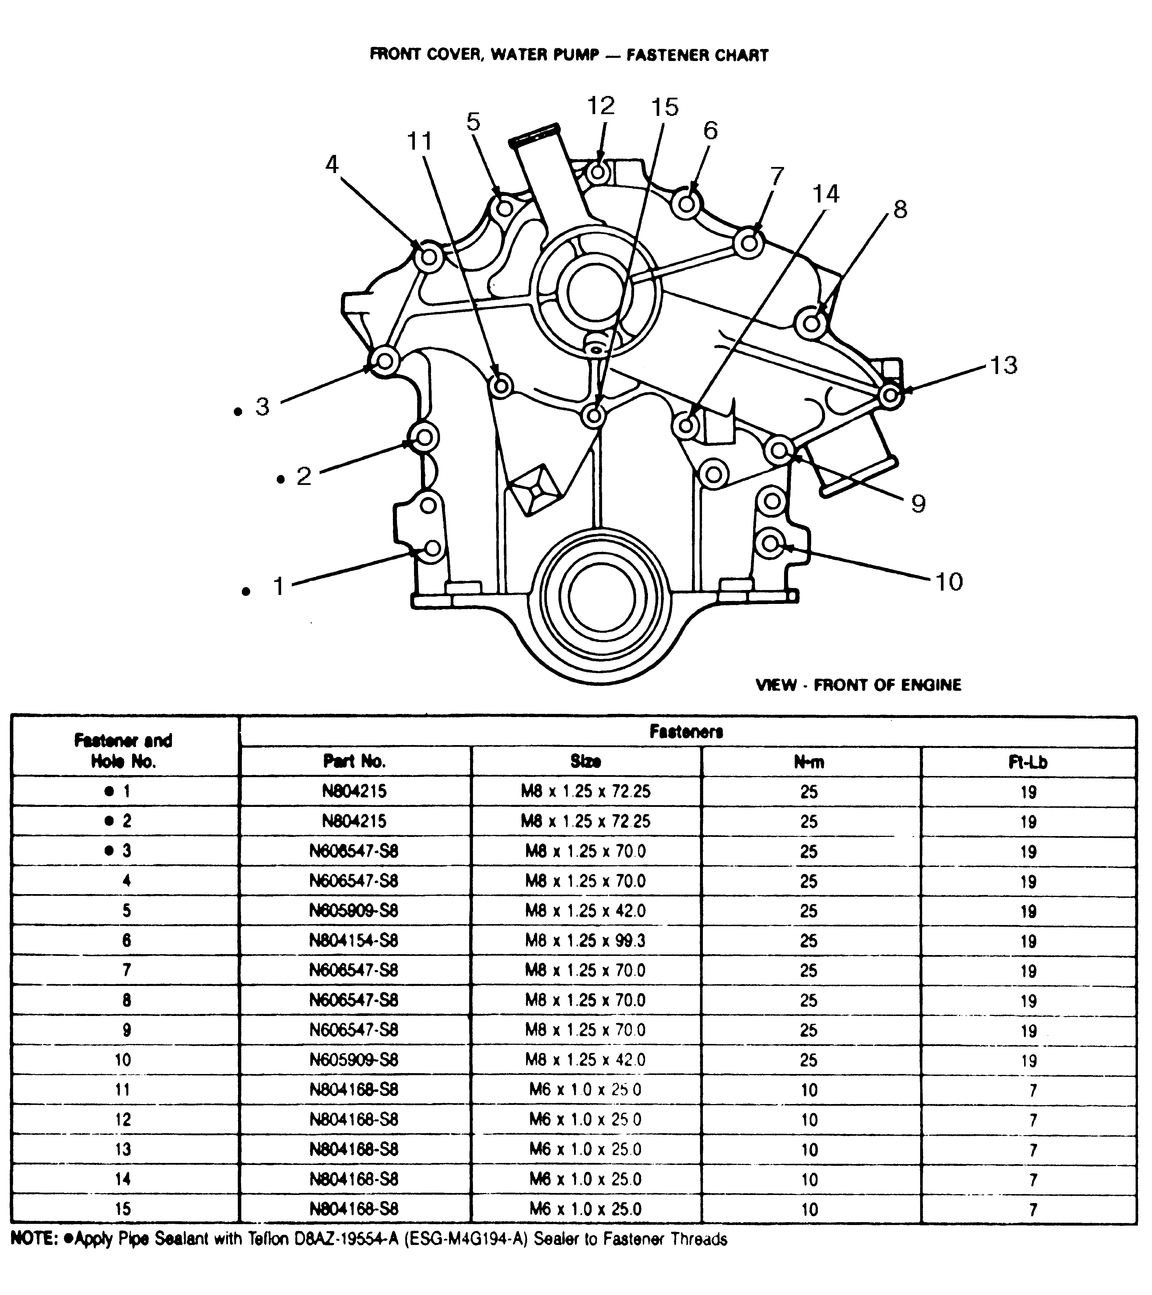
    Fig. 6: 3.0L engine water pump and front cover fastener chart

  16. Install the lower hose and connect the radiator hose.
  17. Install the pulley and hand-tighten the 4 bolts.
  18. Install the alternator adjusting arm and brace.
  19. Install the belts and tension them. See Section 1.
  20. Tighten the 4 pulley bolts to 19 ft. lbs. (26 Nm).
  21. Install the fan.
  22. Fill and bleed the cooling system.
  23. Connect the battery ground cable. Run the engine and check for leaks.
4.0L Engine
  1. Disconnect the negative battery cable.
  2. Drain the cooling system.

    CAUTION
    When draining the coolant, keep in mind that cats and dogs are attracted by ethylene glycol antifreeze, and are quite likely to drink any that is left in an uncovered container or in puddles on the ground. This will prove fatal in sufficient quantity. Always drain the coolant into a sealable container. Coolant should be reused unless it is contaminated or several years old.

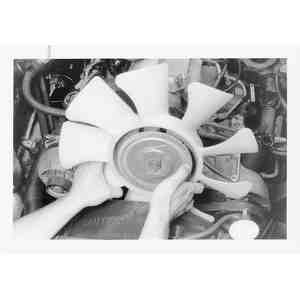
    Fig. 7: To service the water pump, first drain the cooling system, then remove the engine fan/clutch . . .

    Fig. 8: . . . and the fan shroud from the vehicle

  3. Remove the fan and fan clutch assembly.

    NOTE: See the engine fan removal procedure in this section.

    Fig. 9: Remove the lower radiator hose from the water pump. Position a drain pan underneath to catch any coolant

  4. Remove the lower radiator hose from the water pump.

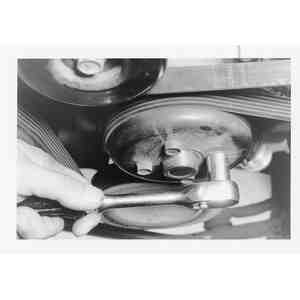
    Fig. 10: Loosen the water pump pulley attaching bolts . . .

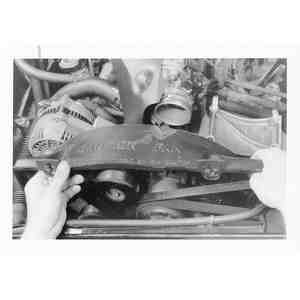
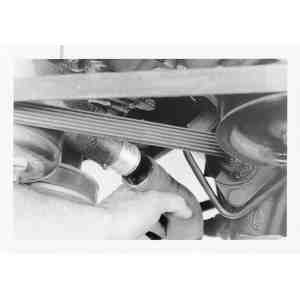
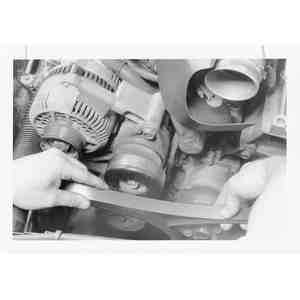
    Fig. 11: . . . before removing the accessory drive belt . . .

  5. Loosen the water pump pulley attaching bolts.
  6. Loosen the alternator mounting bolts and remove the belt. On vehicles with air conditioning, remove the tensioner pulley, alternator and bracket.
  7. Remove the A/C compressor and power steering pump mounting bracket, without disconnecting the lines, and set off to the side.

    Fig. 12: . . . then with the drive belt out of the way, finish removing the water pump pulley

  8. Remove the water pump pulley.
  9. Disconnect the heater hose at the pump.

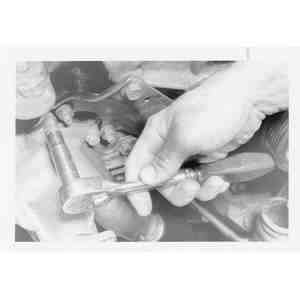
    Fig. 13: Remove the heater hose connection at the water pump

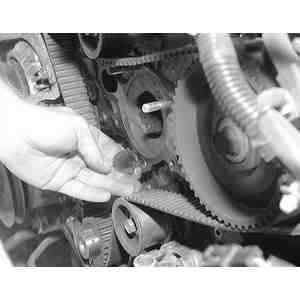
    Fig. 14: Remove all of the water pump attaching bolts . . .

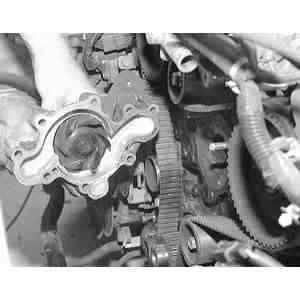
    Fig. 15: . . . then remove the pump from the engine

  10. Remove the attaching bolts and remove the water pump.

    To install:

  11. Clean the mounting surfaces of the pump and front cover thoroughly. Remove all traces of gasket material.

    Fig. 16: Remove all traces of the old gasket before installing the pump

  12. Apply adhesive gasket sealer to both sides of a new gasket and place the gasket on the pump.
  13. Position the pump on the cover and install the bolts finger–tight. When all bolts are in place, torque them to 72–108 inch lbs. (9–12 Nm).
  14. Install the pulley.
  15. On vehicles with air conditioning, install the alternator, bracket and tensioner pulley.
  16. Install the A/C compressor and power steering pump mounting bracket.
  17. Install and adjust the drive belt.
  18. Connect the hoses and tighten the clamps.
  19. Install the fan and clutch assembly.
  20. Fill and bleed the cooling system.
  21. Connect the negative battery cable, then start the engine and check for leaks.
MPV Models
2.6L Engine

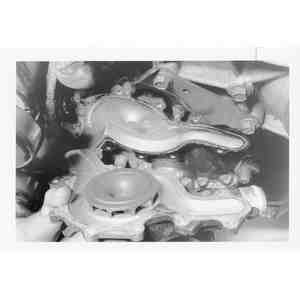
Fig. 17: Water pump assembly — 2.6L engine

  1. Disconnect the battery ground.
  2. Drain the cooling system.

    CAUTION
    When draining the coolant, always drain the coolant into a sealable container. Coolant should be reused unless it is contaminated or several years old.

  3. Remove the accessory drive belts.
  4. Remove the fan and shroud.
  5. Remove the water pump pulley.
  6. Unbolt and remove the water pump.
  7. Thoroughly clean the gasket mounting surfaces.

    To install:

  8. Using a new gasket coated with sealer, position the water pump on the engine. Tighten the bolts to 14–18 ft. lbs. (19–25 Nm).
  9. Install the fan and pulley.
  10. Install the drive belts and shroud.
  11. Fill the cooling system.
  12. Run the engine and check for leaks.
3.0L Engine

Fig. 18: Water pump assembly — 3.0L engine

  1. Position the engine at TDC on the compression stroke.
  2. Properly relieve the fuel system pressure.
  3. Disconnect the negative battery cable.
  4. Remove the air cleaner assembly.
  5. Drain the cooling system.
  6. Remove the spark plug wires.
  7. Remove the fresh air duct assembly.
  8. Remove the cooling fan, water pump pulley and radiator cowling.
  9. Remove the drive belts.
  10. Remove the air conditioning compressor idler pulley. If necessary, remove the compressor and position it to the side without disconnecting the hose lines.
  11. Remove the crankshaft pulley and baffle plate.
  12. Remove the coolant bypass hose.
  13. Remove the upper radiator hose.
  14. Remove the timing belt covers.

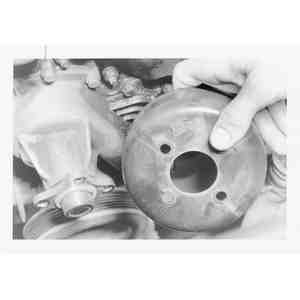
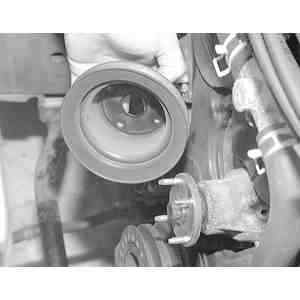
    Fig. 19: Remove the water pump pulley

    Fig. 20: Remove the water pump assembly from the engine

    Fig. 21: Clean the water pump-to-engine mating surface of all gasket material

  15. Remove the timing belt. If reusing the belt be sure to mark the direction of rotation.
  16. Unbolt and remove the water pump. Discard the gasket.
  17. Thoroughly clean the mating surfaces of the pump and engine.

    To install:

  18. Position the pump and a new gasket, coated with sealer, on the engine. Torque the bolts to 14–18 ft. lbs. (19–25 Nm).
  19. Install the timing belt.
  20. Install the timing belt cover assembly.
  21. Install the upper radiator hose.
  22. Install the coolant bypass hose.
  23. Install the crankshaft pulley and baffle plate.
  24. Install the compressor.
  25. Install the air conditioning compressor idler pulley.
  26. Install and adjust the drive belts.
  27. Install the cooling fan and radiator cowling.
  28. Install the fresh air duct assembly.
  29. Install the spark plug wires.
  30. Fill the cooling system.
  31. Install the air cleaner assembly.
  32. Connect the negative battery cable.

Previous Next