Previous Next

REMOVAL & INSTALLATION

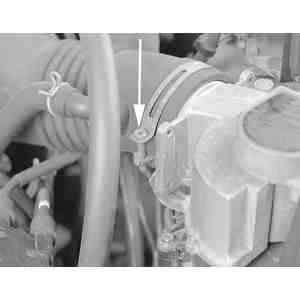
Fig. 1: Loosen the air inlet duct hose clamp at the volume airflow sensor

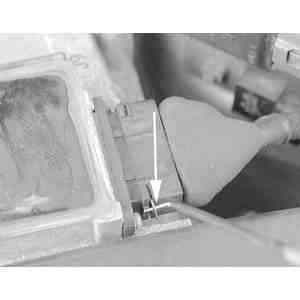
Fig. 2: Release the metal volume airflow sensor connector retaining clip using a small tool such as a pick . . .

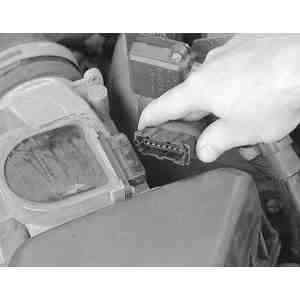
Fig. 3: . . . then pull the connector straight off of the sensor

Fig. 4: Loosen the five air cleaner housing cover fasteners and remove from the vehicle

Fig. 5: The volume airflow sensor is secured to the top of the air cleaner housing cover with four mounting nuts and one mounting bolt

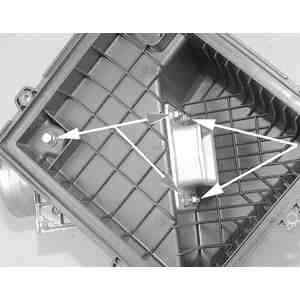
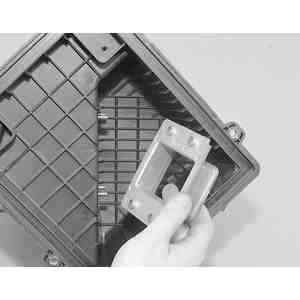
Fig. 6: After removing the four mounting nuts, remove the inner mounting plate

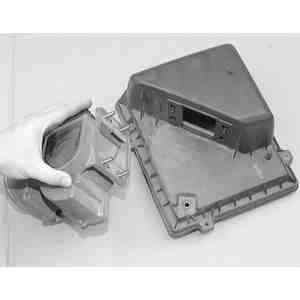
Fig. 7: After removing the mounting bolt, the volume airflow sensor can now be separated from the air cleaner housing cover

  1. Disconnect the negative battery cable.
  2. Loosen the air inlet duct hose clamp at the volume airflow sensor.
  3. Release the metal volume airflow sensor connector retaining clip using a small tool such as a pick and pull the connector straight off of the sensor.
  4. Loosen the five air cleaner housing cover fasteners and remove from the vehicle.
  5. Remove the four mounting nuts, then remove the inner mounting plate.
  6. After removing the mounting bolt, separate the volume airflow sensor from the air cleaner housing cover

    To install:

  7. Install the volume air flow sensor to the air cleaner housing cover and tighten the mounting bolt.
  8. Install the inner mounting plate and tighten the 4 mounting bolts.
  9. Place the air cleaner housing cover and air flow sensor on top of the air cleaner box.
  10. Connect the air inlet hose duct to the air flow sensor and tighten the hose clamp.
  11. Attach the engine wiring harness connector to the volume air flow sensor and tighten down the air cleaner housing cover fasteners.
  12. Connect the negative battery cable.

Previous Next