Previous Next

Headlights

REMOVAL & INSTALLATION

B Series Pick-up, Navajo and 1994–95 MPV Models
  1. Make sure that the headlight switch is turned OFF.
  2. Disconnect the negative battery cable.
  3. Open the vehicle's hood and secure it in an upright position.
  4. If equipped with a bulb access panel, open by depressing the latch then lifting. If equipped, open the headlight access panel by sliding the latch and lifting the panel upwards

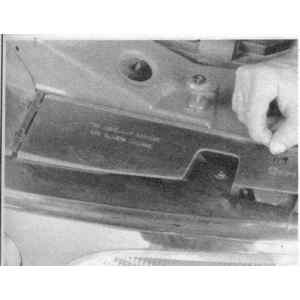
    Fig. 1: Push down the upper retaining tab on the headlight bulb connector plug and pull straight off of the bulb

  5. Unfasten the locking ring which secures the bulb and wire harness plug assembly, then withdraw the assembly rearward.
  6. Disconnect the electrical wire harness plug from the bulb and remove the locking ring as well.

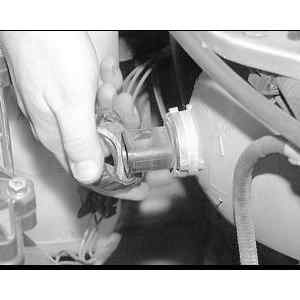
    Fig. 2: Turn the headlight bulb retaining ring counterclockwise and pull off of the back of the bulb

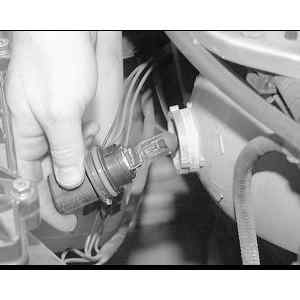
    Fig. 3: Pull the headlight bulb straight out of the headlight housing. Under any circumstance, never touch the glass of the light bulb with your fingers

    To install:

  7. Before connecting a light bulb to the wire harness plug, ensure that all electrical contact surfaces are free of corrosion or dirt.
  8. Install the locking ring onto the bulb, then line up the replacement headlight bulb with the harness plug. Firmly push the bulb onto the plug until the spring clip latches over the bulb's projection.

    WARNING
    Do not touch the glass bulb with your fingers. Oil from your fingers can severely shorten the life of the bulb. If necessary, wipe off any dirt or oil from the bulb with rubbing alcohol before completing installation.

  9. Position the headlight bulb and secure it with the locking ring.
  10. Connect the negative battery cable.
  11. To ensure that the replacement bulb functions properly, activate the applicable switch to illuminate the bulb which was just replaced. (If this is a combination low and high beam bulb, be sure to check both intensities.) If the replacement light bulb does not illuminate, either it too is faulty or there is a problem in the bulb circuit or switch. Correct if necessary.
  12. Close the bulb access panel and the vehicle's hood.
1996–98 MPV Models
  1. Make sure that the headlight switch is turned OFF.
  2. Disconnect the negative battery cable.
  3. Open the vehicle's hood and secure it in an upright position.

    Fig. 4: Unplug the electrical connector by compressing the outer tabs

    Fig. 5: Pull off the sealing cover and unhook the retaining spring

  4. Unplug the electrical connector from the bulb by compressing the tabs and pulling it to the rear.
  5. Remove the sealing ring.
  6. Unhook the headlight bulb retaining spring and turn it counterclockwise approximately 18 of a turn.
  7. Carefully remove the bulb assembly from the socket by pulling it straight back.

    To install:

  8. Before connecting a light bulb to the wire harness plug, ensure that all electrical contact surfaces are free of corrosion or dirt.

    WARNING
    Do not touch the glass bulb with your fingers. Oil from your fingers can severely shorten the life of the bulb. If necessary, wipe off any dirt or oil from the bulb with rubbing alcohol before completing installation.

  9. Carefully install the new bulb assembly into the socket and secure it with the headlight bulb retaining spring.
  10. Install the sealing ring.
  11. Plug the electrical connector into the rear of the bulb and make sure that the locking tabs engage.
  12. Connect the negative battery cable.
  13. To ensure that the replacement bulb functions properly, activate the applicable switch to illuminate the bulb which was just replaced. (If this is a combination low and high beam bulb, be sure to check both intensities.) If the replacement light bulb does not illuminate, either it too is faulty or there is a problem in the bulb circuit or switch. Correct if necessary.

Previous Next