Previous Next

INSTRUMENTS AND SWITCHES

Instrument Cluster

REMOVAL & INSTALLATION

1994 B Series Pick-up and Navajo Models
  1. Disconnect the negative battery cable.
  2. Open the ash tray and remove the two retaining screws. Remove the ash tray assembly from the dash.
  3. If necessary, remove the left and right A/C register vents from the dash.

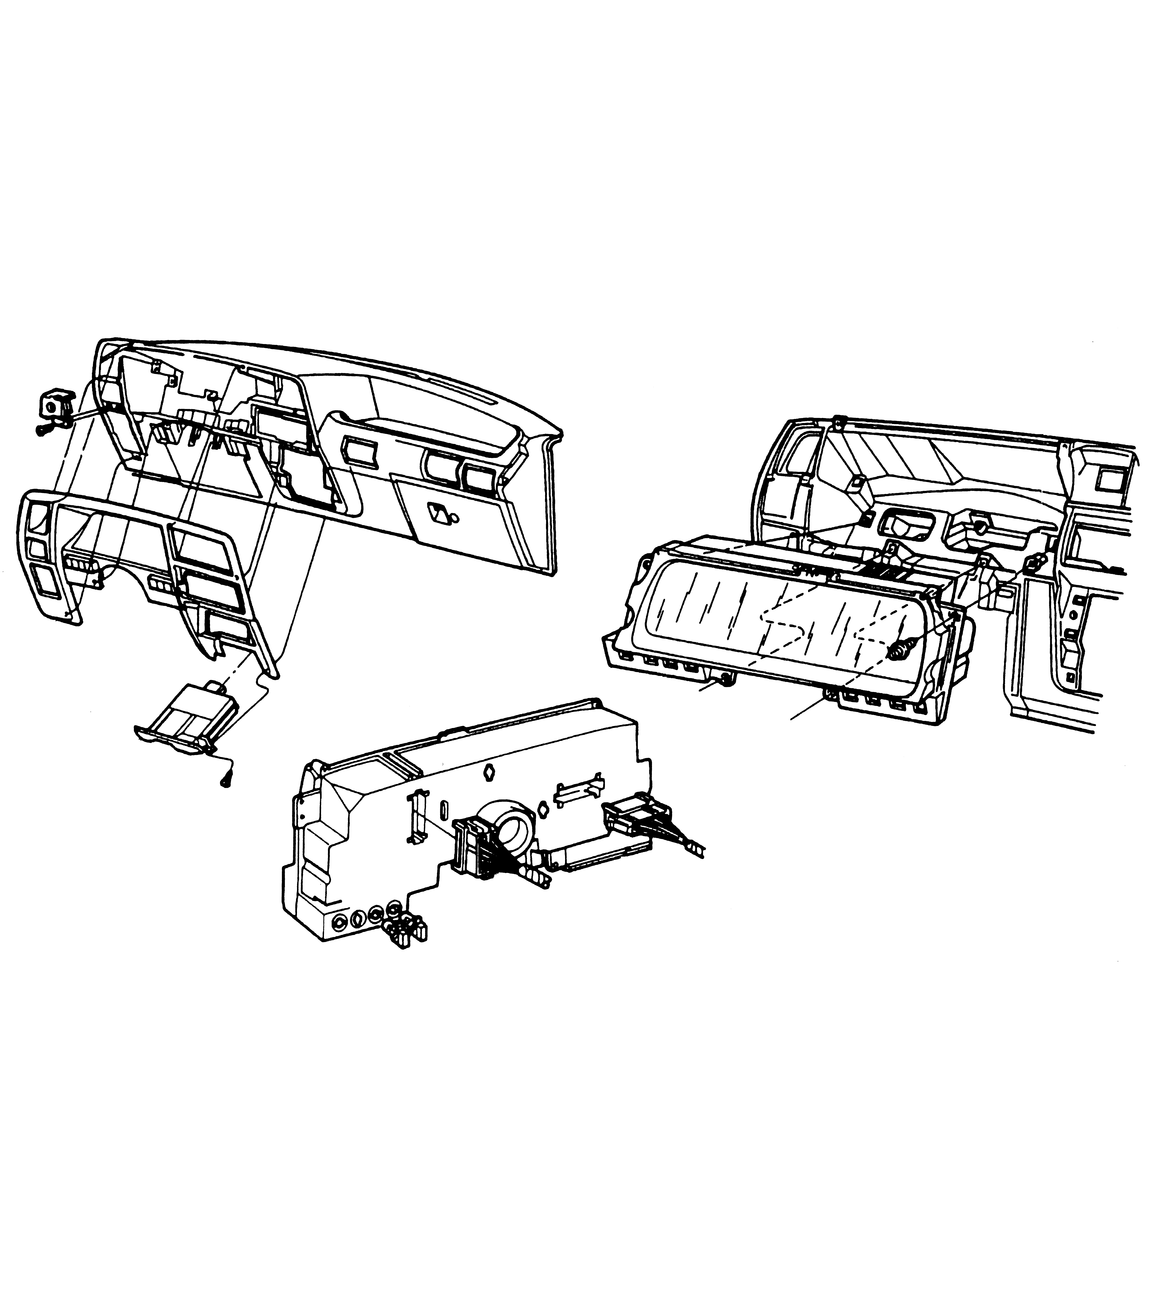
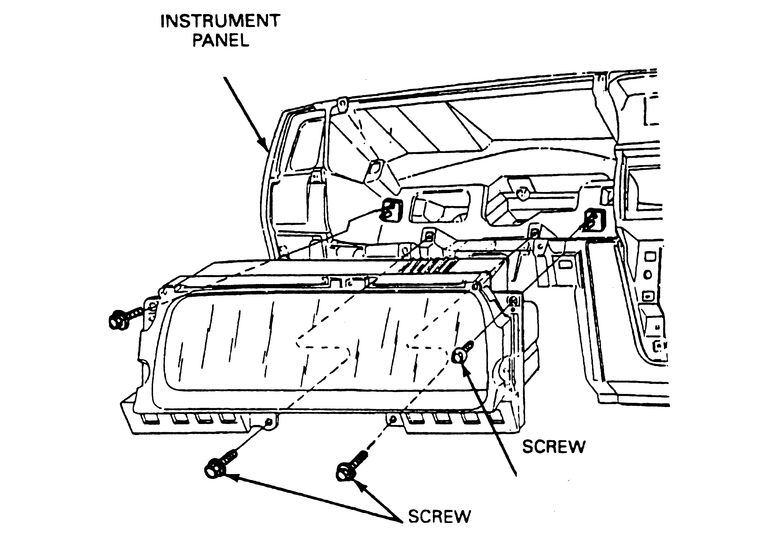
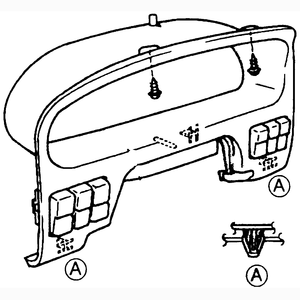
    Fig. 1: Exploded view of the instrument cluster and trim panel assemblies

  4. Unsnap the instrument cluster trim panel by pulling rearwards around the edge of the panel. Depress the hazard warning switch (4-way flashers) and remove the trim panel.
  5. Remove the four screws securing the instrument cluster to the dash mounting.

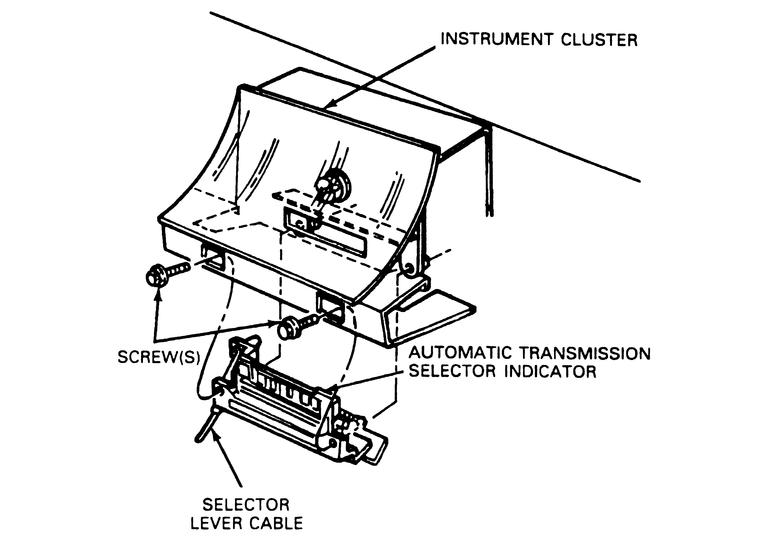
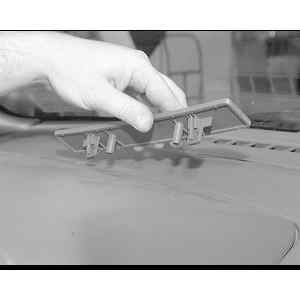
    Fig. 2: Exploded view of the PRNDL indicator mounting

  6. On vehicles equipped with an automatic transmission, perform the following:
    1. Remove the two screws attaching the PRNDL indicator to the cluster.
    2. If necessary for clearance, block the wheels and apply the parking brake, then turn the ignition switch to unlock the steering wheel and pull the gear select lever into the Low (L) range.
  7. Pull the cluster assembly rearward to gain access to the speedometer cable.

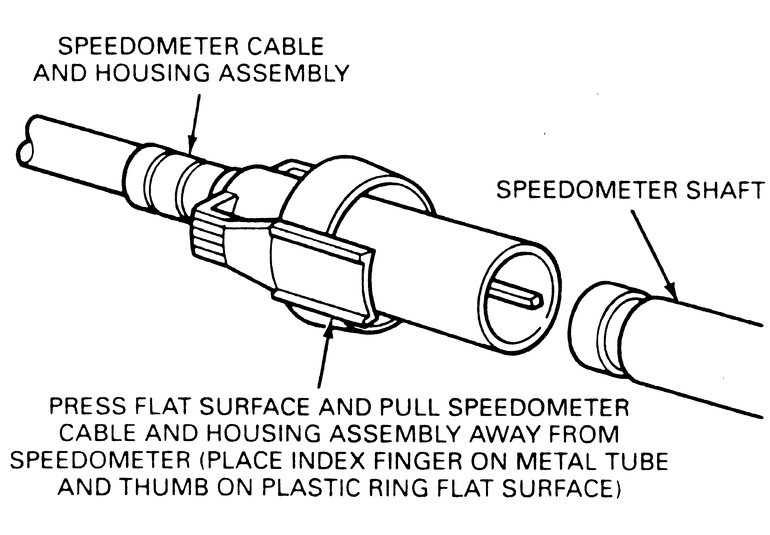
    NOTE: If there is insufficient slack in the cable for gaining access, disconnect the cable from the transmission. Once disconnected pull the cluster out gently until enough clearance is gained.

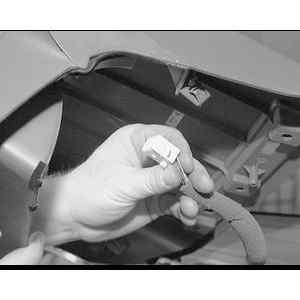
    Fig. 3: View of the speedometer cable end at the instrument cluster

  8. Disconnect the speedometer cable from the cluster. The cable connection has a flat surface clip; press the clip inward and pull the cable from the cluster.
  9. Disconnect the wire harness plugs from the cluster and remove it from the dash.

    To install:

  10. Apply approximately 316 inch (4.8mm) diameter ball of silicone dielectric grease in the drive hole of the speedometer head.
  11. Position the instrument cluster near its opening and attach the electrical plugs to it.
  12. Connect the speedometer cable to the speedometer head. If necessary, reconnect the speedometer cable to the transmission.
  13. If removed, install the two PRNDL indicator retaining screws.
  14. Insert the cluster into the dash and install the four attaching screws.
  15. Ensure that the hazard warning switch is depressed and install the cluster trim panel.
  16. Connect the negative battery cable. Start the vehicle and check all gauges, lamps and signals for proper operation.
1995–98 B Series Pick-up Models
  1. Disconnect the negative battery cable.
  2. Remove the radio.

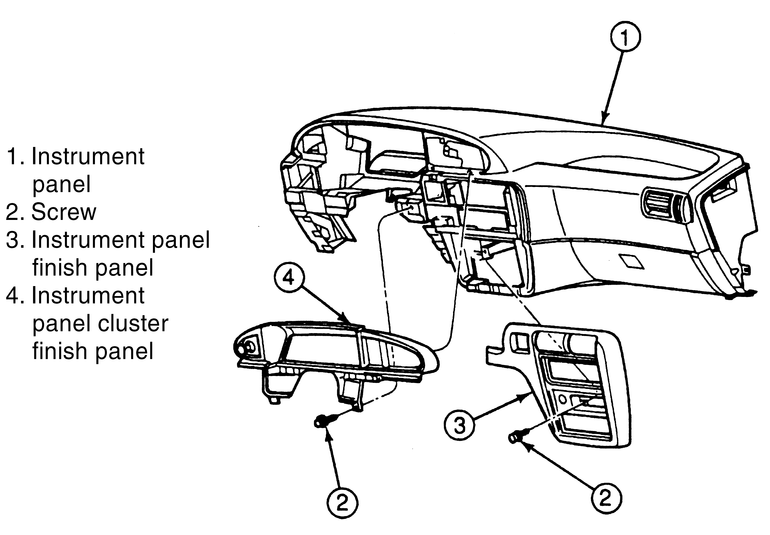
    Fig. 4: Exploded view of the 1995–98 instrument cluster trim panels

  3. Remove the center finish panel to access and remove the lower trim and knee bolster attaching screws.
  4. Remove the lower trim and knee bolster.
  5. Remove the cluster finish panel and unplug the headlamp and dimmer switch harnesses from it.

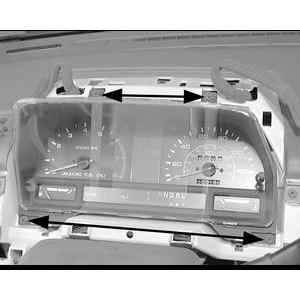
    Fig. 5: Exploded view of the instrument cluster mounting

  6. Remove the four instrument cluster retaining screws.
  7. If equipped with an automatic transmission, remove the two PRNDL indicator attaching screws and remove the indicator by sliding it straight down.
  8. Disconnect the electrical wire harness plugs and remove the cluster.

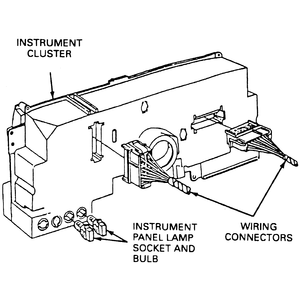
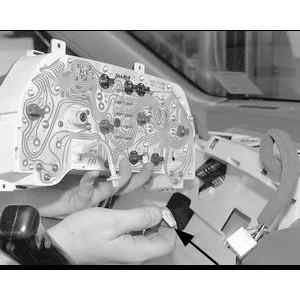
    Fig. 6: View of the electrical connections on the back of the cluster

    To install:

  9. Connect the electrical wire harness plugs and install the instrument cluster.
  10. If equipped with an automatic transmission, install the two PRNDL indicator attaching screws and remove the indicator by sliding it straight down.
  11. Install the four instrument cluster retaining screws.
  12. Connect the headlamp and dimmer switch harnesses to the cluster finish panel then install it.
  13. Install the lower trim and knee bolster panels and the attaching screws.
  14. Install the center finish panel.
  15. Install the radio.
  16. Connect the negative battery cable. Start the vehicle and check all gauges, lamps and signals for proper operation.
1994–95 MPV Models

Fig. 7: Lift up the trim panel from the front edge of the instrument cluster hood assembly to access and remove the three mounting screws

Fig. 8: Remove the lower instrument cluster hood mounting screws

  1. Disconnect the negative battery cable.
  2. Using a small prying tool, remove the trim panel at the front edge of the instrument cluster hood, near the bottom edge of the windshield.
  3. Remove the three instrument cluster hood mounting screws underneath the trim panel.
  4. Remove the two instrument cluster hood mounting screws located under the bootom edge of the hood assembly.
  5. Carefully pull the instrument cluster hood assembly away from the dashboard far enough to unplug the wiring harness connectors from behind the switches on each side.

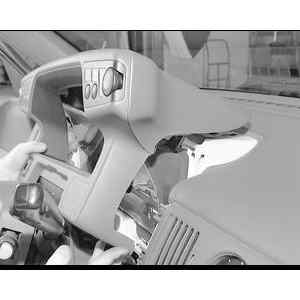
    Fig. 9: Carefully pull the instrument cluster hood assembly away from the dashboard . . .

    Fig. 10: . . . then unplug the wiring connectors from behind the switches on the instrument cluster hood assembly

    Fig. 11: Remove the four instrument cluster assembly mounting screws

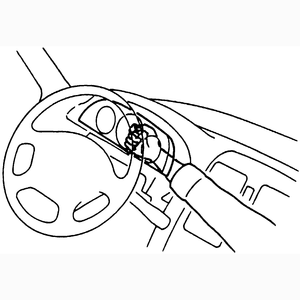
    Fig. 12: When removing the instrument cluster, disconnect the transmission selector cable from the steering column

  6. Remove the 4 cluster assembly retaining screws and pull the cluster towards you slowly and carefully, until you can reach behind it and unplug the electrical connectors, speedometer cable and unhook the transmission range indicator wire from the steering column.
  7. Remove the cluster.

    To install:

  8. Hold the instrument cluster close to the dashboard and route the transmission range indicator wire through the dashboard.
  9. Connect the speedometer cable to the back of the cluster assembly and plug in the electrical connectors.
  10. Place the cluster into correct position, then install and tighten the four cluster retaining screws. Attach the transmission range indicator wire from the steering column.
  11. Hold the instrument cluster hood assembly close to the dashboard and plug in wiring harness connectors.
  12. Place the instrument cluster hood assembly onto the dashboard. Install and tighten the five mounting screws.
  13. Install the trim panel cover.
  14. Connect the negative battery cable. Check the operation of the instrument cluster gauges.
1996–98 MPV Models
  1. Disconnect the negative battery cable.
  2. Shift the selector lever to the L range.
  3. Remove the instrument cluster hood mounting screws.
  4. Pull the instrument cluster hood forward to disengage the retaining clips from the dashboard.
  5. Unplug the wiring harness connectors from behind the cluster hood and remove from the vehicle.
  6. Remove the four instrument cluster mounting screws.
  7. Remove the speedometer cable from the clips.

    Fig. 13: Instrument cluster hood assembly removal

    Fig. 14: Insert your hand into the dashboard from the bottom right of the instrument cluster and disconnect the speedometer cable

  8. Insert your hand into the dashboard from the bottom right of the instrument cluster and disconnect the speedometer cable.
  9. Pull the instrument cluster out far enough to unplug the wiring harness connectors from the back of the cluster assembly. Remove the cluster from the vehicle.

    To install:

  10. Hold the instrument cluster assembly close to the dashboard, then connect the speedometer cable to the back of the cluster assembly and plug in the electrical connectors.
  11. Position the cluster assembly onto the dashboard, then install and tighten the four cluster mounting screws.
  12. Hold the instrument cluster hood assembly close to the dashboard and plug in wiring harness connectors.
  13. Place the instrument cluster hood assembly onto the dashboard. Install and tighten the mounting screws. Make sure that the retaining clips are fully engaged.
  14. Place the selector lever into P range.
  15. Connect the negative battery cable.

Previous Next