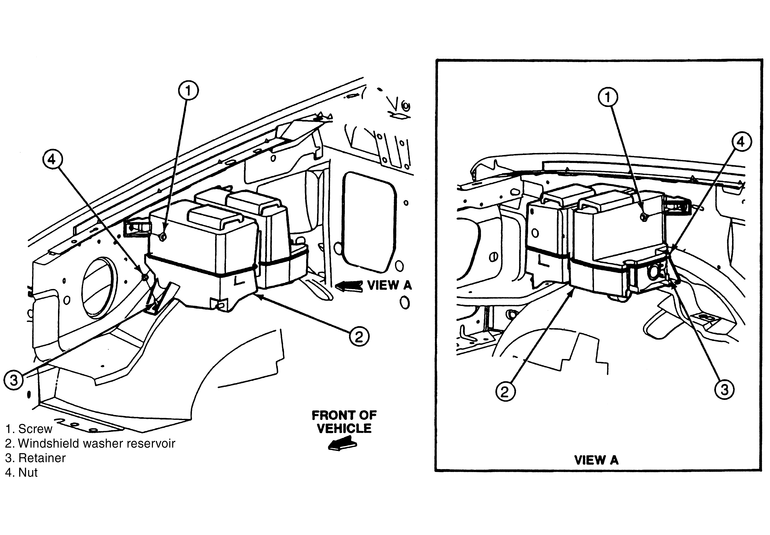
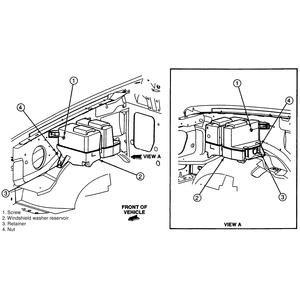
| Fig. 1: Windshield washer fluid reservoir mounting
for 1994–97 models
|
WARNING
Never operate the washer fluid pump without fluid in the reservoir. Repeatedly
running the reservoir dry will ruin the pump.
NOTE: The front washer fluid reservoir is connected to the
coolant overflow tank, which will be removed as an assembly.
- Disconnect the electrical plug and hose from the washer fluid reservoir.
Also, if removing the front washer pump, disconnect the coolant overflow
hose from its reservoir.
- Remove the reservoir attaching screws and lift the assembly from the vehicle.
- Drain and discard the contents of the washer fluid reservoir.
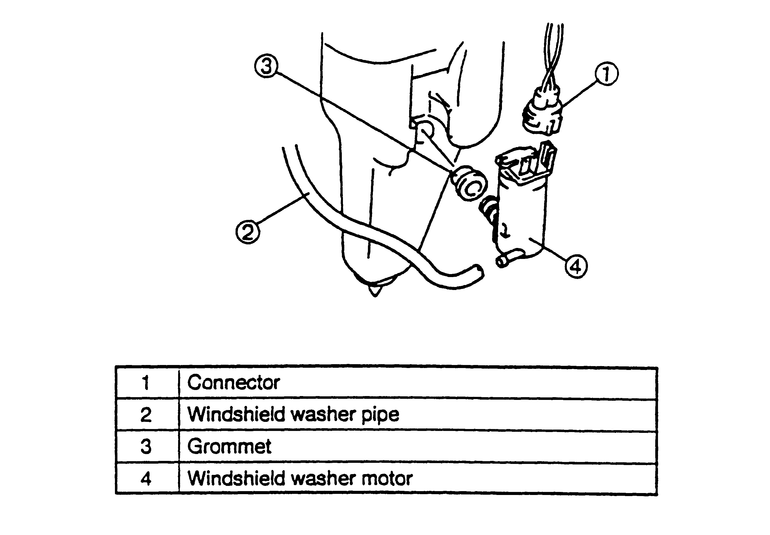
| Fig. 2: Exploded view of the washer pump and retaining
ring mounting
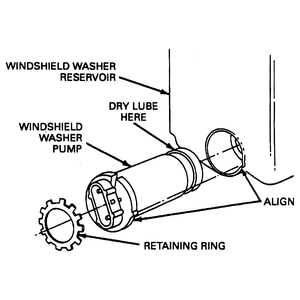
|
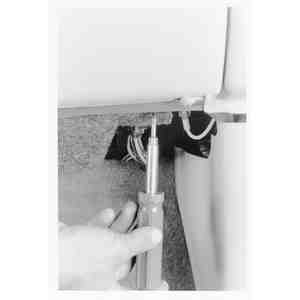
- Using a small prytool, pry out the pump retaining ring.
- Use a pair of pliers and grasp the pump on one wall around the electrical
terminals. Pull out the motor and seal from the reservoir.
| Fig. 3: Pull the washer pump from the reservoir
using a pair of pliers as shown
|
To install:
- Thoroughly clean the reservoir pump chamber and ensure that there is no
foreign material in it.
- Lubricate the outside of the pump seal with a dry lubricant, such as graphite
powder.
- If equipped, align the small tab on the motor with the notch on the reservoir.
- Install the motor so that the seal seats against the bottom of the chamber.
- Use a 1 inch (25.4mm) socket, preferable a 12-point socket, hand press
the retaining ring securely against the motor end plate.
- Install the reservoir assembly.
- Connect the hoses and electrical harness plug.
- Fill the reservoir and operate the washer system. Check for leaks.
- Remove the windshield washer fluid reservoir mounting screws.
- Disconnect the hose(s) from the reservoir tank.
- Unplug the electrical connector from the washer pump.
- Remove the washer fluid reservoir from the engine compartment.
- Empty the washer fluid reservoir.
- Using a small prying tool, pry out the pump, being careful not to damage
the plastic housing.
- Remove the rubber grommet and inspect for damage or debris.
| Fig. 4: Exploded view of the press fit
|
To install:
- Insert the rubber grommet, then lubricate the inside diameter of the grommet
with soapy water and install the pump into the reservoir until it is firmly
seated.
- Connect the hose(s), then place the reservoir into position in the engine
compartment and tighten the mounting screws.
- Plug the wiring harness connector to the pump.
- Fill the reservoir with washer fluid and check pump operation.
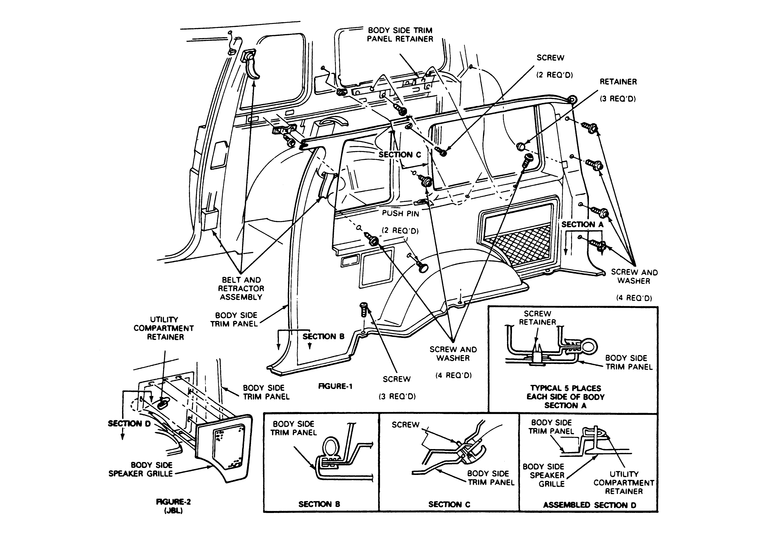
- Remove the left side rear quarter trim panel as follows:
- If equipped, remove the luggage cover from the retainer.
- Remove the door scuff plate from the floor.
- Remove the liftgate scuff plate from the floor.
- Remove the front seat belt attachment from the floor.
- Remove the rear seat belt anchor from the "B" pillar.
- Remove the side window latch.
- Remove the mounting screws and pushpins securing the quarter trim
panel assembly. Remove the panel from the vehicle.
| Fig. 5: Exploded view of the side rear quarter
trim panel assembly
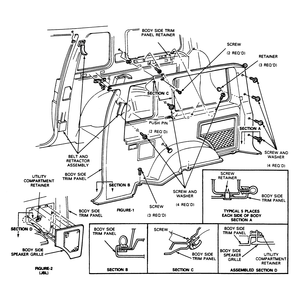
|
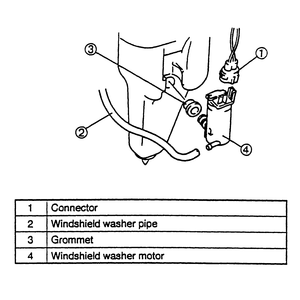
| Fig. 6: Location of the rear window washer
reservoir and motor assembly

|
- Disconnect the filler hose.
- Unplug the washer pump motor electrical connector.
- Loosen the mounting screws and remove the rear window washer reservoir.
- Using a small prying tool, pry out the pump, being careful not to damage
the plastic housing.
- Remove the one piece seal/filter and inspect for damage or debris.
To install:
- Insert the seal, then lubricate the inside diameter of the seal with soapy
water and install the pump into the reservoir until it is firmly seated.
- Install the washer hose to the pump discharge nipple, then place the reservoir
into position on the quarter panel and tighten the mounting screws.
- Plug the wiring harness connector to the pump.
- Connect the filler hoses.
- Fill the reservoir with washer fluid and check pump operation.
- Install the left side rear quarter trim panel as follows:
- Position the side trim panel inside the vehicle. Insert the seat belt
floor attachment through the opening in the panel, if equipped.
- Install the side trim panel.
- Install the side window latch.
- Install the rear seat belt anchor to the "B" pillar. Install the front
seat belt attachment to the floor. Tighten the seat belt anchor and
attachments to 22–30 ft. lbs. (30–40 Nm).
- Install the scuff plate to the floor.
- Install the lower garnish molding to the floor.
- If equipped, install the luggage cover.
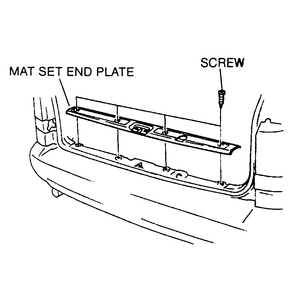
- Disconnect the negative battery cable.
- Remove the mat set end plate.
| Fig. 7: Remove the mat set end plate
|
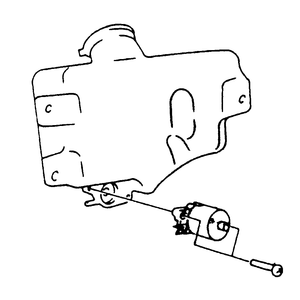
| Fig. 8: Separate the rear washer motor from the
reservoir
|
- Remove the right side rear trim panel.
- Disconnect the washer fluid hose and wiring harness.
- Loosen the mounting screws and remove the rear washer fluid reservoir.
- Empty out the fluid from the reservoir.
- Loosen the two retaining screws and remove the rear washer motor from
the reservoir.
To install:
- Hold the washer motor in place on the reaservoir and install the two retaining
screws.
- Hold the washer fluid reservoir in position, then connect the fluid hose
and wiring harness. Install and tighten the mounting screws.
- Connect the negative battery cable.
- Fill the reservoir with washer fluid and check pump operation.
- Install the right side rear trim panel.
- Install the mat set end plate.