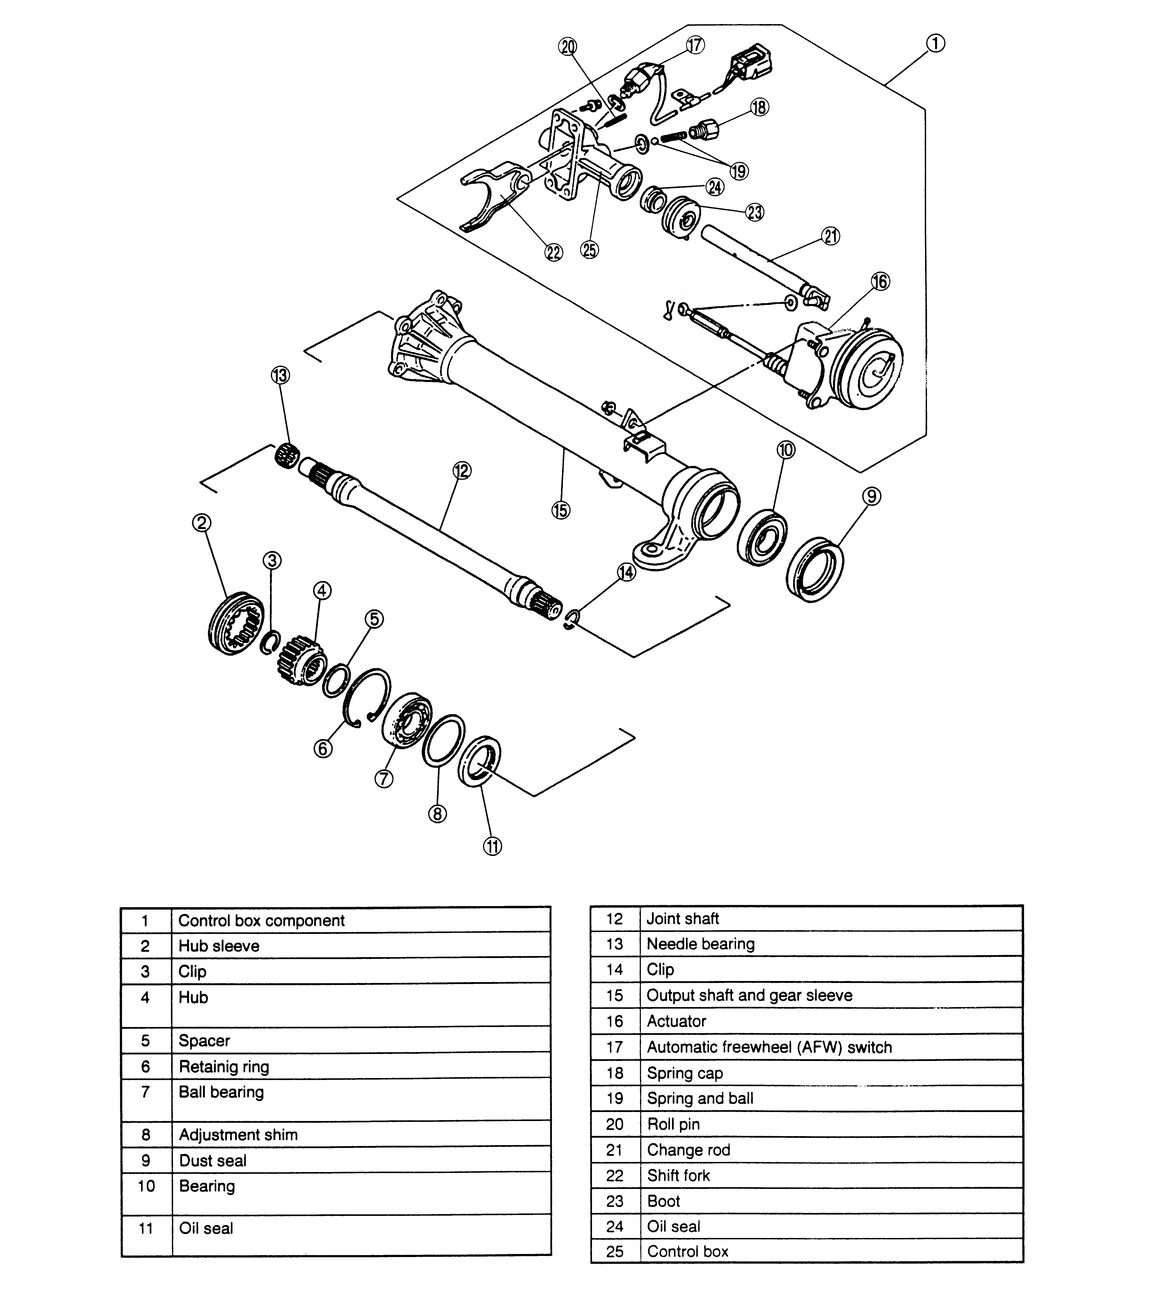
NOTE: The Automatic Freewheel Mechanism on 4WD MPV models are
used in place of automatic locking hubs.
- Disconnect the negative battery cable. Raise and safely support the vehicle.
Remove the left front wheel and tire assembly.
- Drain the fluid from the front differential.
- Remove the left side halfshaft assembly.
- Tag and disconnect the vacuum hoses and electrical connector from the control
box assembly.
- Remove and discard the snap pin at the control box assembly.
- Remove the attaching bolts and remove the joint shaft assembly.
- Remove the attaching bolts and remove the control box assembly.
- Remove the gear sleeve from the side of the differential, if necessary.
- If necessary, remove the output shaft from the differential using a slide
hammer.
| Fig. 1: Exploded view of the components to the automatic
freewheel mechanism — MPV
|
To install:
- If removed, install a new clip on the end of the output shaft and install
in the differential. Install the gear sleeve, if removed.
- Install the control box and tighten the attaching bolts to 17–20 ft.
lbs. (23–26 Nm).
- Install the joint shaft assembly and tighten the attaching bolts to 27–40
ft. lbs. (36–54 Nm). Install the attaching nut and tighten to 49–72
ft. lbs. (67–97 Nm).
- Install a new snap pin at the control box assembly.
- Connect the electrical connector and vacuum hoses at the control box assembly.
- Install the left side halfshaft assembly.
- Fill the differential with the proper type and quantity of fluid.
- Install the wheel and tire assembly and lower the vehicle.