Previous Next

REMOVAL & INSTALLATION

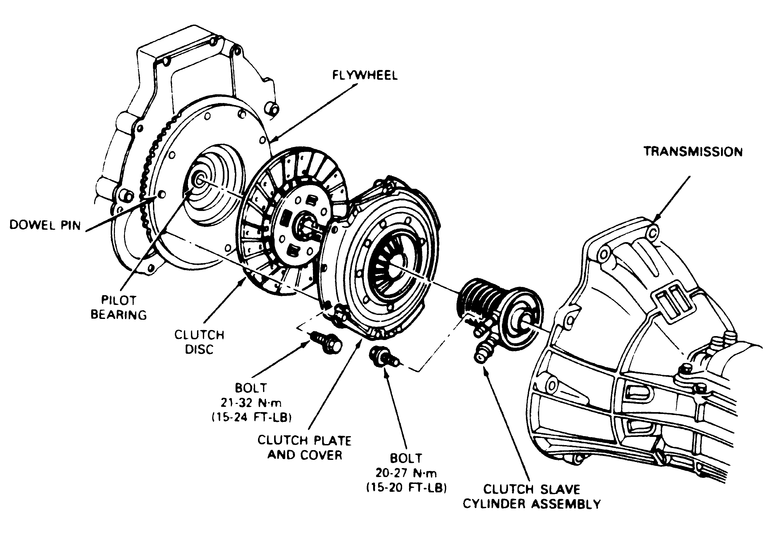
Fig. 1: Exploded view of the clutch components for 2.3L, 2.5L, 3.0L & 4.0L engines

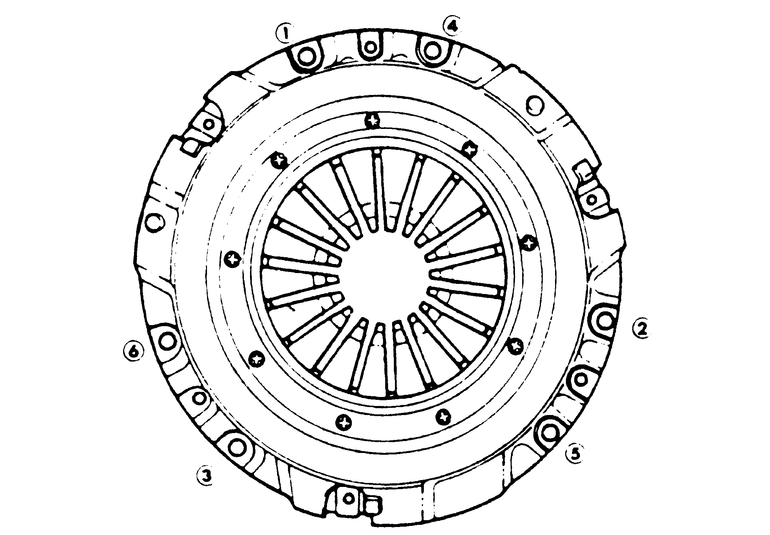
Fig. 2: Pressure plate bolt torque sequence

  1. Disconnect the negative battery cable.
  2. Disconnect the clutch hydraulic system master cylinder from the clutch pedal and remove.
  3. Raise the vehicle and support it safely.
  4. Remove the starter.
  5. Disconnect the hydraulic coupling at the transmission.

    NOTE: Clean the area around the hose and slave cylinder to prevent fluid contamination.

  6. Remove the transmission from the vehicle.
  7. Mark the assembled position of the pressure plate and cover the flywheel, to aid during re-assembly.

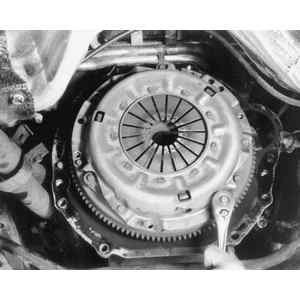
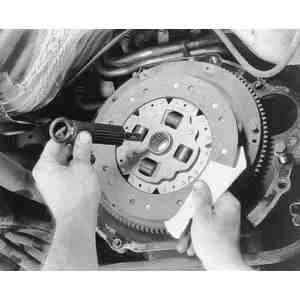
    Fig. 3: Loosen and remove the clutch and pressure plate bolts evenly, a little at a time . . .

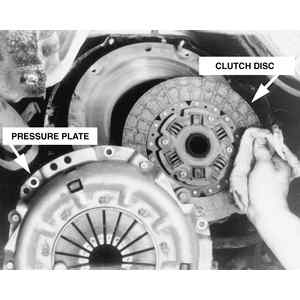
    Fig. 4: . . . then carefully remove the pressure plate and clutch assembly from the flywheel

  8. Loosen the pressure plate and cover attaching bolts evenly until the pressure plate springs are expanded, and remove the bolts.
  9. Remove the pressure plate and cover assembly and the clutch disc from the flywheel. Remove the pilot bearing only for replacement.

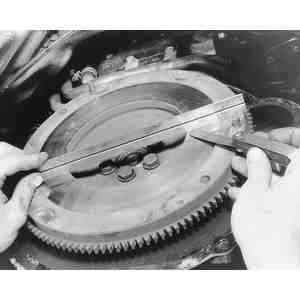
    Fig. 5: Check the flywheel surface for flatness and, if necessary, remove it from the engine for truing

    To install:

  10. Position the clutch disc on the flywheel so that the Clutch Alignment Shaft Tool T74P-7137-K or equivalent can enter the clutch pilot bearing and align the disc.

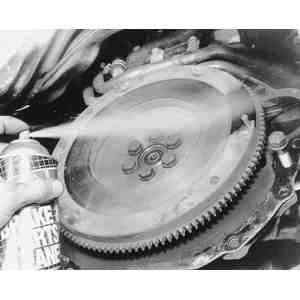
    Fig. 6: Be sure that the flywheel surface is clean before installing the clutch

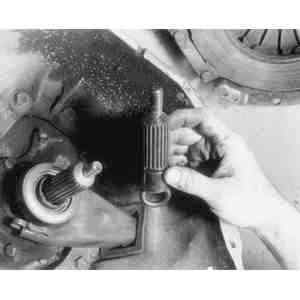
    Fig. 7: Typical clutch alignment tool, note how the splines match the transmission's input shaft

    Fig. 8: Use the clutch alignment tool to align the clutch disc during assembly.

  11. When reinstalling the original pressure plate and cover assembly, align the assembly and flywheel according to the marks made during the removal operations. Position the pressure plate and cover assembly on the flywheel, align the pressure plate and disc, and install the retaining bolts that fasten the assembly to the flywheel. Tighten the bolts to 15–25 ft. lbs. (21–35 Nm) in the proper sequence. Remove the clutch disc pilot tool.

    Fig. 9: Be sure to use a torque wrench to tighten all of the bolts

  12. Install the transmission into the vehicle.
  13. Connect the coupling by pushing the male coupling into the slave cylinder.
  14. Connect the hydraulic clutch master cylinder pushrod to the clutch pedal.

Previous Next