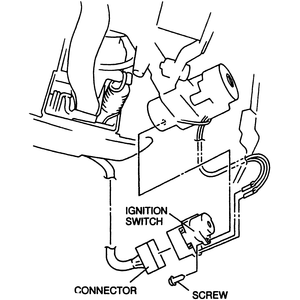
Previous Next

Ignition Switch

REMOVAL & INSTALLATION

Navajo and B Series Pick-up
  1. Disconnect the negative battery cable.
  2. Remove the steering wheel.
  3. As necessary, remove all under dash panels in order to gain access to the ignition switch.
  4. As necessary, lower the steering column to gain working clearance.
  5. Disconnect the ignition switch electrical connectors.
  6. Remove the ignition switch retaining screws from the studs. Disengage the ignition switch from switch rod. Remove the switch from the vehicle.

    To install:

  7. Position the lock cylinder in the LOCK position.
  8. To set the switch, position a wire in the opening in the outer surface of the switch through its positions until the wire drops down into the slot.

    NOTE: The slot is in the bottom of the switch where the rod must be inserted to allow full movement through the switch positions.

  9. Position the ignition switch on the column studs and over the actuating rod. Torque the retaining nuts to 40–64 inch lbs. (4.5–7.2 Nm).
  10. Remove the wire from the slot in the housing. Continue the installation in the reverse order of the removal procedure.
MPV

Fig. 1: Ignition switch installation

  1. Disconnect the negative battery cable. Wait at least 90 seconds before performing any work.
  2. Remove the steering column cover and the lower dash panel.
  3. Remove the screw and disconnect the connector.
  4. Extract the key-reminder switch terminals from the ignition switch and remove the ignition switch.
  5. Installation is the reverse of removal.

Previous Next