Previous Next

Rear Control Arms

REMOVAL & INSTALLATION

Lateral Rod

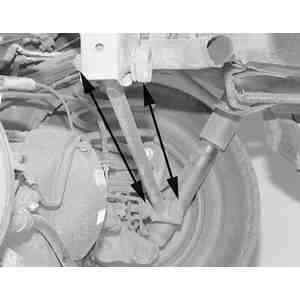
Fig. 1: Using a backup wrench, remove the nuts and bolts securing the lateral rod to the vehicle underbody and rear axle

  1. Raise and safely support the vehicle.
  2. Support the axle housing with a jack.
  3. Remove the lateral rod-to-chassis stud bolt and nut and the lateral rod-to-axle housing nut.
  4. Remove the lateral rod.
  5. Place the lateral rod in position and secure it with the mounting hardware. Make sure the lateral rod is installed with the identification mark toward the body.
  6. Tighten the lateral rod-to-axle housing nut to 108–127 ft. lbs. (146–167 Nm). Tighten the lateral rod-to-chassis stud bolt and nuts to 94–127 ft. lbs. (128–167 Nm).
Upper Control Arms

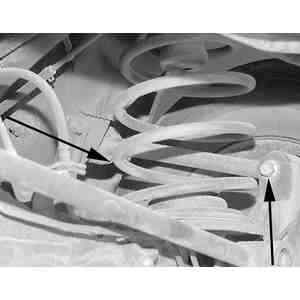
Fig. 2: Remove the nuts and bolts to the upper trailing arm

  1. Raise and safely support the vehicle.
  2. Support the axle housing with a jack.
  3. Remove the upper control arm-to-chassis bolt and nut and the upper control arm-to-axle housing bolt and nut.
  4. Remove the upper control arm.
  5. Place the control arm in position and secure it with the mounting bolts. Tighten the upper control arm attaching bolts and nuts to 94–127 ft. lbs. (128–167 Nm).
Lower Control Arms

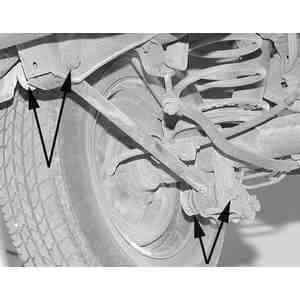
Fig. 3: Remove the nuts and bolts to the lower trailing arm

  1. Raise and safely support the vehicle.
  2. Support the axle housing with a jack.
  3. Remove the lower control arm-to-chassis bolt and nut and the lower control arm-to-axle housing bolt and nut.
  4. Remove the lower control arm.
  5. Position the lower control arm and install the mounting bolts. Tighten the upper control arm attaching bolts and nuts to 101–127 ft. lbs. (137–167 Nm).

Previous Next