NOTE: Low pressure gas shocks are charged with Nitrogen gas.
Do not attempt to open, puncture or apply heat to them. Prior to installing
a new shock absorber, hold it upright and extend it fully. Invert it and fully
compress and extend it at least 3 times. This will bleed trapped air.
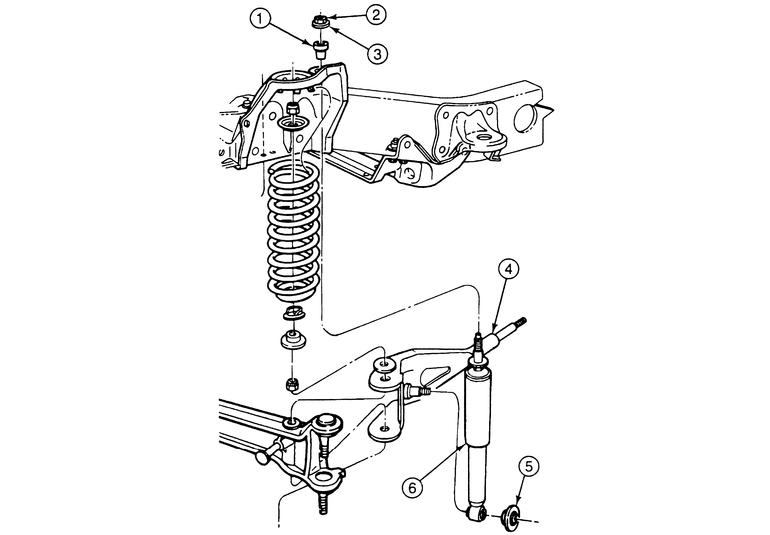
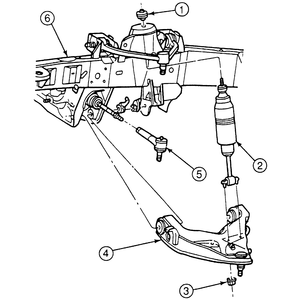
| Fig. 1: Exploded view of the front shock absorber
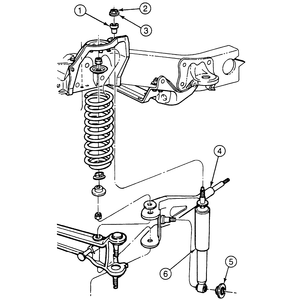
|
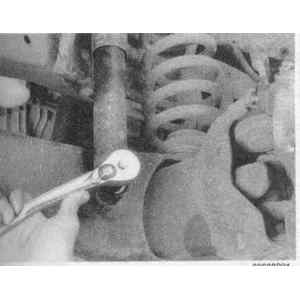
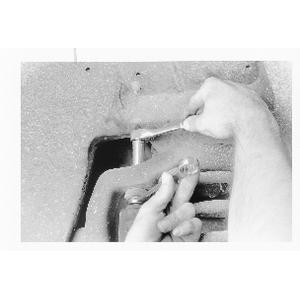
- Raise the vehicle, as required to provide additional access and remove the
nut attaching the shock absorber to the lower mounting stud on the radius
arm.
- Slide the lower shock absorber end off of the stud.
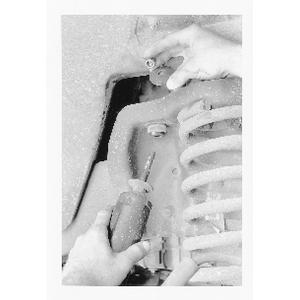
- Remove the nut, washer and insulator from the upper shock absorber mount
at the frame bracket and remove the shock absorber.
NOTE: A second wrench may be needed to hold the shock absorber
from turning while removing the upper attaching nut.
| Fig. 2: To remove the front shock absorber, remove
the lower radius arm shock retaining nut . . .
|
| Fig. 3: . . . then pull the lower shock mount from
the stud

|
| Fig. 4: Next, unbolt the upper shock mount using
a second wrench on the mount stud to keep it from spinning . . .
|
| Fig. 5: . . . then pull the shock assembly from the
upper spring mount
|
To install:
- Position the washer and insulator on the shock absorber rod and position
the shock absorber to the upper frame bracket mount.
- Position the insulator and washer on the shock absorber rod and install
the attaching nut loosely.
- Position the shock absorber to the lower mounting stud and install the attaching
nut loosely.
- Tighten the lower shock attaching bolts to 39–53 ft. lbs. (53–72
Nm), and the upper shock attaching bolts to 25–34 ft. lbs. (34–46
Nm).
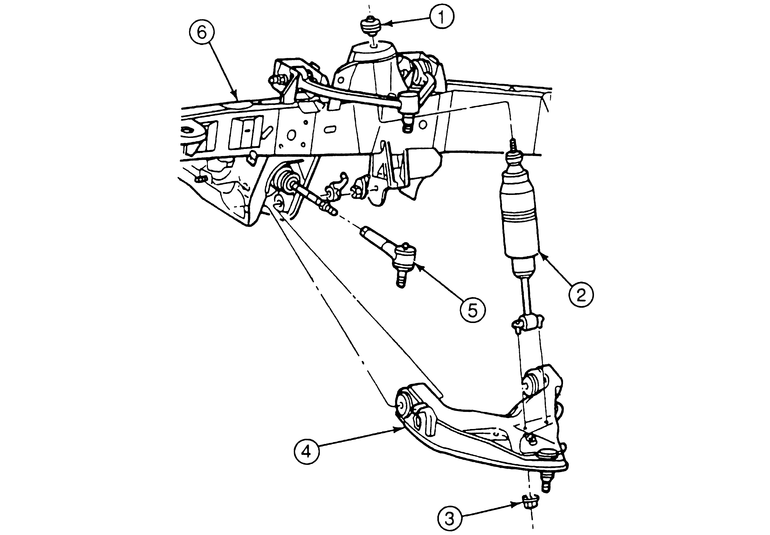
| Fig. 6: Exploded view of the 1998 B Series Pick-up 4WD
front shock absorber — rear wheel drive similar
|
- Raise the front of the vehicle and place jackstands under the lower control
arms. Ensure that the lower shock attaching nuts do not become obstructed
by the jackstands.
- Remove the upper shock-to-frame attaching nut, washer and insulator assembly.
- Remove the two lower shock-to-control arm attaching nuts.
- Slightly compress the shock absorber by hand and remove it from the vehicle.
To install:
- Position the lower washer and insulator on the shock absorber rod and position
the shock absorber to the upper frame bracket mount.
- Position the upper insulator and washer on the shock absorber rod and install
the attaching nut loosely.
- Position the lower shock absorber mounting studs into the control arm and
install the attaching nuts loosely.
- Tighten the lower shock attaching nuts to 15–21 ft. lbs. (21–29
Nm), and the upper shock attaching bolts to 30–40 ft. lbs. (40–55
Nm).