CAUTION
Always replace disc brake pad assemblies on an axle. Never service one wheel
only.
NOTE: Mazda recommends that new caliper pins be installed whenever the caliper is removed from the steering knuckle.
CAUTION
Older brake pads may contain asbestos, which has been determined to be a cancer
causing agent. Never clean the brake surfaces with compressed air! Avoid inhaling
any dust from any brake surface! When cleaning brake surfaces, use a commercially
available brake cleaning fluid.
NOTE: Do not use a screwdriver or similar tool to pry piston away from the rotor.
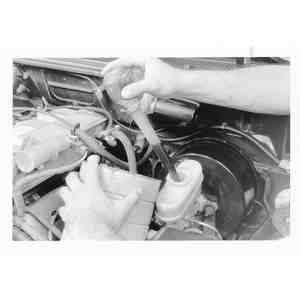
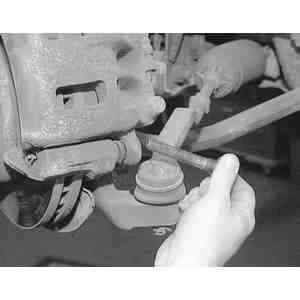
| Fig. 1: Before beginning the brake pad procedure,
remove some fluid from the master cylinder
|
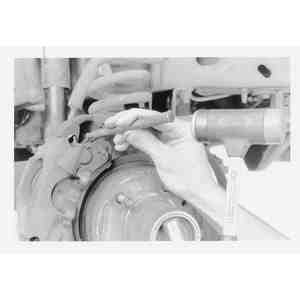
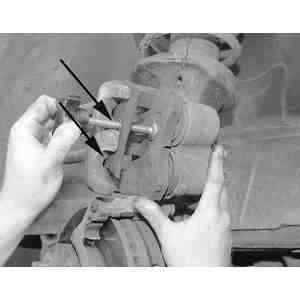
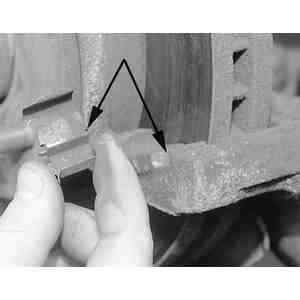
| Fig. 2: Use a hammer and punch, and drive the caliper
pin out from between the caliper and its mount
|
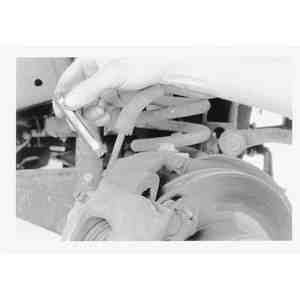
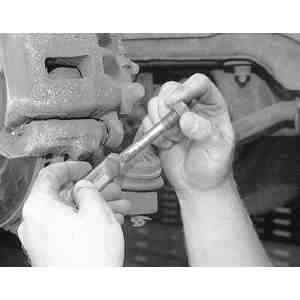
| Fig. 3: Pull the out from behind the caliper. Repeat
the procedure for the lower pin
|
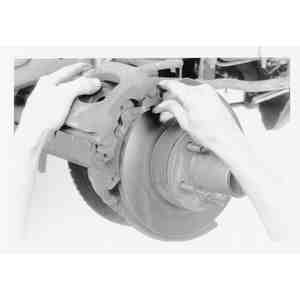
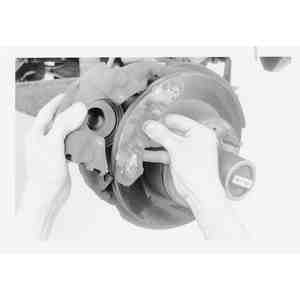
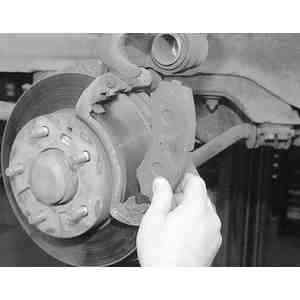
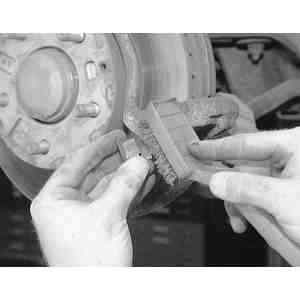
| Fig. 4: Slide the caliper assembly off of the rotor
|
| Fig. 5: Holding the caliper as shown, press down
then slide the pad out to remove it from the caliper
|
| Fig. 6: Remove the outer brake pad from the caliper
|
| Fig. 7: If necessary, support the caliper by a length
of wire from the frame. Never let it hang by the hose
|
| Fig. 8: Finally, remove the inner brake pad from
the steering knuckle assembly
|
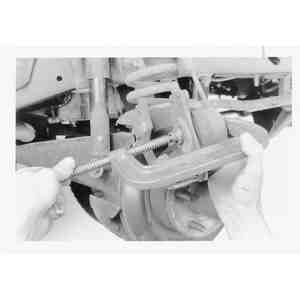
| Fig. 9: Place the inner pad's friction material against
the caliper piston and press it in with a C-clamp
|
| Fig. 10: Ensure that the anti-rattle clip is installed
as shown on the inner pad
|
| Fig. 11: View of a correctly installed outer pad
|
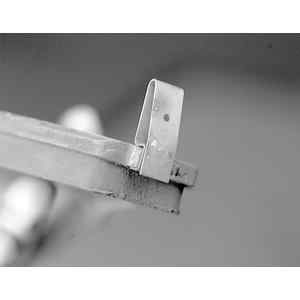
| Fig. 12: Ensure that the tang is driven flush to
the caliper mount
|
| Fig. 13: After installing the pins, ensure that the
tangs are free to contact either side of the caliper mount
|
To install:
NOTE: The first couple of times you apply the brakes, the pedal may go to the floor. Continue to pump the brake pedal until it feels firm.
| Fig. 14: Exploded view of the 4x4 navajo and 1994–97
B Series Pick-up front brake caliper assembly — 4x2 similar
|
| Fig. 15: Exploded view of the 1998 4x4 B Series Pick-up
front brake caliper assembly — 4x2 models similar
|
| Fig. 16: Use a C-clamp to slightly press in the caliper
piston to aid removal
|
CAUTION
Older brake pads or shoes may contain asbestos, which has been determined to
be a cancer causing agent. Never clean the brake surfaces with compressed air!
Avoid inhaling any dust from any brake surface! When cleaning brake surfaces,
use a commercially available brake cleaning fluid.
NOTE: Use care to retain as much of the original caliper slide pin grease as possible.
To install:
NOTE: The first couple of times you apply the brakes, the pedal may go to the floor. Continue to pump the brake pedal until it feels firm.
| Fig. 17: The bottom end of the inner brake pad is equipped
with a pad thickness sensor, which makes a squealing noise to alert you
that the pads must be changed
|
| Fig. 18: When removing the disc brake pads, you only
have to remove the bottom caliper slide bolts
|
| Fig. 19: After removing the bottom sliding bolt, swing
up and support the caliper with a strong piece of wire. Then remove the
inner and outer disc brake pads
|
| Fig. 20: Using a brake caliper piston and compressor
tool and an old brake pad, push the pistons into the bore. If equipped
with dual piston calipers, it may be necessary to alternate the tool back
and forth between the pistons (arrows)
|
| Fig. 21: If necessary, remove and clean, or replace,
the four anti-rattle clips located in the caliper on the ends of each
brake pad
|
| Fig. 22: Before installing the pads and caliper, clean
the anti-rattle clips with a brush
|
| Fig. 23: Before installing the sliding caliper bolts,
clean them and then lubricate them with brake grease
|
To install: