Previous Next

REMOVAL & INSTALLATION

Navajo and B Series Pick-up Models
  1. Follow the procedures for pad removal earlier in this section.

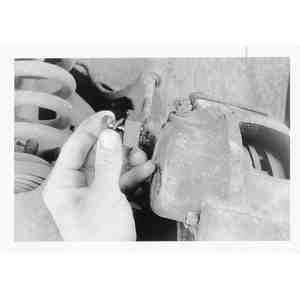
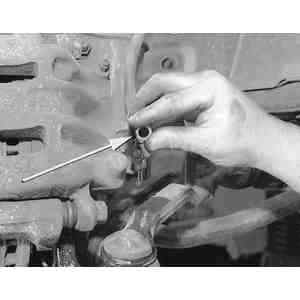
    Fig. 1: Loosen the brake hose-to-caliper retaining bolt . . .

  2. Remove the brake hose-to-caliper attaching bolt.

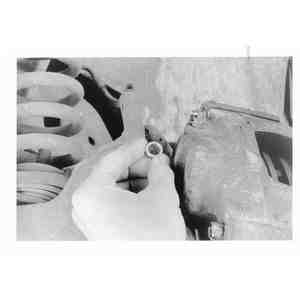
    Fig. 2: . . . then remove it, along with the hose fitting and the sealing washers

    Fig. 3: Always discard the old sealing washers and use new ones when installing the caliper

  3. Discard the brass washers and plug the brake hose and caliper bolt hole.
  4. On dual piston caliper models, and if necessary, remove the brake pad anchor plate by removing the two attaching screws from the back of the steering knuckle.
  5. Inspect the caliper, piston and rubber seals/boots for damage and replace as necessary.

    To install:

  6. On dual piston calipers, and if removed, position the anchor plat to the steering knuckle and install the two retaining bolts. Use a threadlocking compound on the old bolts or install new bolts and tighten them to 73–97 ft. lbs. (98–132 Nm).
  7. If it was necessary to remove the brake pads, install them to the anchor plate (dual piston) or caliper (single piston).
  8. Install the caliper as instructed in the brake pad installation procedures.

    NOTE: Always use new sealing washers when assembling the hose to the brake caliper.

  9. Place a new sealing washer on the brake hose bolt, slide the bolt through the hose fitting and install a second sealing washer to the bolt.
  10. Position the hose/bolt to the caliper then tighten the bolt to 22–29 ft. lbs. (30–40 Nm).
  11. Bleed the brake system. Check for leaks and proper operation before placing the vehicle into service.
MPV Models

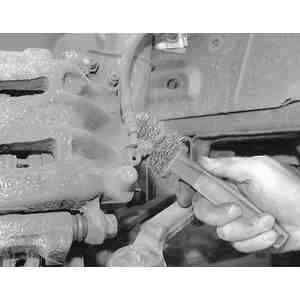
Fig. 4: Before disconnecting the brake hose at the caliper, clean any dirt or debris from the hose and banjo bolt connection using a wire brush

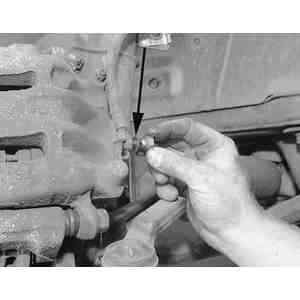
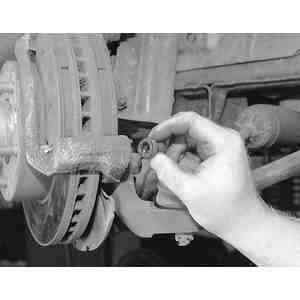
Fig. 5: Remove the banjo bolt from the caliper connection. Be careful not to lose the crush washer that is located between the brake hose and banjo bolt

Fig. 6: Be careful not to lose the crush washer that is located between the caliper and the hose fitting. Note that the two crush washers at the brake hose fitting are of different sizes and must not be mixed up

Fig. 7: Inspect the condition of the caliper sliding bolt rubber boots and replace if necessary

  1. Raise and safely support the vehicle. Remove the wheel and tire assembly.
  2. Remove the banjo bolt and disconnect the brake hose from the caliper. Plug the hose to prevent fluid leakage.
  3. Remove the caliper mounting bolt and pivot the caliper about the mounting pin and off the brake rotor. Remove the caliper from the pin.
  4. If installing the same caliper, inspect the condition of the caliper sliding bolt rubber boots and replace if necessary.
  5. Installation is the reverse of the removal procedure. Lubricate the caliper mounting bolts or bolt and pin prior to installation.
  6. Tighten the caliper mounting bolt(s) to:
  7. Front caliper: 61–69 ft. lbs. (83–93 Nm)
  8. Rear caliper: 37–50 ft. lbs. (50–68 Nm)
  9. Bleed the brake system. Check for leaks and proper operation before placing the vehicle into service.

Previous Next