Previous Next

Door Panels

REMOVAL & INSTALLATION

Navajo and B Series Pick-up Models

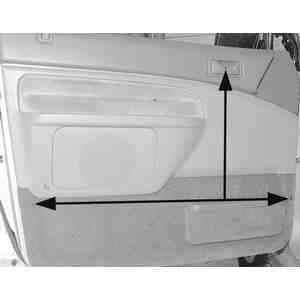
Fig. 1: Exploded view of the Navajo front door trim panel

Fig. 2: Exploded view of the B Series Pick-up door trim panel

  1. Open the window.
  2. Unscrew the door lock knob.
  3. On Explorer/Mountaineer, remove the 2 screws retaining the trim panel located above the door handle.
  4. On Ranger, remove the two screws in the armrest and remove it.
  5. If equipped with manual window crank handles, pull off the handle cover, then remove the attaching screw.
  6. Remove the trim cup behind (Explorer/Mountaineer) or around (Ranger) the door handle using a small prying tool. Retention nibs will flex for ease of removal.
  7. If equipped with power accessories, use the notch at the lower end of the plate and pry the plate off. Remove the plate from the trim panel and pull the wiring harness from behind the panel. Disconnect the harness from the switches.
  8. Remove any retaining screws uncovered by the removed trim pieces.
  9. Using a flat wood spatula, insert it carefully behind the panel and slide it along to find the push-pins. When you encounter a pin, pry the pin outward. Do this until all the pins are out. NEVER PULL ON THE PANEL TO REMOVE THE PINS!
  10. Lift slightly to disengage the panel from the flange at the top of the door.
  11. Disconnect the door courtesy lamp and remove the panel completely. Replace any damaged or bent attaching clips.
  12. Installation is the reverse of removal.
MPV Models

Fig. 3: Remove the interior door panel mounting screws before disengaging the retaining clips

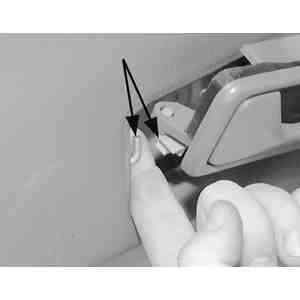
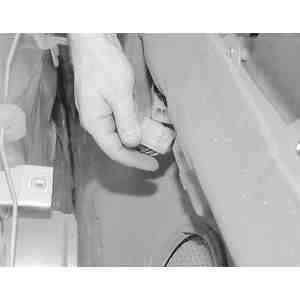
Fig. 4: Disengage the inside door handle release rod from the handle and retainer clip

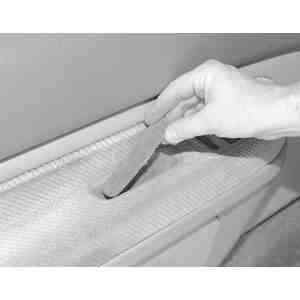
Fig. 5: Remove the felt pad at the bottom of the door panel pull cup

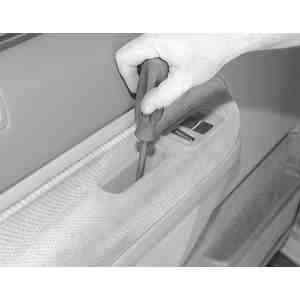
Fig. 6: Then, using a phillips head screwdriver, remove the screw at the bottom of the pull cup

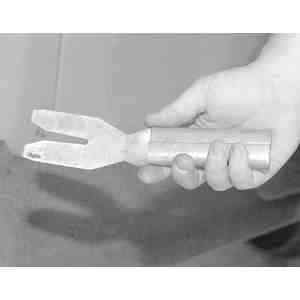
Fig. 7: It is a good idea to have a door trim panel removal tool when performing this kind of procedure

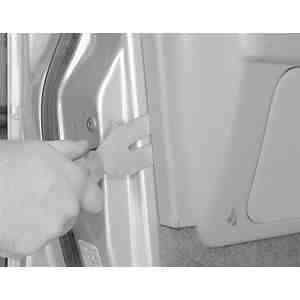
Fig. 8: Place the door panel trim removal tool between ther door and the trim panel and pry the clips away froim the door

Fig. 9: If equipped with electric windows, disconnect the switches froom behind the door panel

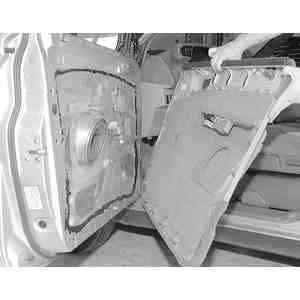
Fig. 10: Carefully pull the interior door panel away from the door

  1. Disconnect the negative battery cable.
  2. Remove the interior door panel mounting screws before disengaging the retaining clips
  3. Disengage the inside door handle release rod from the handle and retainer clip
  4. Remove the felt pad at the bottom of the door panel pull cup
  5. Then, using a phillips head screwdriver, remove the screw at the bottom of the pull cup
  6. Place the door panel trim removal tool between ther door and the trim panel and pry the clips away froim the door
  7. If equipped with electric windows, disconnect the switches froom behind the door panel
  8. Carefully pull the interior door panel away from the door
  9. Installation is the reverse of removal. When snapping the clips into place, make sure that they are squarely over the holes to avoid bending them.

Previous Next