Previous Next

Liftgate

REMOVAL & INSTALLATION

Navajo

Fig. 1: View of the Navajo liftgate hinge to body mounting

Fig. 2: View of the liftgate cylinder assist rods and related components

NOTE: The liftgate glass should not be open while the liftgate is open. Make sure the window is closed before opening the liftgate.

  1. Open the liftgate door.
  2. Support the door in the open position and disconnect the liftgate gas cylinder assist rod assemblies by carefully prying the locking spring out of the ball socket.
  3. Carefully move the headliner out of position and remove the hinge-to-header panel attaching screws.
  4. Remove the hinge-to-liftgate attaching screws and remove the complete assembly.

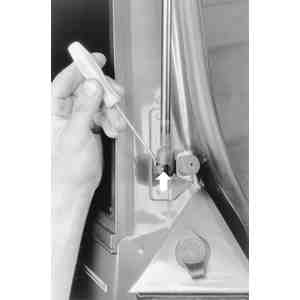
    Fig. 3: To disconnect the liftgate gas cylinders, pry out on the locking spring (arrow) . . .

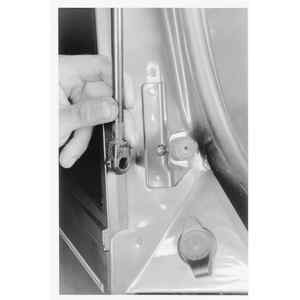
    Fig. 4: . . . then pull the gas cylinder's end from the ball socket

    To install:

  5. Install the hinge to liftgate door and tighten the attaching screws.
  6. Install the hinge to roof header panel, then tighten the screw and washer assemblies to 12–20 ft. lbs. (17–27 Nm).
  7. Install the liftgate gas cylinder assist rods.
  8. Adjust the liftgate hinge as necessary.
  9. Securely tighten the retaining bolts. Reposition and trim panels.
MPV
  1. Disconnect the battery ground cable.
  2. Open the liftgate.
  3. Disconnect the wiring connector.
  4. Disconnect the washer hose.
  5. Remove the strut-to-liftgate bolts.

    Fig. 5: Liftgate components — MPV

  6. Match mark the hinge position.
  7. Support the liftgate and remove the hinge bolts. Lift off the liftgate.
  8. Position the liftgate and install the mounting bolts. Torque the hinge-to-liftgate bolts to 78–113 inch lbs. (9–13 Nm); the strut-to-liftgate bolts to 69–104 inch lbs. (8–12 Nm).

Previous Next